This Install Guide is for JMRI versions 3 and later.
For earlier versions (2012 and before), refer to the old Windows Install Guide.
Using JMRI requires a combination of hardware (in this case running Windows), Java software and a JMRI download for a specific version. The table below shows configurations that have been reported working - there may be other combinations that are also possible, but they have not been reported by the user community.
| JMRI® Release | Windows Rel. | Java Rel. |
|---|---|---|
| Test rel 5.9.x and newer | 8.1, 10, 11 | Java 11 or Java 17 (Recommended) |
| Production rel 5.0 through 5.8 | 8.1, 10, 11 | Java 11 |
Older releases:
| JMRI® Release | Windows Rel. | Java Rel. |
|---|---|---|
| Test rel 5.x | 8.1, 10, 11 | Java 11 |
| Test rel 4.99.x | 8.1, 10, 11 | Java 11 |
| Test rel 4.27.1 | 7, 8, 10, 11, Vista | Java 8 or Java 11 (Recommended) |
| Production rel 4.26 | Vista | Java 8 |
| Production rel 4.26 | 7, 8, 10, 11 | Java 8 or Java 11 (Recommended) |
| Test release 4.x.y through 4.25.9 | 7, 8, 10, 11, Vista | Java 1.8 ("Java 8") |
| Test release 3.10.1 | Java 1.6 | |
| Test release 3.10.1 | Vista SP1 | Java 1.7 |
| Test release 2.14.1 | Java 1.5 or 1.6 | |
| Test release 2.14.1 | Windows 2000 SP3, XP | Java 1.6 |
| Production release 2.8 | Windows 98, ME | Java 1.6 |
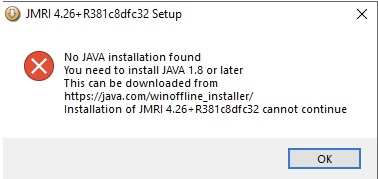
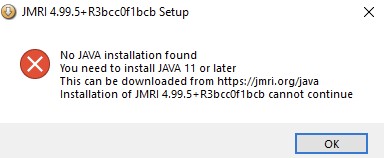
Since JMRI 5.1.6. During the installation your machine will be checked for java 11 or greater. First it will check the default version, then if that fails search the registry entries (javasoft keys).
If java 11 or greater is not found it will ask you whether you wish to continue the installation. Continuing permits you to resolve this issue later by either installing a valid version or linking JMRI to an absolute version as described in Using a specific java version section below.
When running JMRI the search order for java (specifically bin/javaw.exe) is:It is recommended that you use java 11, and if you have no applications requiring Java 1.8 then remove it.
Check to see what release of Java is currently installed on your computer. Open a "command" window by typing "Command prompt" into the search bar next to the Windows Start icon. Then type:
java -version
Use the tables above to make sure the version of Java you are running is compatible with the version of JMRI you want to install. If you want to run a more current version of JMRI, consider installing Java 11 (see suggestions by clicking here). IF YOU HAVE JAVA 8 CURRENTLY INSTALLED, MAKE SURE TO UNINSTALL IT FIRST. [Multiple problems have been reported if both Java 11 and Java 8 are installed at the same time.]
JMRI also supports an offline installation - to set up, refer to the Offline
Installation section below.
The JMRI project is continuously adding features, bug fixes, examples and tutorials to the release, and so
new "Test" versions appear every couple of weeks. You may find one of these has features that you really want.
These are announced in the JMRI users Groups.io group.
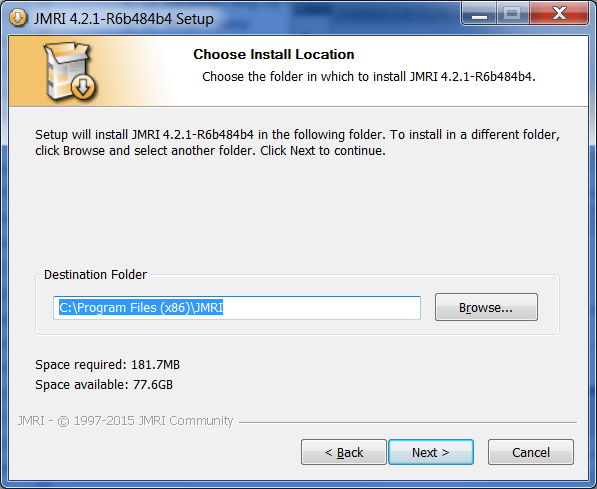
To use a specific java installation either install that version in the <JMRI install directory>\jre directory or link the specific java version to the <JMRI install directory>\jre directory.
To install it to <JMRI Install Directory>\jre during the install simply tell it to install it there.
To link the java installation directory to <JMRI Install Directory>>jre do the following:
Make a note of the directory where the version of java you wish to use is installed and where JMRI was installed.
As an example the java I wish to use is in "C:\Program Files\Microsoft\jdk-11.0.16.101-hostspot"
JMRI was installed in the default location "C:\Program Files (x86)\JMRI"
To create the link open a Command Prompt in administrator mode (elevated permissions) and enter the command:
mklink "C:\Program Files (x86)\JMRI\jre" "C:\Program Files\Microsoft\jdk-11.0.16.101-hostspot"
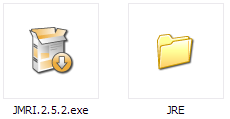
The Windows JMRI installer for version 2.5.2 or later supports an offline installation of Java and JMRI. Typically, this would be used when the computer on which you wish to run JMRI does not have internet access.
(The following instructions assume that you are setting up a blank removable flash drive - creation of a CD will be similar but may depend on the capabilities of your CD authoring software)
jre-8u66-windows-i586.exe.Setup of the JMRI offline installation media is now complete.
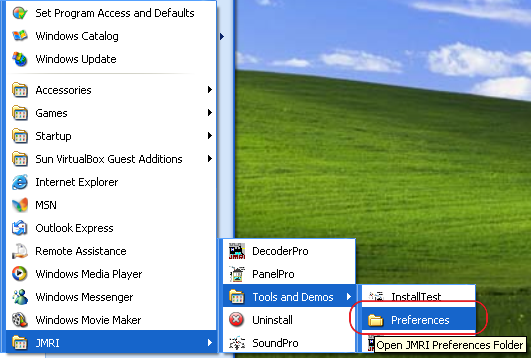
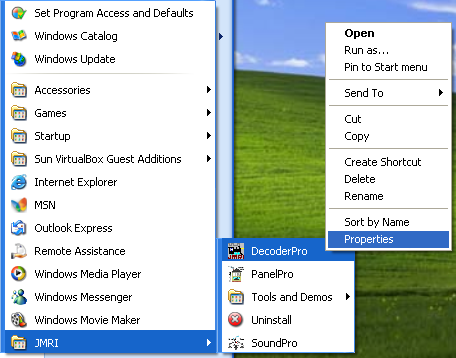
If for any reason you wish to start totally clean and discard all previously stored Connections, Roster entries and Panels, run "Uninstall JMRI", found in the Windows Start Menu > All Programs > JMRI > Tools and Demos beforereinstalling a new version of JMRI.
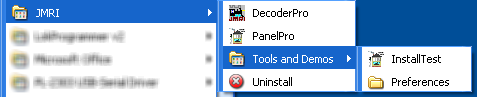
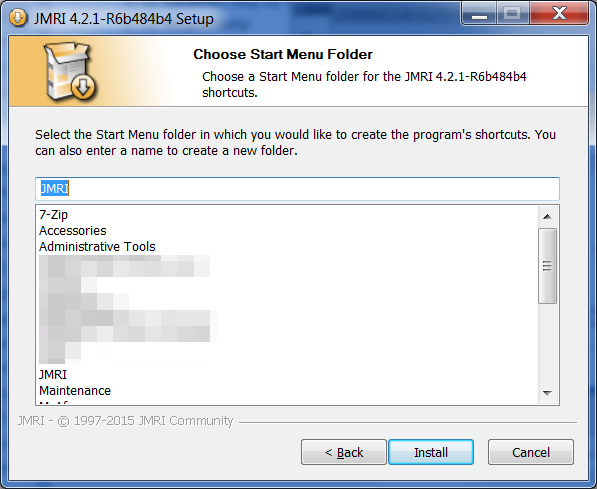
(This shows the Start menu following a 'Typical' install - a 'Full' install will place additional icons in this menu)
DecoderPro may encounter problems if the Serial Port used to connect to the layout shares an interrupt with another Serial Port. Typically COM1 and COM3 share an interrupt, as do COM2 and COM4. In particular, some systems are unable to communicate (and may experience a lockup) when the layout's Serial Port shares an interrupt with a port used for a serial mouse. Make sure that the Serial Port connected to your layout does not share an interrupt with another Serial Port.
With Windows XP, your Serial Port parameters might not be properly set for hardware flow control. To fix this, right-click on My Computer and select Properties. Go to the Hardware tab and click on Device Manager. Open up the section that says Ports (COM & LPT). Right-click on the Serial Port you have the LocoBuffer hooked up to and select Properties. Go to the Port Settings tab and set the options to:
19200, 8, None, 1, Hardware.
Click OK.
Quit the application and restart JMRI. Verify your connection settings.

Depending on what it wants to display, JMRI can open up very large windows. Generally, JMRI uses the size of the screen and information about fixed things like the start bar to decide the maximum size for an opening window so that e.g. the corners can't be reached to resize the window.
Depending your Windows display operation, large JMRI windows will either resize to stay on the large part of the screen, clear of start bars and menu bars, or will be displayed at the full size of the screen, appearing under the start bar and menu bars.
This is controlled by the Taskbar and Start Menu Properties control panel. JMRI windows can open to the full screen size if the 'Keep the taskbar on top of other windows' option is de-selected.
Also, they can open to the full screen size if the 'Auto hide the taskbar' option is selected
If you're using a "skinning" utility which changes the appearance of programs running on your computer, you should tell it to ignore the "java.exe" program. That's how JMRI and DecoderPro will appear to it, and they weren't written with such "skins" in mind.
During installation, JMRI can do a number of things automatically that makes it easier to revert to a previous working setup if a major problem is encountered in a test release.
Note: This procedure will not preserve work done since upgrading; it restores everything back to the state at the time of upgrade.
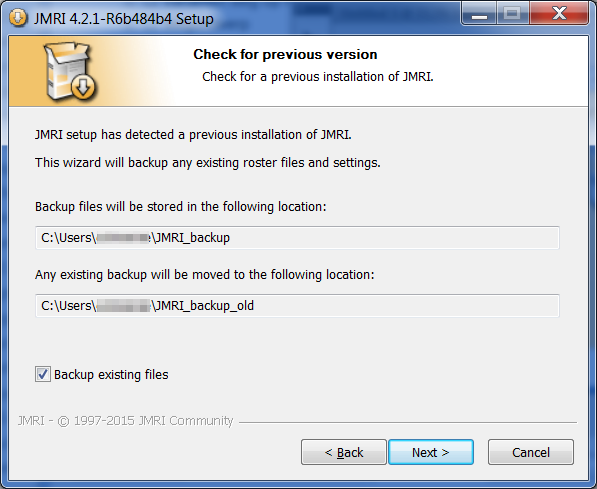
A backup copy of all your user files (Panel files, Roster entries, Preferences etc.) is saved when a new revision of JMRI is installed. This is done by the installer when it asks to save a backup copy which, if selected, is saved in a folder named "JMRI_backup".
When installing a newer version of JMRI than that already installed, backup creation is defaulted to "Yes"; when installing an older version, it is defaulted to "No".
If problems occur with the new version and it is necessary to revert to the
last version in use, you should install the older version right over the version
currently installed. Then find the folder that holds the folder named "JMRI_backup".
This will normally be located in your user-profile folder - a quick way to
find this is to follow the "Preferences" link in "JMRI > Tools and Demos" from the Start menu.
Once opened, navigate up one level to your user-profile folder.
Depending on the version of Windows, this will typically be one of:
| Windows Version | User Profile Folder |
|---|---|
| Windows 2000 - XP | C:\Documents and Settings\[username] |
| Windows Vista, 7, 8, 10, 11 | C:\Users\[username] |
Restart JMRI and you should be back to where you were before installing the new version.
Windows98 and ME can run JMRI 2.8.
Note: It is possible to install Java 1.8 onto machines running Windows XP or Vista SP1, but this is unsupported by Oracle.
jre-8u151-windows-i586.exe. This is
the last installer that worked for Windows XP; if you later get prompted to do a Java Update
to a newer version than 151, cancel it instead of applying it (if you do apply the update,
you'll have to reinstall the 151 version of Java as described here.) The installer will
complain that it is unsupported,but should allow you to continue with the installation.
Assuming that this is successful, proceed with installation of
current JMRI test and production releases.It's important to have enough memory and free hard disk space. We recommend you have at least 256 MB of memory for Windows 98, 512 MB of memory for Windows 2000 and 2 GB for the newer W7-W10 systems. Note that used PC hardware is available for very little money; it might be cheaper to buy a used computer than to update your existing one.
Note: Current versions of JMRI are developed with Java 1.8 (moving to Java 11). You may get a message
if you are using later versions of Java:
"WARNING: An illegal reflective access operation has occurred"
or "WARNING: Please consider reporting this to the maintainers".
You can ignore the messages.
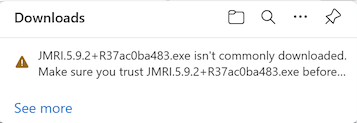
After downloading a JMRI installer program, a trust message might be displayed due to the low volume of downloads. The following details are based on Microsoft Defender. Other 3rd party anti-virus packages have similar procedures for handling the warnings.
If a JMRI download does not meet the trust requirements the untrusted message is displayed instead of the normal download completion message.
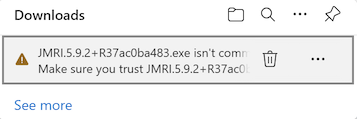
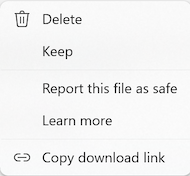
Moving the mouse over the message will display an option to delete the download or click on the 3 dots to see more options.
Select Keep from the list of options.
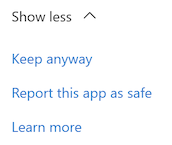
Another dialog is displayed with additional information. Click on Show more.
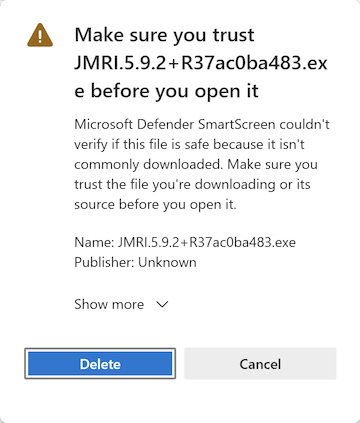
Select Keep anyway.
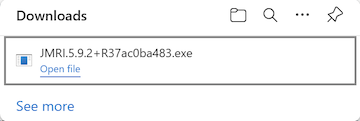
The JMRI installer is finally moved to the Downloads folder. Click on Open file to run the installer immediately or run it later from Downloads.
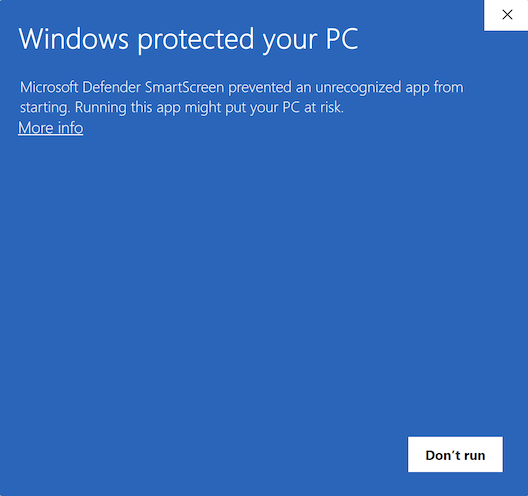
When the JMRI installer is run the first time, the execute trust checking occurs. Click on More info.
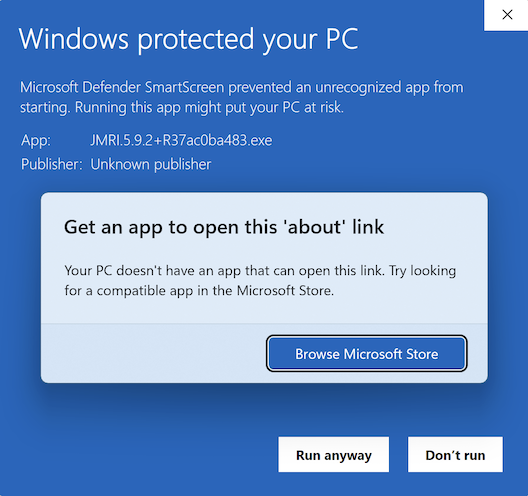
If it is ok to run the JMRI installer, click on the Run anyway button.
Sometimes things go wrong. The information in this section can help.
With JMRI a Windows utility called InstallTest.exe is installed. To execute a series of tests on
your Windows JMRI installation, start InstallTest from the Start menu -> Programs -> JMRI -> Tools and Demos
-> InstallTest. The following screen will open:
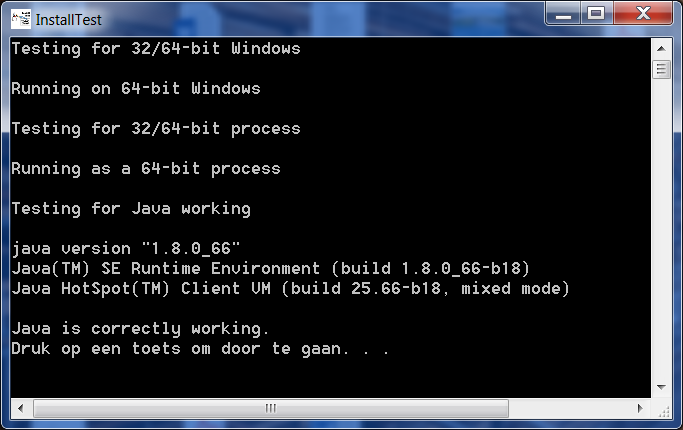
Press any key to continue (after reading the screen).
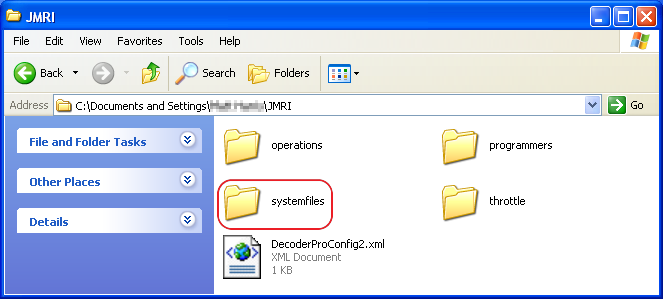
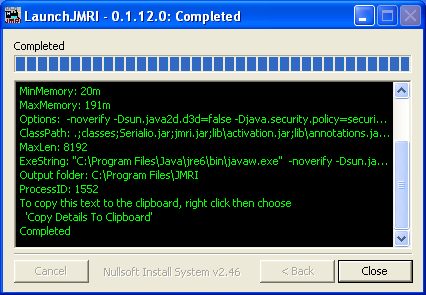
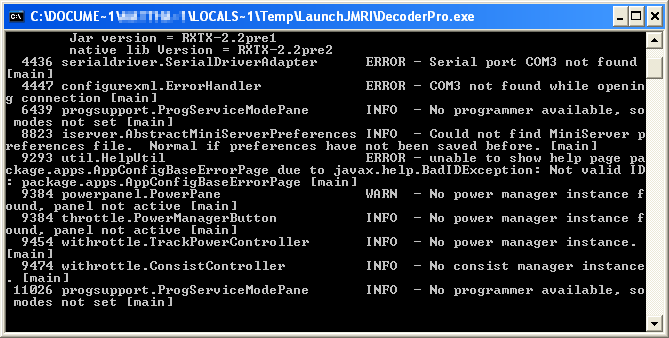
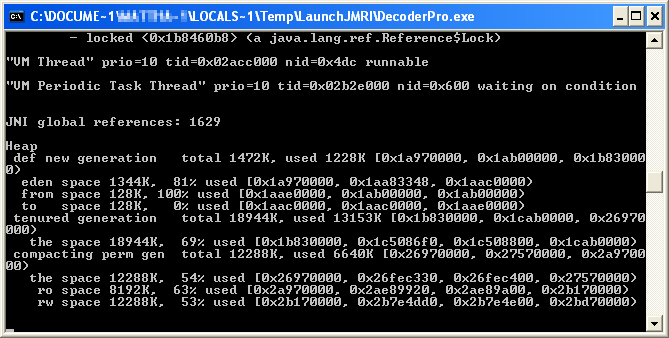
JMRI logs information about errors to a "messages.log" file in the "systemfiles" sub-directory of the JMRI preferences directory, and to a console window. This window is generally white text on a black background, and is labelled either "Java" or "DOS". If something is going wrong, look there for more information.
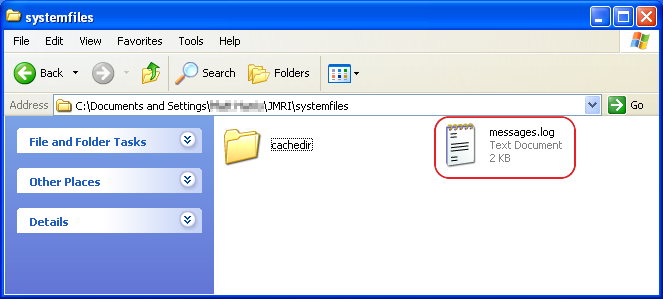
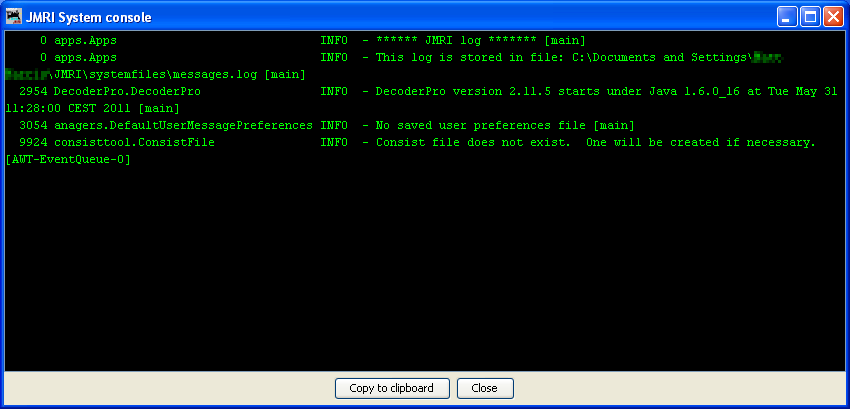
If a JMRI support volunteer ask you for a copy of the error messages, you can usually get them from the
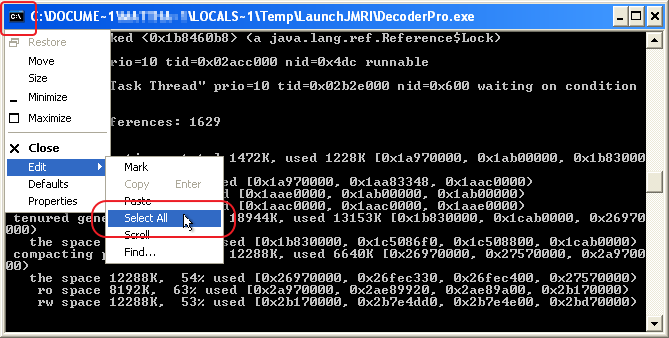
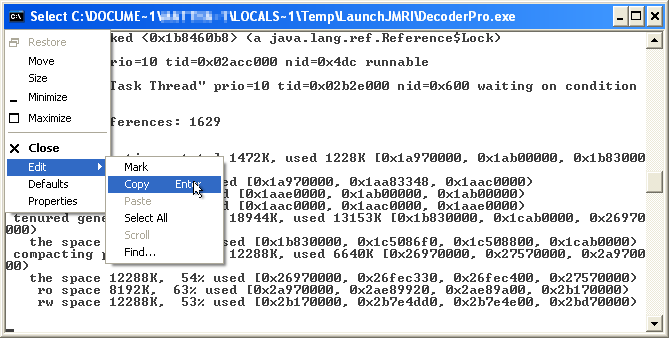
messages.log file. If you can't find it there, make a copy of the JMRI System Console log window:
To assist with resolving JMRI start-up issues, it is possible to modify the Start Menu shortcut used to launch JMRI.
Shortcuts are modified as follows:
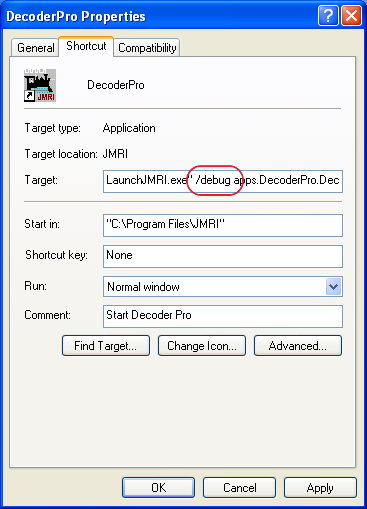
For further information on the JMRI shortcuts, see the page outlining the start-up procedure on Windows.
To assist with resolving JMRI shutdown issues, it is possible to modify the start menu shortcut used to launch JMRI.
Shortcuts are modified as follows:
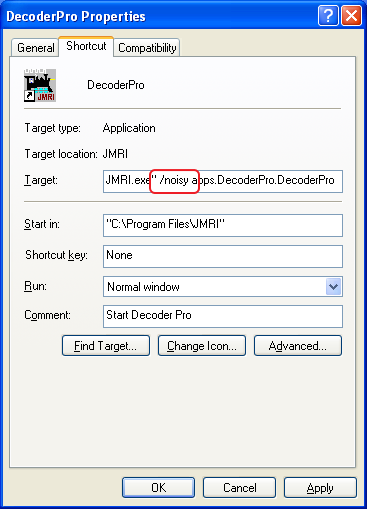
For further information on the JMRI shortcuts, see the Help page outlining the start-up procedure on Windows.