These directions focus on installing the 3.x and
4.x releases of JMRI® on OS X computers.
Instructions to install current JMRI releases on current Macs can be
found here
If you have an even older Mac and need to install an earlier release, please see these
Early Mac OS X install instructions.
Now, on to the show:
JMRI 3.x - 4.x installs will take up about 330 MB of disk space, mostly for the Help pages and decoder definitions.
No Macintosh running macOS has built-in Serial Ports, so if your layout hardware needs a serial connection, you'll have to use a USB-to-Serial adapter.
No matter if you have a USB-to-Serial adapter, or a device with a direct USB connection, you will need macOS drivers (system software) for the hardware you're using. Most hardware won't need a separate driver; they're already present in macOS. In some cases you will need to install a special driver, though, so check the manufacturer's website to make sure.
Note: OS X 10.11 El Capitan and later macOS versions generally require signed drivers. If you installed drivers for a previous version, particularly drivers that don't say they support OS X 10.10 Yosemite, those older drivers may not work with 10.11 El Capitan. Go to the website for your USB adapter, download the newest driver and install it before you update to El Capitan, or right after updating before trying to run JMRI.
For more instructions on USB connection debugging and testing for correct drivers, see the USB section further down on this page.
We test using a Keyspan PDA Adapter; those drivers are available at http://www.keyspan.com/downloads/. Some device drivers will list each port under several names, e.g. starting with "/dev/tty" or "/dev/cu", for example "/dev/tty.KeyUSA19181.1". In that case, you must select the one that starts with "cu", e.g. "/dev/cu.KeyUSA19181.1".
OS X drivers for FTDI chipsets are available from FTDI.
There's a macOS driver for USB-serial adapters based on the Prolific PL2303 chipset available here. If you can't access your USB dongle, and it seems to use that chipset (you can check in the USB tab of System Profiler), this driver will make it available as /dev/cu.PL2303-xxx.
Download JMRI 4.26 - or JMRI 3.10.1. Since the version numbers change with every release, this link takes you to the general JMRI download page, where you can select whichever version you like.
The JMRI project is continuously adding features, bug fixes, examples and tutorials to the release, and so a new "test" version appears every month or so. You may find one of these has features that you really want. These are announced in the JMRI users Groups.io group at https://groups.io/g/jmriusers.
Normally, the download will open a new Finder window showing a JMRI folder. If not, double-click the file you downloaded above. This should open a window with the JMRI folder. If that still doesn't open a window, look for a newly-mounted disk image (e.g. in Finder) and open that manually.
To install, you just have to move the downloaded JMRI folder to where you want it on your computer. We recommend you put it in Applications, which is the standard location for this. To do that, just drag the JMRI folder onto the "Applications" icon.
If you want to keep it somewhere else, just drag the folder to the desired location.
Note that on macOS Catalina and later, you won't be able to run JMRI from within the Downloads, Desktop or Documents folder, so we strongly recommend you drag the JMRI folder to Applications and run it from there.
If you already have JMRI installed and working, and want to update to a newer version, just:
Your existing configuration information, Panel files, etc. will continue to be used with the new version.
If for any reason you wish to start totally clean and discard all previously stored Connections, Roster entries and Panels, delete the JMRI settings folder before starting the program. You will find it by choosing "Go to Folder..." from the Finder's Go menu (or ⌘+Shift+G). In the pane that appears, enter "~/Library/Preferences/", click "Go". If a "JMRI" folder is present in Preferences, move it to the Trash.
Connect your computer to your Command Station hardware.
You can run the program by double-clicking on the "DecoderPro" or "PanelPro" or other application icons in the JMRI folder.
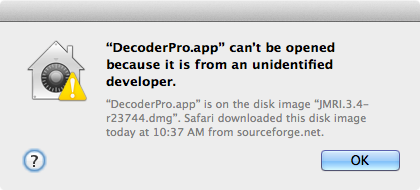
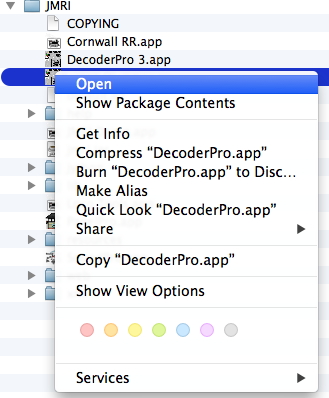
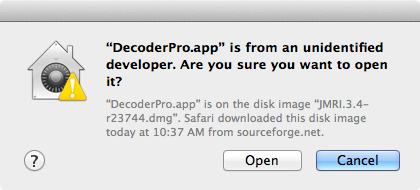
Depending on your security settings, when you first try to run a new JMRI version (usually by double-clicking on the icon for DecoderPro or PanelPro), you may get a warning dialog that it "can't be opened because it's from an unidentified developer". In that case, dismiss the dialog, then hold the Control key down and click the icon to get its contextual menu. Select the "Open" option. You'll be asked to confirm. Be sure to click the "Open" button, and not accept the default "Cancel".
Your next step will be to set the Preferences for your particular layout connection. More on this on the JMRI Setup help page. Go there next to complete your setup.
Mac OS uses names like "cu.SomeName" and
"tty.SomeName" for devices, including
USB-attached devices like USB-serial converters,
LocoBuffer-USBs and similar. Generally, you'll want to use the
one that starts with "cu." if both
cu. and tty. are present, but
see the specific installation page for your particular type of
device. Sometimes you can recognize your interface from the
right-hand part of the name. If not, the easiest way to find
the name for your interface is to disconnect it, start JMRI,
write down the list of available devices, close JMRI, reconnect
the interface, start JMRI again, and look to see which extra
name has appeared. That's the name one you want.
JMRI supports many different Mac computers, with several different kinds of processors, multiple macOS versions, and various layout hardware. Some combinations can cause trouble. This section gives some debugging hints.
Irrespective of DCC system, there are some basic rules for troubleshooting any USB-attached device to a Mac.
while : ;do clear;ls -lt /dev|head;i=$((i+1));echo $i;sleep 1;done
tty.xxx version.
cu.xxx you need
to select in JMRI. If you cannot get this far,
there's no way JMRI can find your device until the driver issue is resolved.
To check for Java SE 6, JMRI 4.5.2 and up include a script. Follow these steps (assuming JMRI is installed in the folder /Applications/JMRI; if it's installed in a different location, adjust the paths as needed):
El Capitan and later: Reboot into Recovery Mode by restarting your Mac and pressing Cmd-R until the Apple logo appears. Once in Recovery Mode, select Terminal from the Utilities menu.
/Applications/JMRI/PanelPro.app/Contents/Resources/uninstall-java6.sh
El Capitan and later: Run the command
bash /Volumes/Macintosh\ HD/Applications/JMRI/PanelPro.app/Contents/Resources/uninstall-java6.sh /Volumes/Macintosh\ HD
Source: JMRI 4.5.2 Release notes.
Sometimes very old Macs have an older "vecsub.jar" library installed in a place that
will cause problems for JMRI. It happens more often when you're compiling your
own version, but it can also happen when just running a download. If you get messages about
error: cannot find symbol getX()
or getY() or getZ(), the solution is to copy the JMRI/lib/vecmath-1.5.2.jar file from
within the JMRI distribution directory to the ~/Library/Java/Extensions/ directory.
(You might have to create that directory).
Do not do this unless you have seen that symptom.
Some issues:
With macOS, JMRI makes this easy to do. PanelPro and DecoderPro save their Preferences separately, so they can be configured independently.
On a Mac, the different Preferences files take their name from the name of the application icon that's invoked. This lets you create multiple copies of e.g. DecoderPro that each use their own, separate Preferences files. Let's say you want one called "CoolNewOne".
It won't work to drag one of the JMRI application icons out of the JMRI folder, since they need the other files that can be found there. If you want an icon in some other place, like on your desktop:
Note that renaming the alias alone does not cause the application icon to be renamed, so the alias will be using the same Preferences as the original.