The LogixNG Module table contains a list of the defined LogixNG Modules.
The LogixNG Module table lists all of the currently defined LogixNG Modules. Each row has a standard set of columns.
The dropdown combo box has 3 actions that can be applied to the current LogixNG Module row.


To create a new LogixNG Module, click on the Add... button. The Add LogixNG Module window will be displayed.
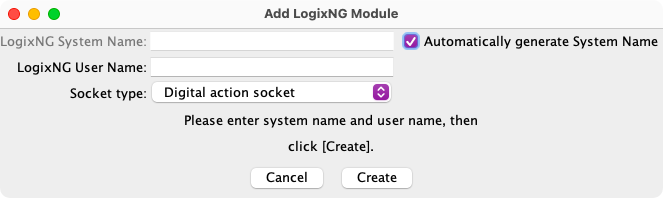
The system name is required. The system name for a LogixNG Module always begins with the letters IQM. If the entered name does not start with IQM, it will be automatically added. The typical suffix is a number. If Automatically generate System Name is checked, the system name format will be IQM:AUTO:nnnn. Any other format requires adding a $ (dollar) character between IQM and the suffix.
The user name is optional but recommended. A user name may be any useful text, provided the new user name was not previously assigned to another LogixNG Module. Once a LogixNG Module is created, its system name cannot be changed. Its user name may be changed in the LogixNG Module Table. The user name is usually used to provide a more descriptive name, for example, "Signal 5 Control".
LogixNG has a concept called sockets. They are used to provided connection points that support a variety of connections. When a LogixNG Module is being created, it has to know what kind of socket it will support.
The Socket type combo box is used to select the socket type.
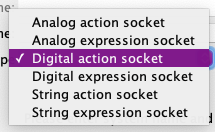
The Digital expression socket is equivalent to a Logix Conditional that only has variables and returns a true or false when called from another Conditional.
The Digital action socket is used to perform a set of actions. It can also implement a full if/then/else set of logic.
After clicking Create, the LogixNG Module will be created and the Edit Module window will appear.