Prior to using the programmer you need to have completed the previous section (Getting Started), have your computer connected to your command station/booster with the required interface device for your DCC system, you are now ready to actually program a decoder that has been installed in your locomotive.
On your initial opening DecoderPro, the main page will be displayed: (After preferences are
set) The list of locomotives programmed by DecoderPro will be blank until you add a
locomotive. From then on when it is opened a list of all the locomotives whose decoders you
have previously programmed in DecoderPro3 or classic DecoderPro will be listed.
DecoderPro provides access to the JMRI tools required to program DCC decoders. If you are an advanced user, using PanelPro to run your layout, then you may start PanelPro and then from the File menu start DecoderPro.
If you already have roster entries and you want to start programming in Comprehensive Programmer, double-click on the roster entry.
DecoderPro by its self may program DCC decoders and also use the other JMRI tools to manually operate your trains from the computer interface. These include throttle control and power control of your layout if your DCC system allows them.
The DecoderPro window is divided into five main section from top to bottom.
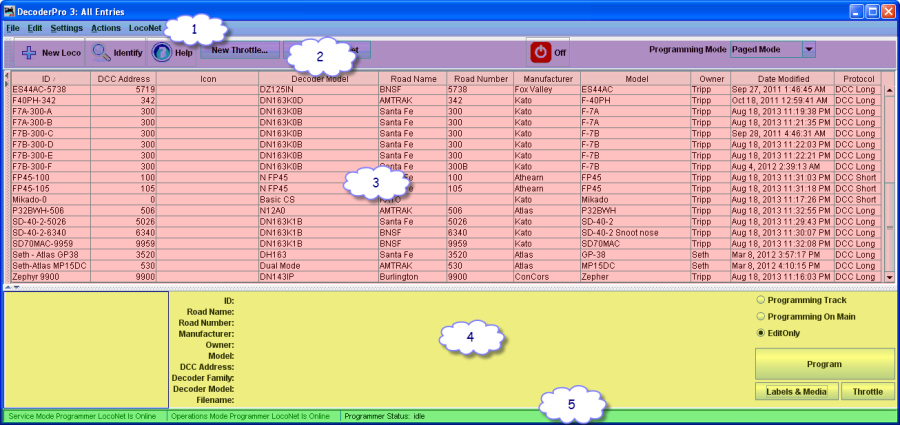
1. The Menu Bar.
2. The Tool Bar
3. The Roster Table a list of all the
decoders in your roster that are part of the active roster group. To set up a roster group in
addition to the default group of All Entries see Settings for Roster groups..
4. The Decoder Information Area. Show
information about any selected locomotive in the roster list.
5. A status bar that reports information about DecoderPro operation including errors.
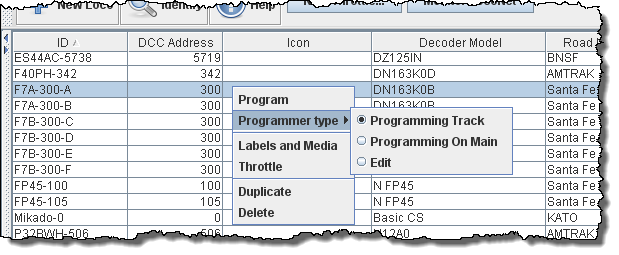
Anywhere in the roster table you may right-click and a context menu will be displayed.
| Right click (Context Menu) | |
| Program | |
| Programmer type |
Programming Track |
| Programming on Main | |
| Edit (Allows you to edit roster without making changes to program) | |
| Labels and Media | Opens programming page to select either Labels TAB or Roster Media TAB |
| Throttle | Opens a JMRI Throttle |
| Duplicate | Duplicates the selected roster entry to use for same type of locomotive. |
| Delete | Deletes roster entry. |
At this time a new user will have no entries in the Roster list of locomotives. If you are updating program and have a Roster installed the Roster list will be populated as shown. We can now add a locomotive to the list.
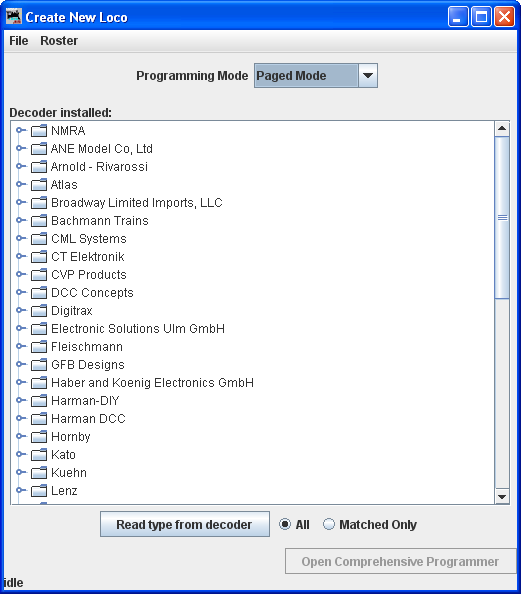
On the Tool Bar is an icon labeled New Loco. Click on the icon and the Create New Loco pane opens. Place a locomotive (with the decoder installed) on the Programming Track (Service Mode), click on Read type from decoder button (at the bottom of the window)
As in the screen below several possible decoders will probably be highlighted. This happens because the decoders are electrically the same but are packaged differently to fit the locomotives that they are used in. If you know which decoder is in use, then select that one. If not, in most cases any of the highlighted decoders will work, and you should select the one with the least letters at the end, since letters are often used to denote locomotive specific variations. Note all of the Tsunami decoders are using the same hardware in different configurations.
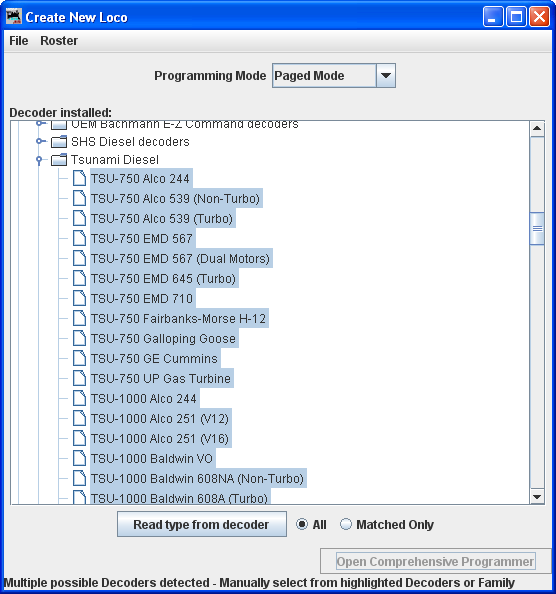
I know that this decoder is an Athearn N Scale FP-45 factory installed Tsunami Diesel Genesis OEM decoder. So I will select that decoder from the list.
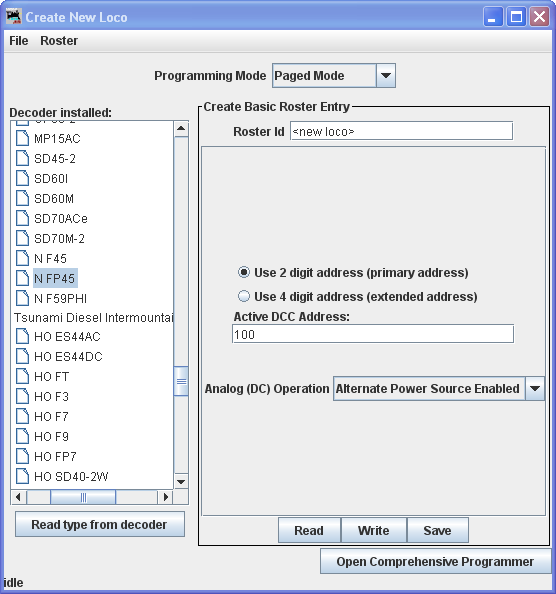
Note that we have selected a decoder, which is highlighted. Also the Open Comprehensive Programmer button is activated to allow us to enter the programmer.
Click on the Open Comprehensive Programmer button and the Roster Entry Pane will open for the Selected Programmer. Go to the next page