The Basic Programmer uses only the required panes to set up the decoder for DCC operation and creating a Roster entry and uses only the first two TABs. The first action in programming a locomotive with DecoderPro® is to fill out the roster entry screen.
A roster is a database of all locomotives that your installation of DecoderPro has programmed. All of this information will be contained in the list on the DecoderPro main page. It includes the information seen in the screen below:
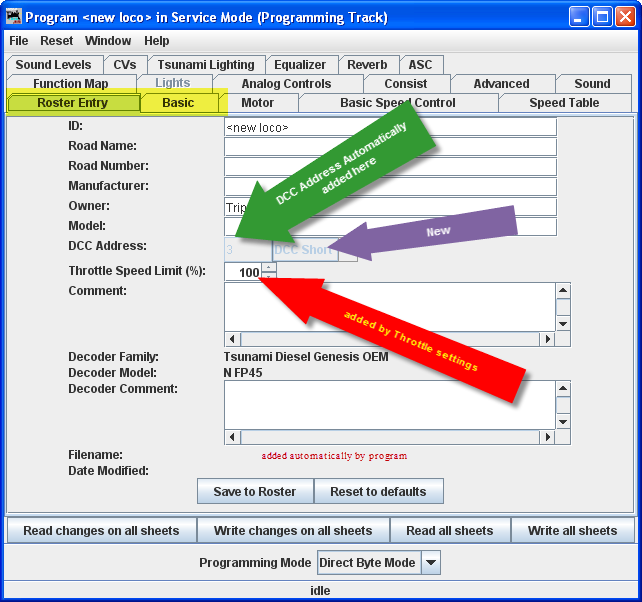
Most of these fields are self-explanatory. However, note that the first field (ID) becomes the file name in the Roster for the locomotive you are programming. Set up a schema to identify your locomotive to its decoder program. i.e. Mfr, Loco Type, and Address (Kato_SD40-2_5645). Spaces in the ID field will be changed to underscores (_) when the file is written. In a club environment, often the ID begins with the owner's name, or member number. This way the Roster (which is sorted alphabetically) will keep all of an owner's locomotives listed together. DecoderPro also allows you to categorize roster entries into Groups, so you could have a separate group for each member.
We'll get to Groups and all the other neat stuff that can be done with DecoderPro in a
while. I just thought I'd give you peek behind the curtain, and give you a chance to mentally
thank the JMRI developers for all their work on DecoderPro version 3. Of course a message to
that effect posted to the JMRI Users group would also be warmly received.
The DCC address will be filled in automatically when we get to programming the address. The
Decoder Family and Model are entered automatically from the Selection page we just used to
get here.
The Decoder Comment field is a good place to add the date you purchased the locomotive, price, or any other information you might feel is important to record.
The button stores the current decoder information to your computer hard drive and folder where your roster file is located. The default storage is the same directory where the program is installed.
The button can be used to return the Roster file to the condition of a new file for the type and version of the decoder listed in the roster entry. It does NOT change the values in the roster file on your hard disk, unless you specifically save it after using this reset button. It also is not written to the decoder until you specifically select a write operation. It was included in DecoderPro so that if you get hopelessly confused in proceeding screen to screen entering variables, you can return to the decoder manufacturers baseline default set and start again.
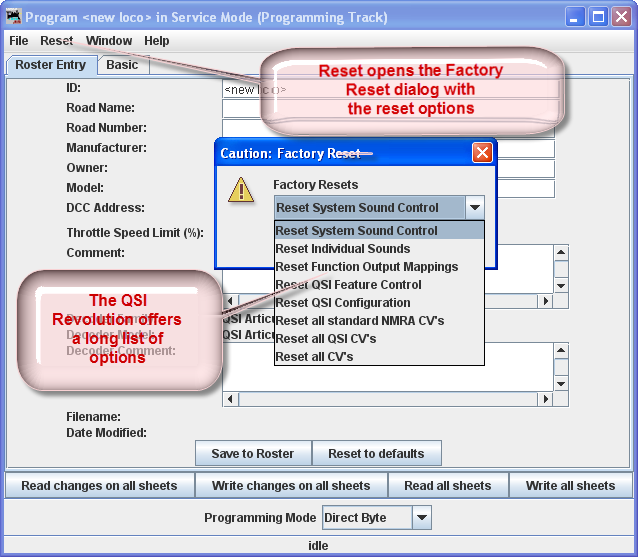
Most decoders will activate the Reset Menu (next to the File menu at the top
of the page). This will reset the decoder to the manufacturers default settings for all the
CVs, or just some of them if the manufacturer has several reset routines. It does this by
writing directly to a CV in the decoder, if the decoder has that feature, CV8 in the case of
Digitrax. All decoders may not support reset and how they work is manufacturer and decoder
dependent.
One decoder with a lengthy list of reset routines is the QSI Revolution decoder, which
enables a drop-down list of options for resetting the decoder as shown below:
You will note that the decoder address is shown but grayed out (or blank if this is a new locomotive in the roster). This field is automatically filled in by the program and is determined from the address entered using the Basic tab which we will get to shortly. This address is used with the Ident function on the start page if you wish to recall a locomotive that is already in your roster.
The Programming mode can be changed by clicking on the drop down box

There are options for several programming modes. JMRI now selects the best mode for you. It determines this from the command station type you are using and the decoder model you are attempting to program. Usually this will be OK. If you find that you are having a problem with programming you may try a different mode.
For most newer decoders, stay with Paged mode or whichever Direct mode your Command Station supports. Your decoder documentation should let you know if programming in some other mode is necessary... but if you are having problems, experiment. If a mode is not supported for the selected decoder and system, that option will be grayed out. For this decoder I will use Direct Bye Mode.
When you make your selection, the programming mode should now display to the left of the in the dropdown box.
Below is a Basic Programming Roster setup for Athearn FP-45 locomotive in n scale with OEM decoder (Tsunami 750) decoder. Note in the status at the bottom of pane indicates that the file has been saved.
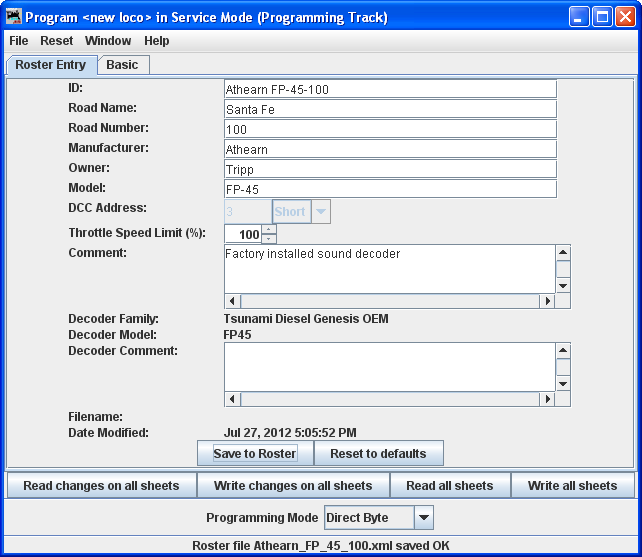
Now that we have the Roster information all in order, we can continue with programming the decoder.
Now it's time to click on the Save to Roster button to save this data. Note that there will be brief message in status bar at the bottom of the screen that roster has been saved.
Let's move on to the Basic Programmer.