You may have noticed that at the top of the window are Two tabs: Roster Entry and Basic. We have completed the Roster Entry pane of the Program window, now, click on the Basic tab to change panes to continue with programming your decoder. The Basic pane will be displayed and look similar to the following illustration: Many panes in the programmer contain decoder dependent features, as a result what you see may not exactly agree with what you see here. Only those variables that your decoder can implement will be shown.
Below is a screen for OEM decoder that is used in the Athearn FP-45
locomotive.shown in factory settings, which is normally address 3
.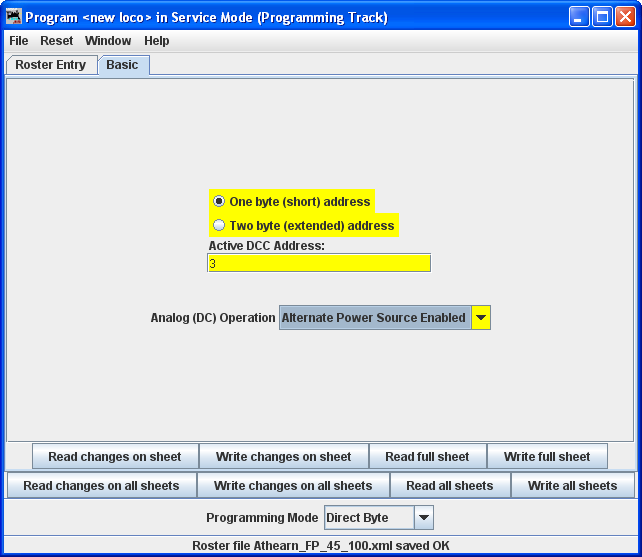
You will see three options you can change, highlighted in yellow:
To enable Analog (old style DC, some vendors refer to this as dual mode) Operation select the appropriate entry from the drop-down list.
The yellow highlighting indicates these options are "probable" settings and have not been
confirmed from the decoder. Settings that have been changed by the user and have not been
written back to the decoder appear in a orange color. You will see examples of
this throughout the manual.
Be patient, especially with older computers. At the very bottom of the pane (where it says "idle") you will see a running account of exactly what DecoderPro is doing, for example, the specific CV being read.
Again, the and functions are dependent on your command station. If your system does not have the capability to read CVs, then these buttons will not be available.
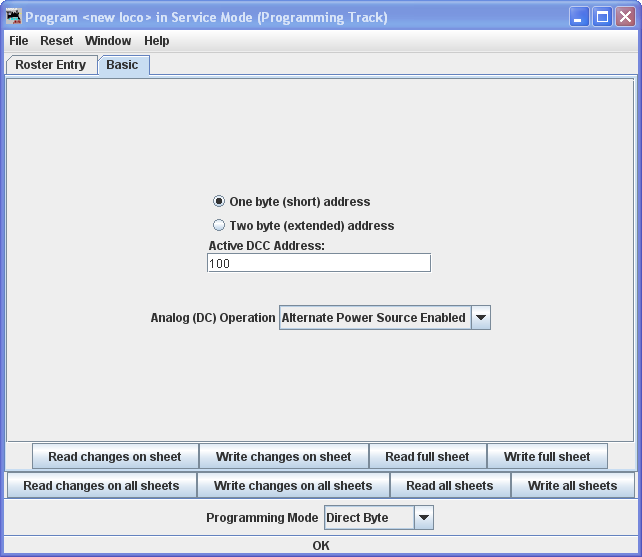
If you wish to change the address of the locomotive, type in the new address. To turn on or off 4 digit addressing, select the desired radio button. . Be sure that the address type agrees with the number of characters in the address.
When you are finished, click on to write the new values in the decoder.
Writing usually takes much less time than reading, because the value can be sent directly. As the write operation proceeds, the data will change from yellow to white. If there is difficulty writing to the decoder, the data will change to red. The software will automatically keep trying until the write operation is successful. In some instances the system will "time-out" after a certain number of tries without an acknowledgement from the decoder. This does not necessarily mean that the values have not been written, just that the program has not received an acknowledgement. This can be due to the locomotive moving and getting on dirty track so that it can't pulse back, or possibly because the command station or decoder cannot read back. Try moving the loco and try again. If it is a command station or decoder read-back issue, try the loco on the mainline and see if the programming was successful.
To finish this "basic" programming of a decoder, click once more on the Roster Entry tab, You will see that the address field has now been filled in, so you can now click on the button. Your new decoder settings have now been written not only to the decoder, but also saved to a computer file where they may be recalled in the future.
I have programmed the address for this locomotive and clicked on the Write full sheet button to send the address to the command station to program the decoder. Note that the status line keeps you updated as to what is writing and should finish with OK, which is good or an error message which usually meant the write was not completed. All the entries are now in white color as they match the decoder.
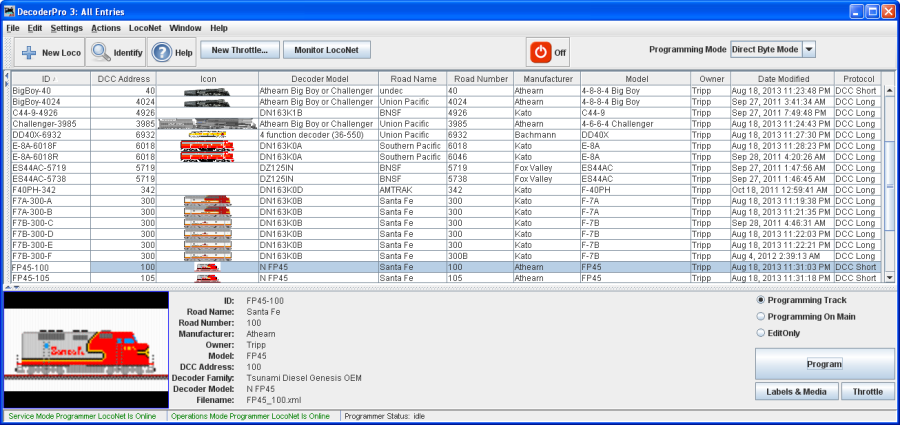
Now that we have entered the Roster data and set the desired address, lets return to DecoderPro Main window by closing the Programming window.
Notice that we now have a list of all the locomotives programmed so far that are in our roster.
What we've done so far is what is available in the Basic mode of
programming in DecoderPro. Which is basically put Locomotive in the roster and assign an
address. A good place to start for new folks or at a club. It's hard to go wrong, but you can
change the loco address and add it the roster, which are the two most often needed actions
with programming.
The classic DecoderPro offered a number of modes, most of which were often redundant and
confusing showing how the user could edit the underlying file to make special application
programming modes. The Comprehensive Programmer was the most popular for a long time until
Advanced came along with added features. So now they've been combined in DecoderPro. Thus the
Comprehensive Programmer with added Advanced features is the only other programmer that
DecoderPro offers.
Since we've already covered Basic, let's explore the DecoderPro Comprehensive Programmer!
Select the Locomotive that you want to program in Comprehensive Programmer, then double click on selection to open Programmer.
At the bottom of the window is the Labels & Media andThrottle buttons. Use these buttons to set up the Icon photos for your roster entries and to set up the Function Labels on the software throttle included in JMRI. Click the links that we've included and take a look.