This tour demonstrates DecoderPro version 5.1.3. Version 4 works similarly.
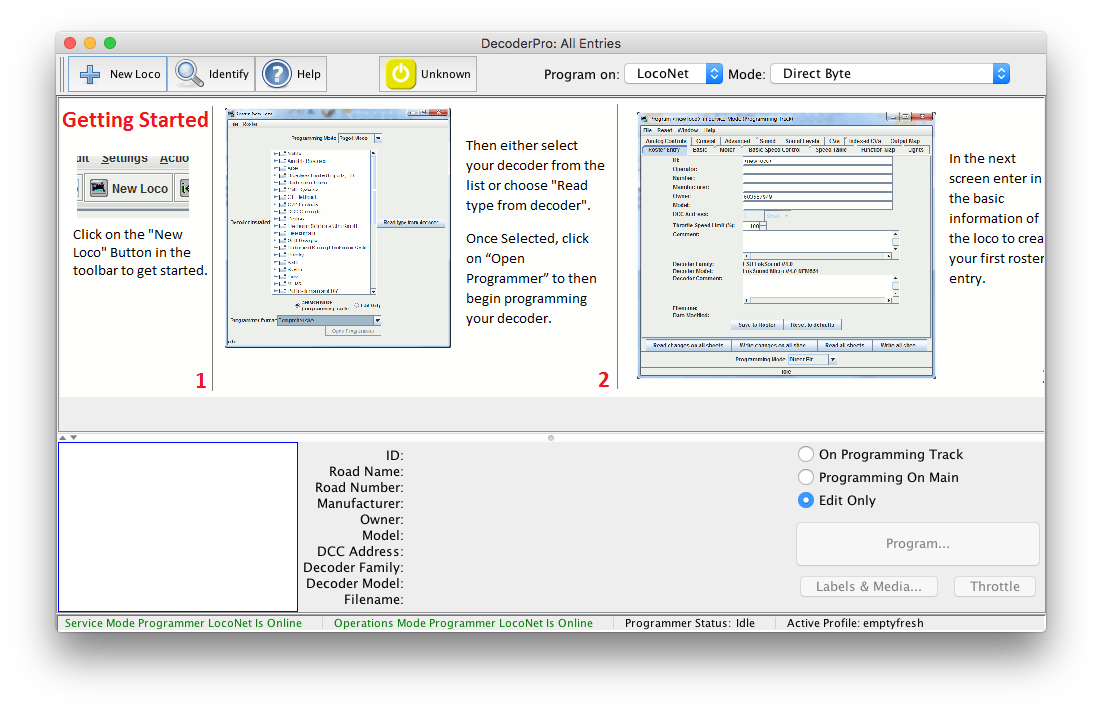
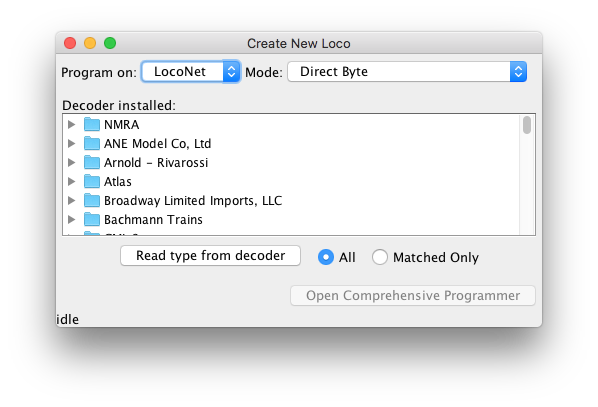
You'll get a new window to configure the programmer with information about a specific type of decoder, or an existing locomotive. This will become your locomotive roster as you program your decoders
To start working with a newly-installed decoder, click the "Read type from decoder" button to have the programmer read the decoder and attempt to identify it. (You could also explicitly tell the programmer the decoder type by selecting it from the "Decoder Installed" list)
While the programmer is talking to the decoder, status will be displayed at the
bottom of the window; "Idle" or "OK" means that things are working. Number codes will point out
errors.
If it succeeds, it will select the decoder model in the selection box. Usually it will only be
able to narrow the selection down to a few choices. Check that the right model is selected
in the "Decoder Installed" list; update the selection if desired.
Some people prefer a very plain programmer, and some want to have access to every feature. To handle this, DecoderPro provides several programming interfaces which you can set in your Preferences under Roster > Programmer:
For now, we stay with the "Comprehensive Programmer".
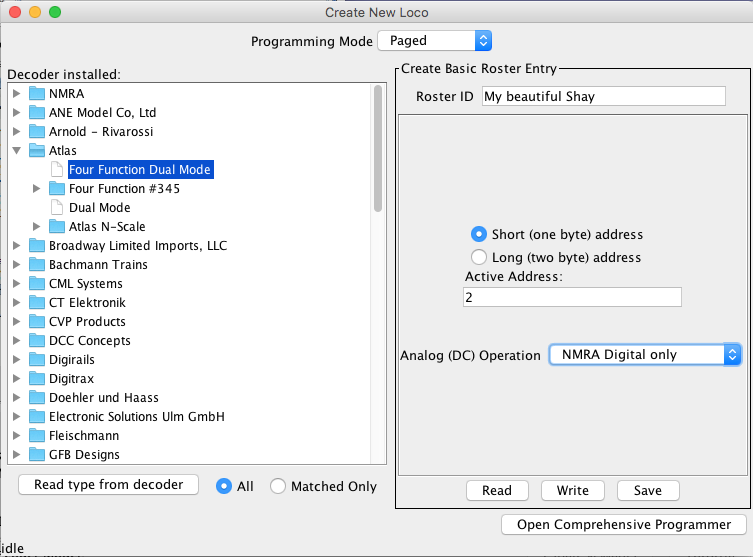
After a single decoder is selected in the listing on the left, the right-hand side will open and allow entering a unique roster ID and the (current) decoder address.
Continue by clicking "Open Programmer".
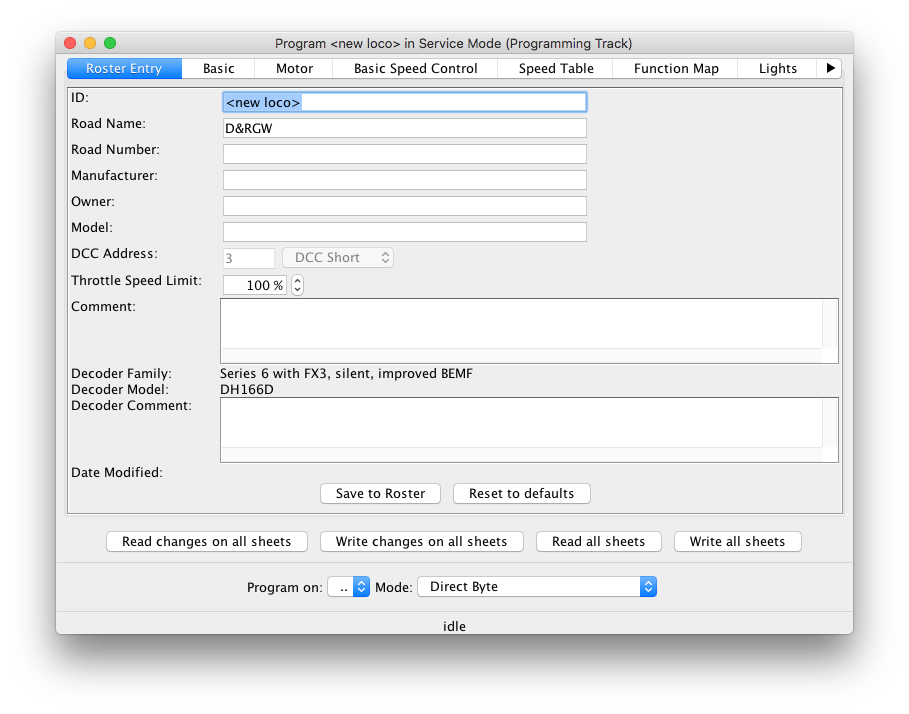
You will be presented a new pane, opening on the first tab "Roster Entry".
Enter any information on the locomotive model and the decoder installed. None of this is
programmed in the decoder, except for the Address, but you can't change it here. Still,
you can keep some notes here to track your model's internals.
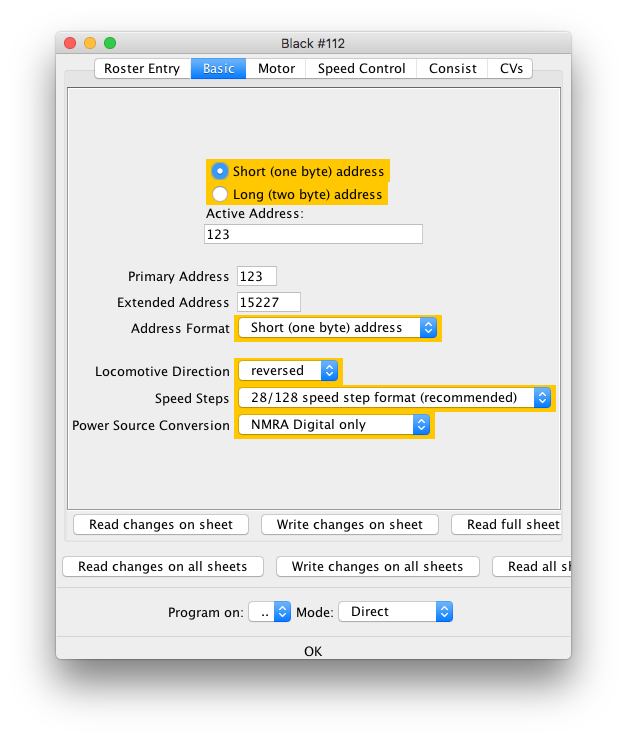
Each of the tabs opens a new screen you can use to configure different aspects of the decoder. The "Basic" pane handles the address and other settings you'll need to start.
Using the buttons -- On the bottom of each screen are buttons that will
read values from or write values to the decoder. For example, to do a basic
configuration, enter values in the fields and click Write sheet. The
variable fields are color coded to represent their states:
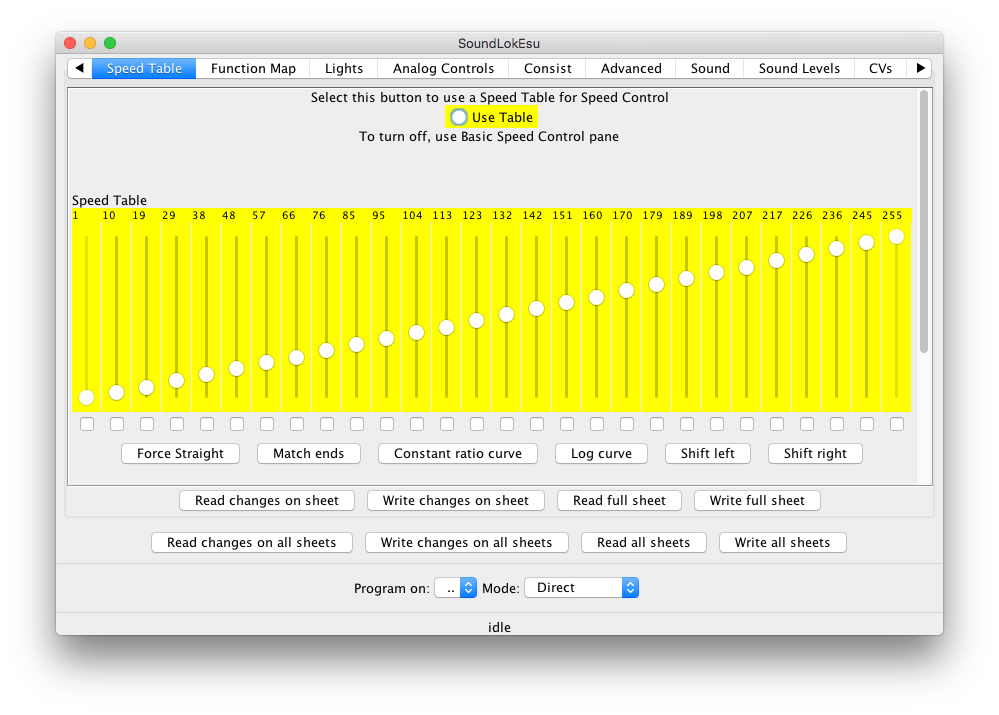
For example, after a "Read" the speed table values are shown on white in the first image, while in the second image it shows that when you modify a value, it's marked on yellow. Doing a write will set the color back to white; doing a read will reset the number to the value in the decoder, and also reset the field to white.
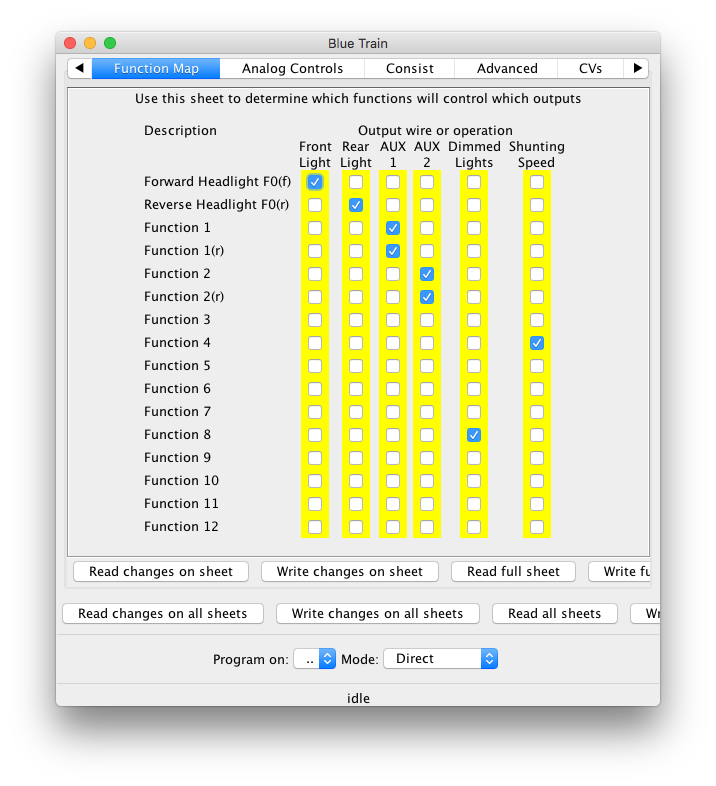
Although having a name for an entire CV is nice, where this really helps is with complicated bit-mapped options. Digitrax FX lighting options, for example, require configuring two sets of bits into one CV. Another example is configuring a Soundtraxx decoder's mapping between functions and sounds. This involves bits and values spread across a dozen different CVs, but DecoderPro turns that configuration job into simple checking of boxes.
Each selection box, checkbox or radiobutton is mapped to specific bit(s) in the decoder's CVs. The programmer handles the reading and writing of the CVs when the individual settings are changed. Instead of bits, you're working with the name or description from the decoder manual.
DecoderPro is meant to be easily configurable to add new types of decoders. You can also add programmer sheets, change their layout, and even redo the entire appearance. To do that, DecoderPro is driven by human-readable files in XML format. Read how to do that here.
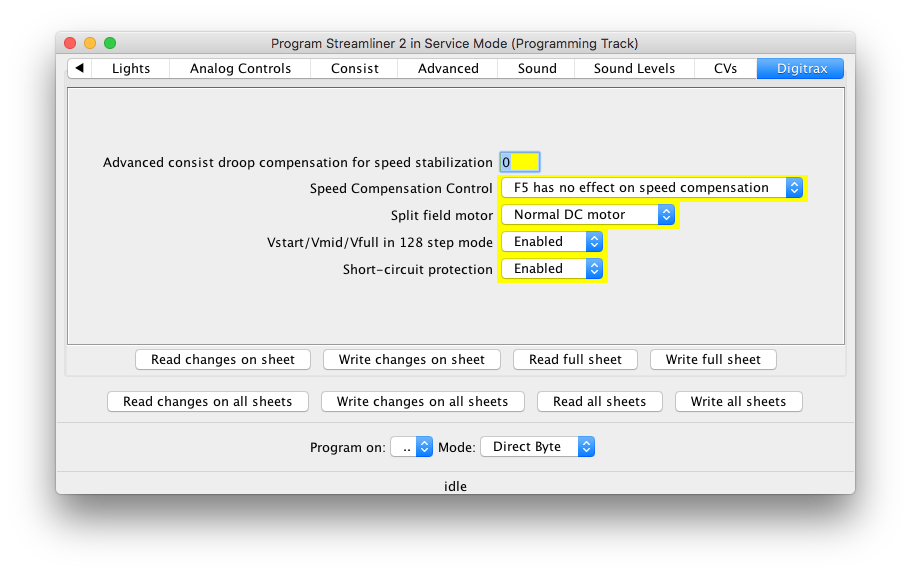
These files make it convenient to update DecoderPro to work with a new decoder. For example, the unique capabilities of a Digitrax DH142 decoder appear on the "Digitrax" tab.
Additional decoder-specific variables and sheets can be added via configuration files. By choosing an industry-standard XML format for decoder information, we hope to make it possible to create a complete library. Perhaps we can even interest manufacturers in documenting their products in this format.
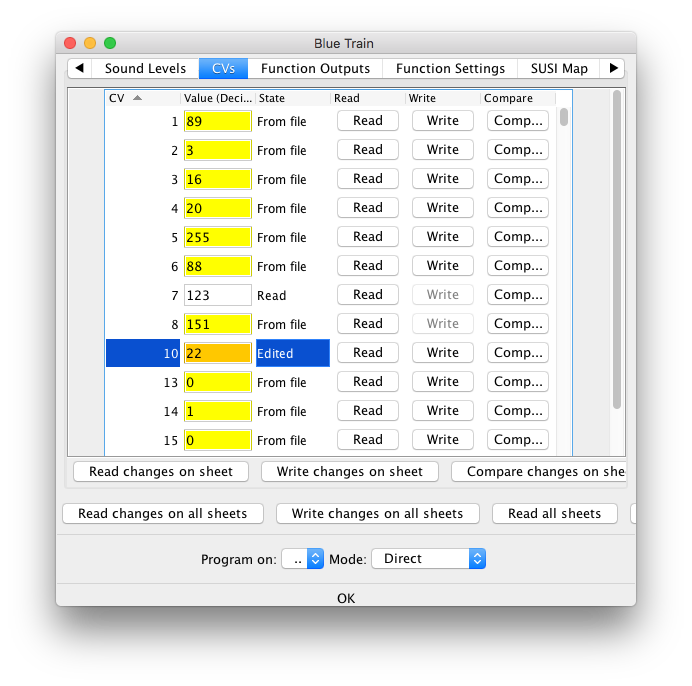
It is also possible to program the CVs directly using the CV Programmer. The "Read" and "Write" buttons allow you to work with individual CV contents. Changes made here will also update any associated values found on other programmer tabs.

DecoderPro maintains a Roster of your locomotives. You can save the decoder configuration, and then later work with the stored CV values instead of having to read them from the decoder. This saves the time it takes to read a complete decoder, which can be quite long. The roster can also store locomotive information for you.
From the DecoderPro main screen, you can select a specific locomotive to work on by selecting it from the Roster list and then clicking the "Program..." button. The programmer opens with the current values already present on the "Roster Entry" sheet. After you made changes and wrote them to the decoder, click "Save to Roster" to store the roster information to a file on your computer's local disk; you'll be reminded to do this if you close the programmer with any unstored information.
For more info, see Roster Help.
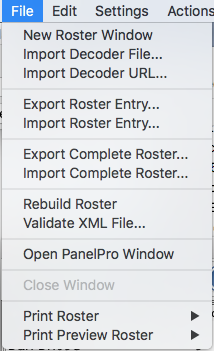
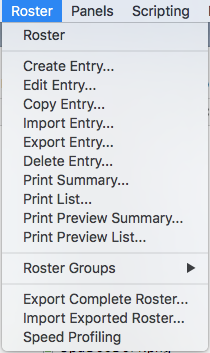
A combination of menus allow you to access and manipulate your roster entries.
For example, you can print the information for a selected roster entry by choosing "Print Roster
> Selected Entry" from the File menu.
For information on how to set up and use DecoderPro, please see the DecoderPro User Guide.
Here's more information on how DecoderPro works and how to add a new Decoder Type.