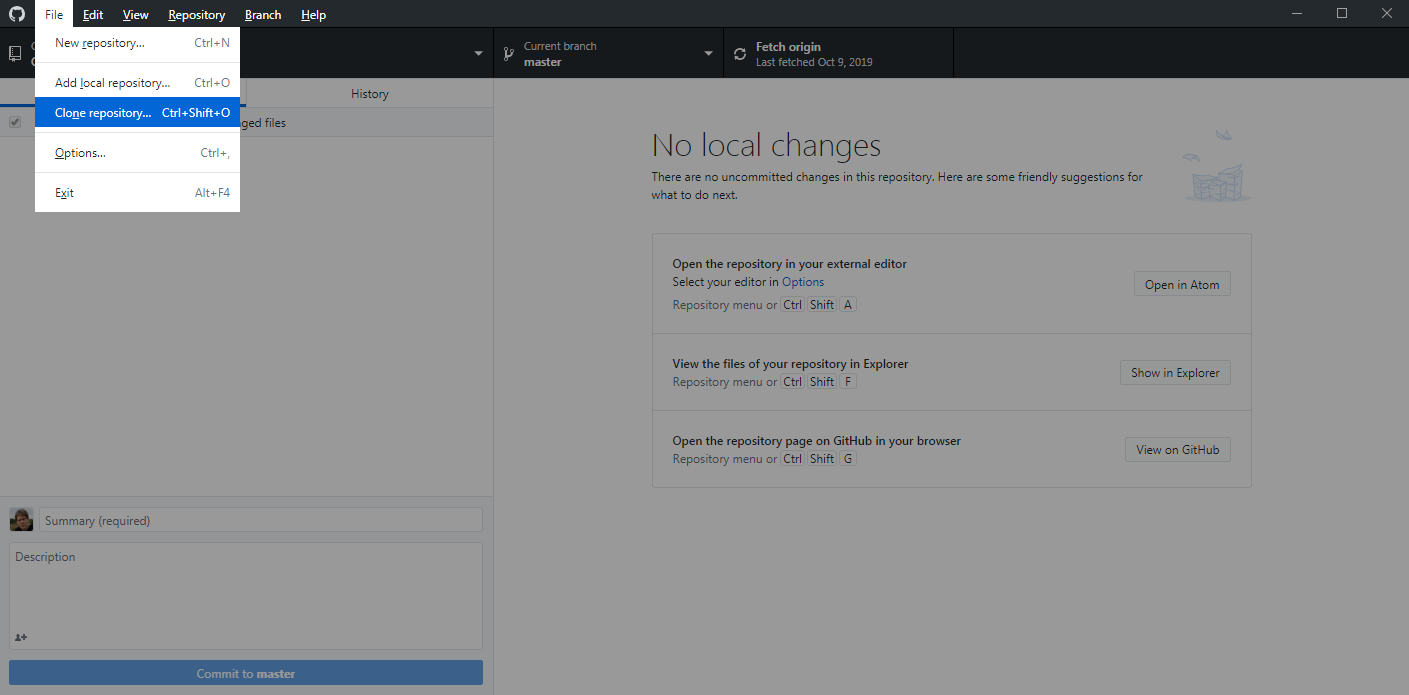
We then start GitHub Desktop. We now need to clone our JMRI repository to the local computer.
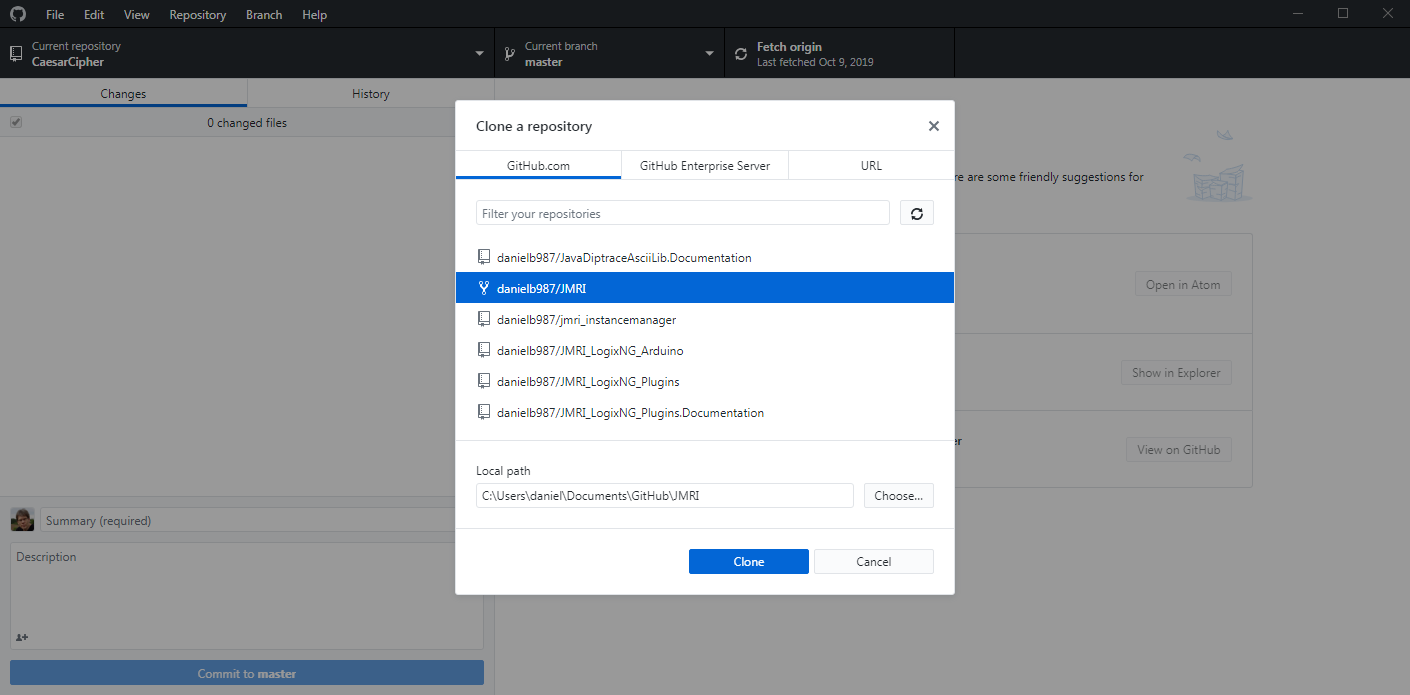
This tutorial was created by GitHub user danielb987 so the JMRI repository is
danielb987/JMRI.
Depending on the speed of the Internet connection, cloning the JMRI repository to your computer may take a while. It's about two gigabyte of data to download. Be patient!
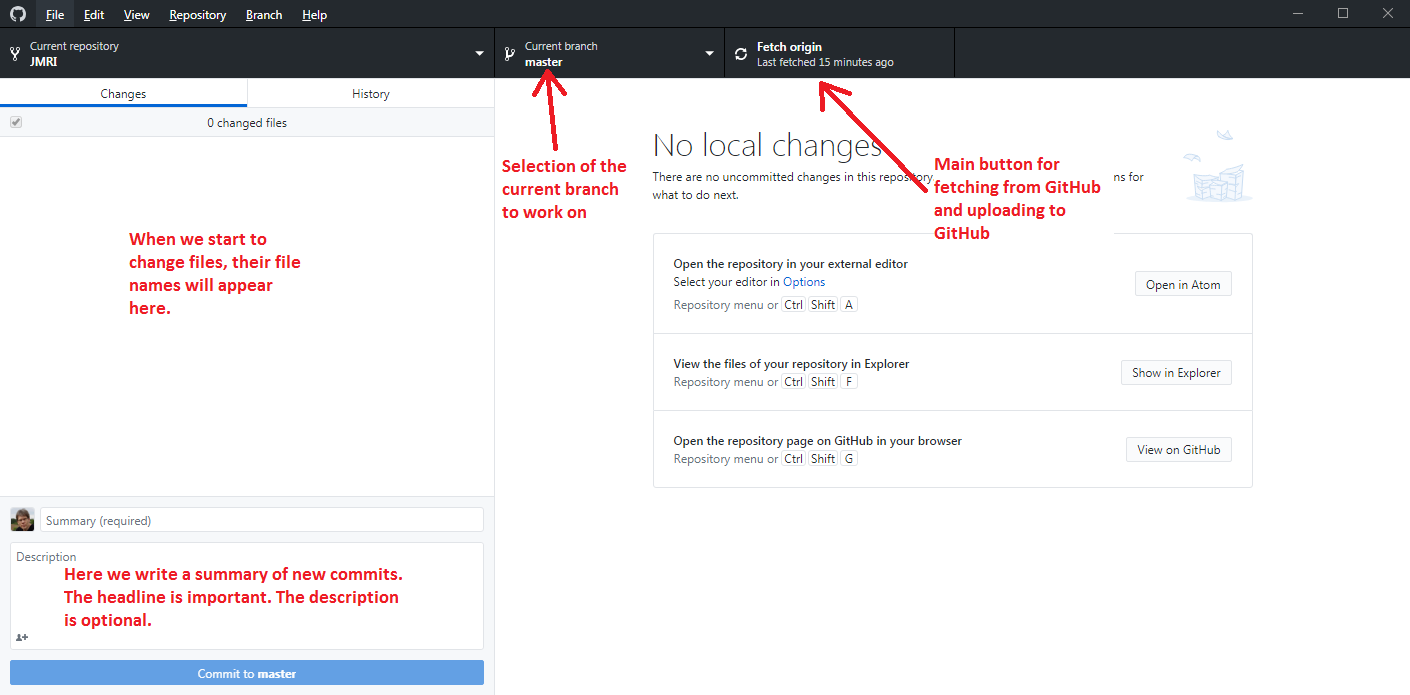
Below the menu, there is three "buttons": Current repository, current branch and the Fetch-button. The button "Current branch" is used to select another branch or to create a new branch. Note that branches are cheap, so there is no problem creating new ones as needed.
The last button, "Fetch origin", sends data to and from the GitHub web server. When it says "Fetch origin", it only syncs the computer with the server, but once there is commits to either download from the GitHub server to the local computer, or commits to upload from the local computer to the server, this button will tell you about it and once you press the button, the commits will be downloaded or uploaded to the server.
First, select the "master" branch to keep it up to date with the JMRI master branch. Then
go to the main menu, click on "Branch" and "Merge into current branch".
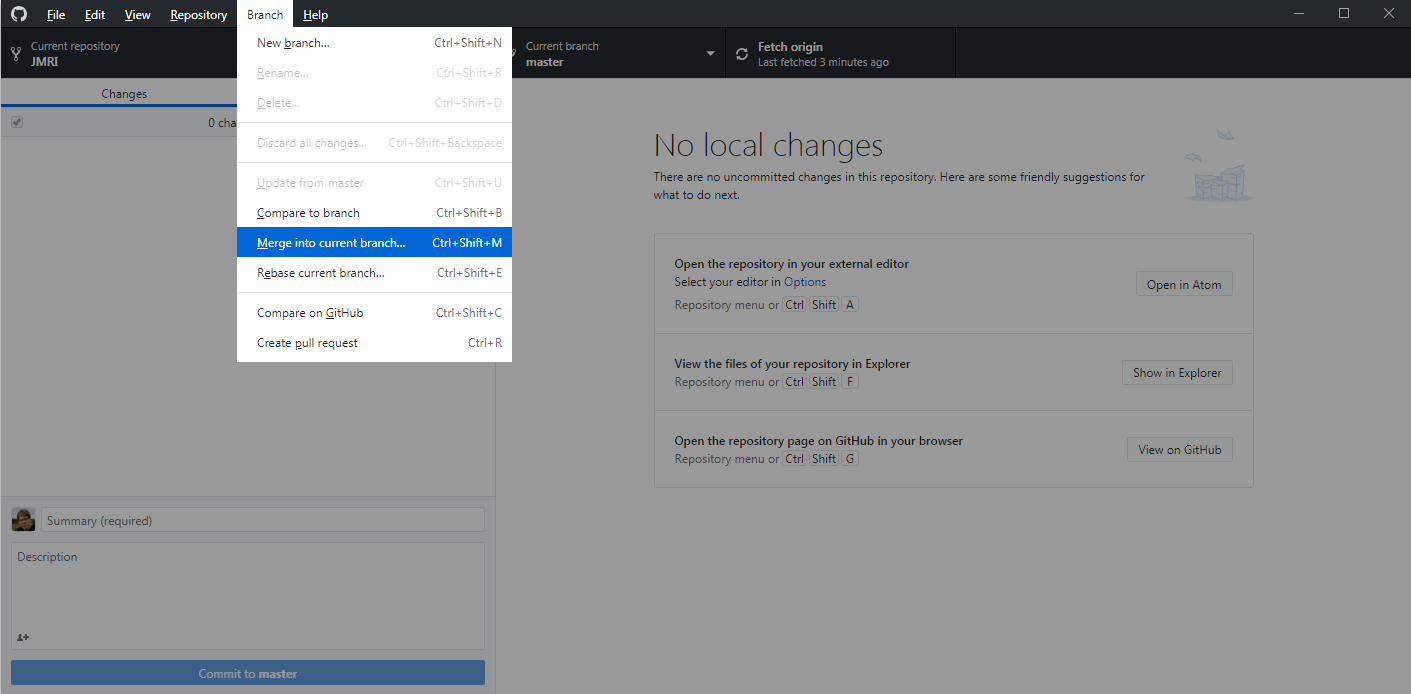
Then select the upstream/master branch. It's at the bottom of the list.
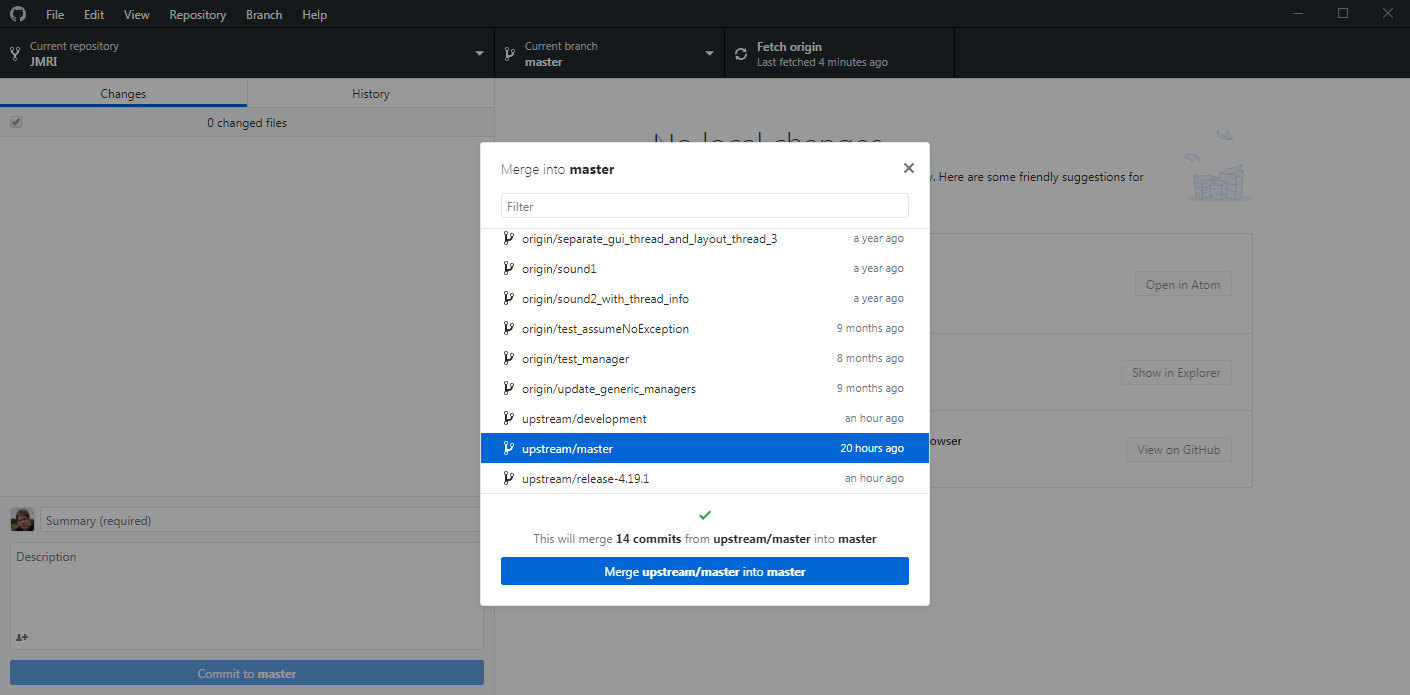
The text "20 hours ago" tells you when the last change was made to the upstream/master
branch. The text "This will merge 14 commits from upstream/master into master" tells you how
many commits that are to be merged, from which branch and to which branch. Ensure you have
chosen the correct branches!
Click on the button "Merge upstream/master into master" to do the merge. When it's finished,
you will see this:
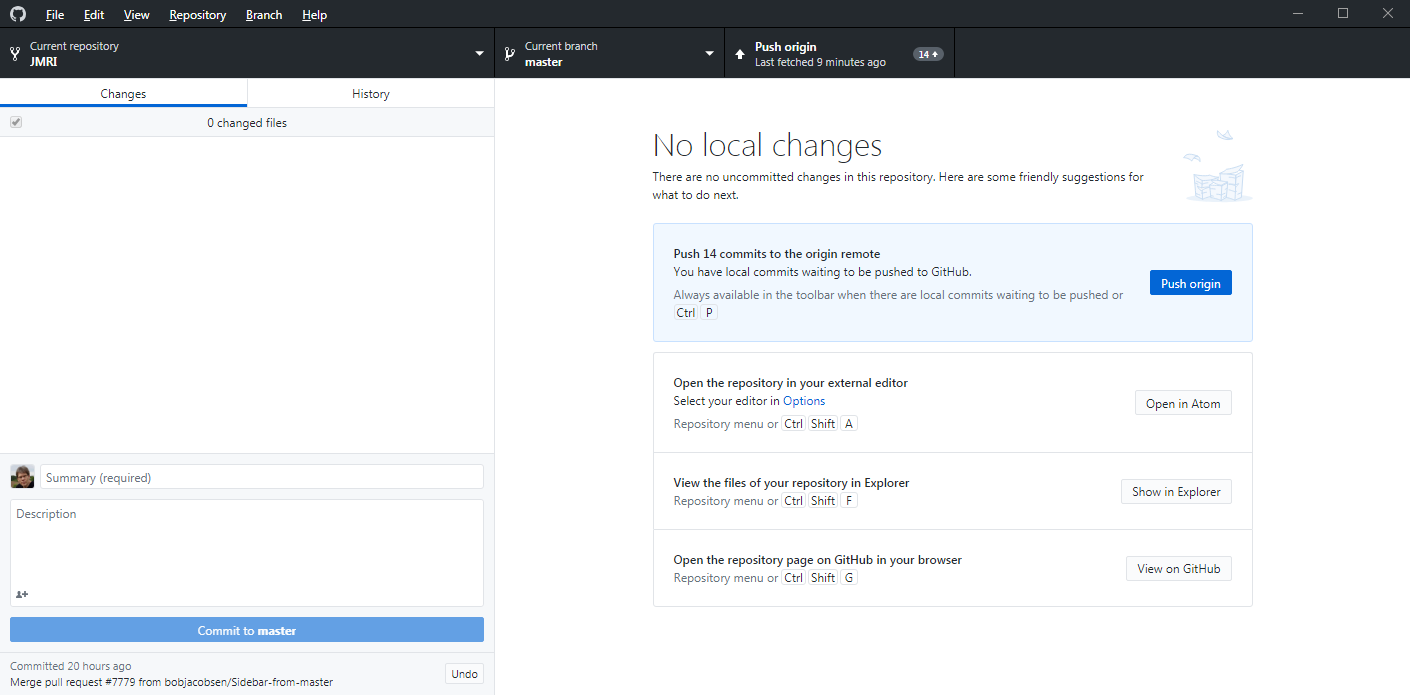
The button "Fetch origin" has now changed its name to "Push origin". The number 14 tells that
there are 14 commits to upload to the server.
But wait! Why do we want to _upload_ the commits? Haven't we just downloaded them from JMRI?
Yes, we downloaded the commits from upstream/master into our local master on the local computer. It's now time to upload these commits to our repository on the GitHub server.
This is what happened: We are working with three different repositories. For me, my
username on GitHub is danielb987, so I'm working with these three repositories:
JMRI/JMRI - The main repository for the JMRI project on the GitHub serverdanielb987/JMRI - My repository on the GitHub serverWhat has happened is that we merged "upstream/master" from JMRI/JMRI to our "master" branch in our repository on our local computer. So we still need to upload these changes to our "master" branch on our local computer to our GitHub repository on the GitHub server, which for me is "danielb987/JMRI".
We use the workflow:
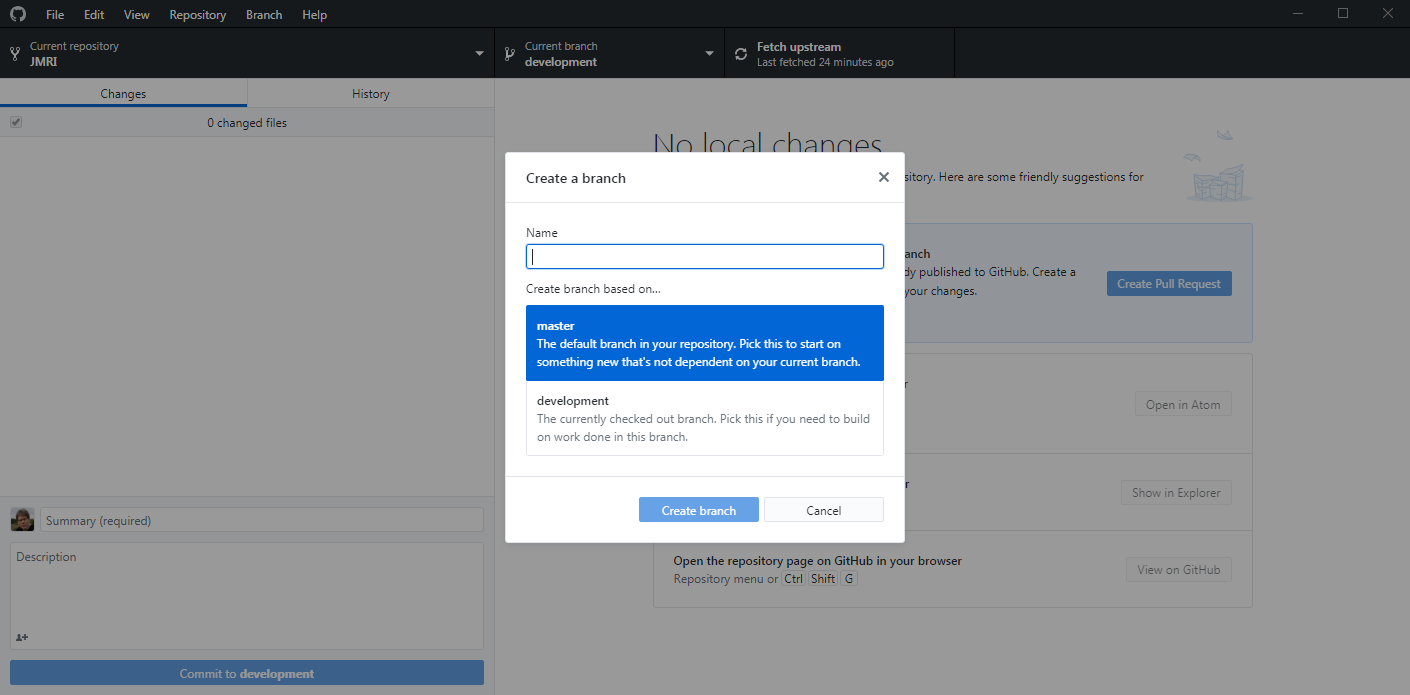
Click on the button "Current branch" and then click on the button "New branch" and give
the new branch a name.

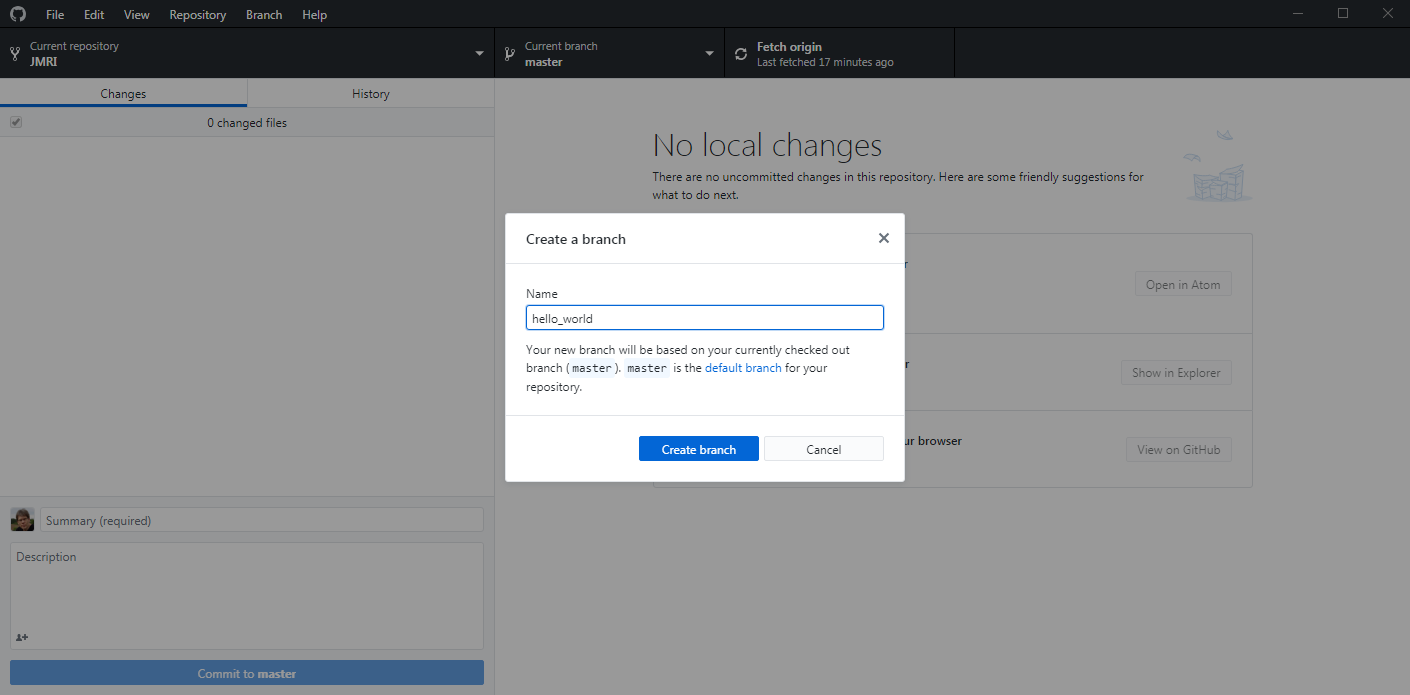
Prevent using international characters or spaces in the branch name as it may
cause problems for the maintainers later.
You can create the branch from another branch than the master branch. For
example, JMRI may use the branch "development" as the branch to base development on. If this
is the case, you select the development branch, then merge the branch "upstream/development"
into the branch "development" and then create the branch from development. Note that if you
do this, GitHub desktop will warn you and ask if you really want to start from the
development branch or start from the master branch. Select the "development" branch in this
case.
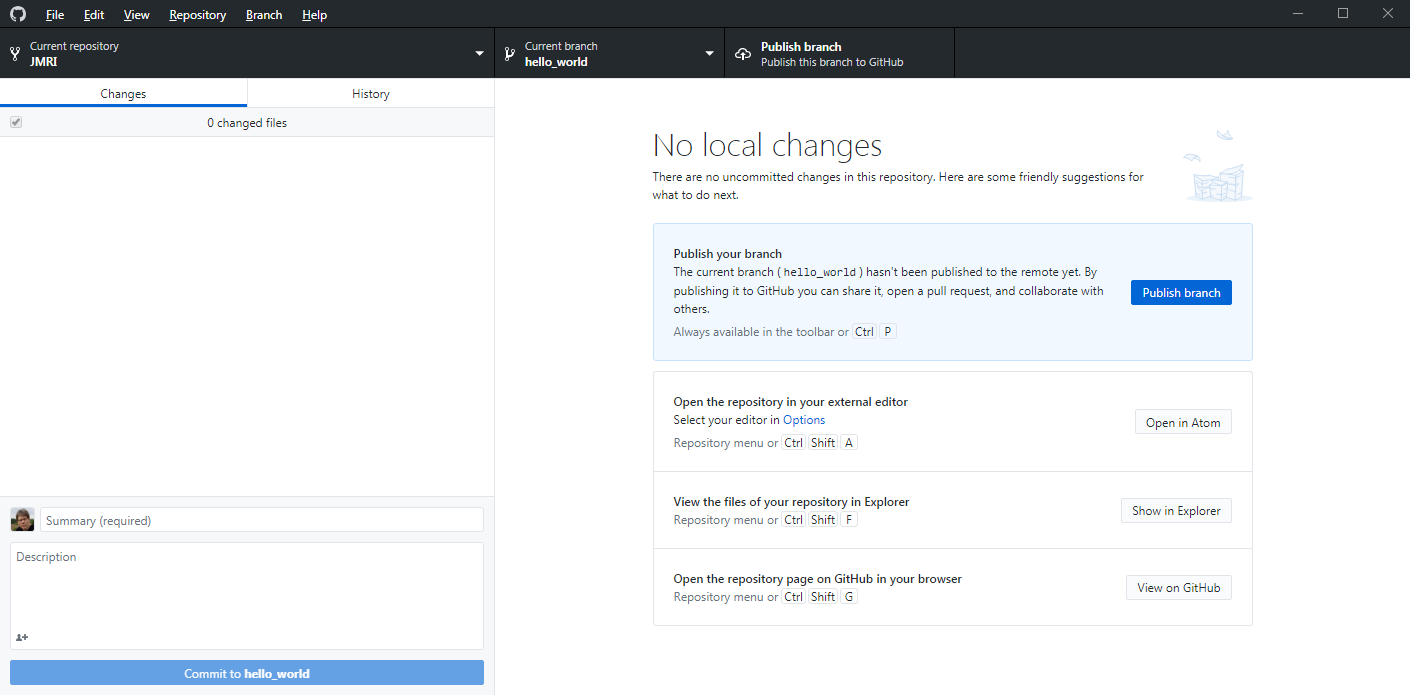
When a new branch is created, it only exists on your local computer. In order to push it to
the server, we click on the button "Publish branch".
In order to do that, we click on the button "Create Pull Request".

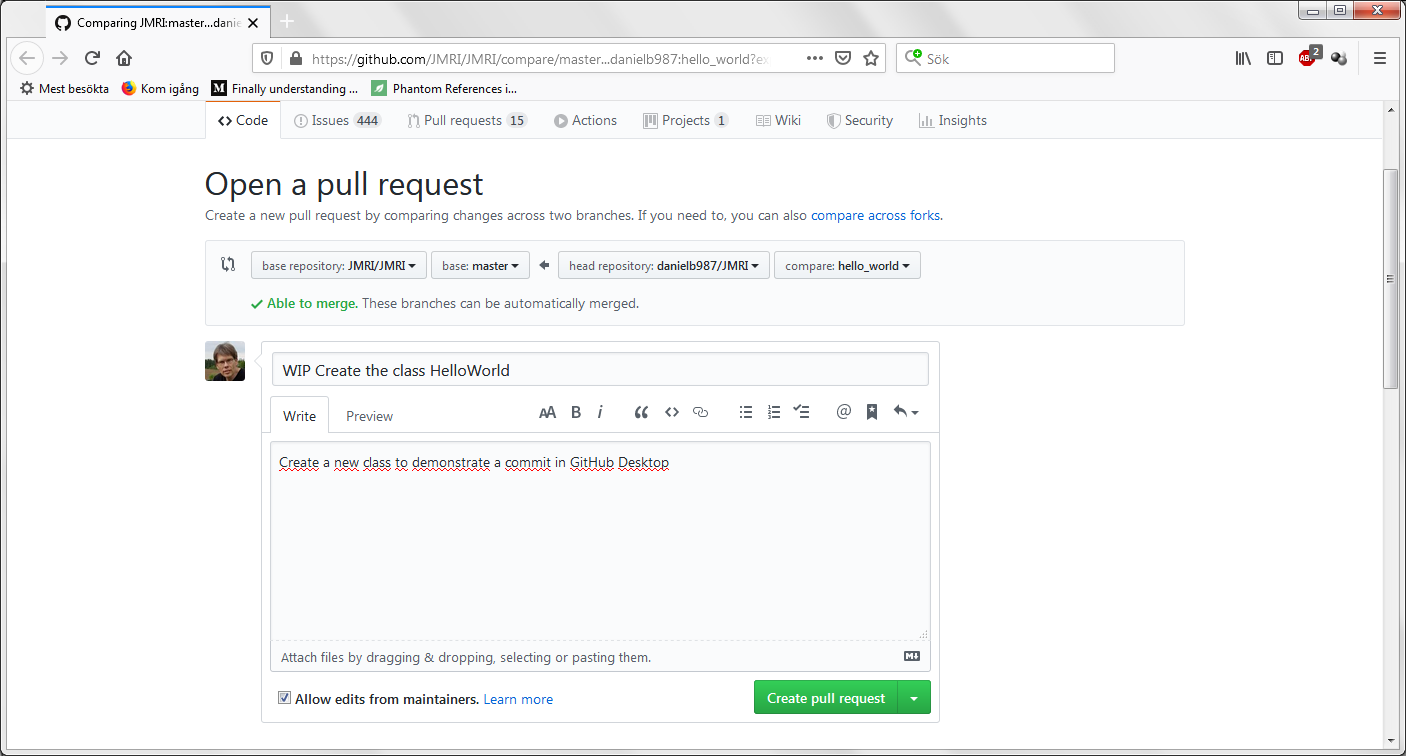
This will open a web browser. If you are not logged in to GitHub, you need to log in. When
you have logged in, you will see the web page for creation of a Pull Request.

Fill in a title and a description of the Pull Request and click on the button "Create Pull
Request".
Sometimes you may want to do some more work on the Pull Request before it's merged, or you
may want somebody else to look at it. In these cases, you can mark the Pull Request as "Work
In Progress" by writing the letters WIP in the title.
After the Pull Request is created, the following page is shown.
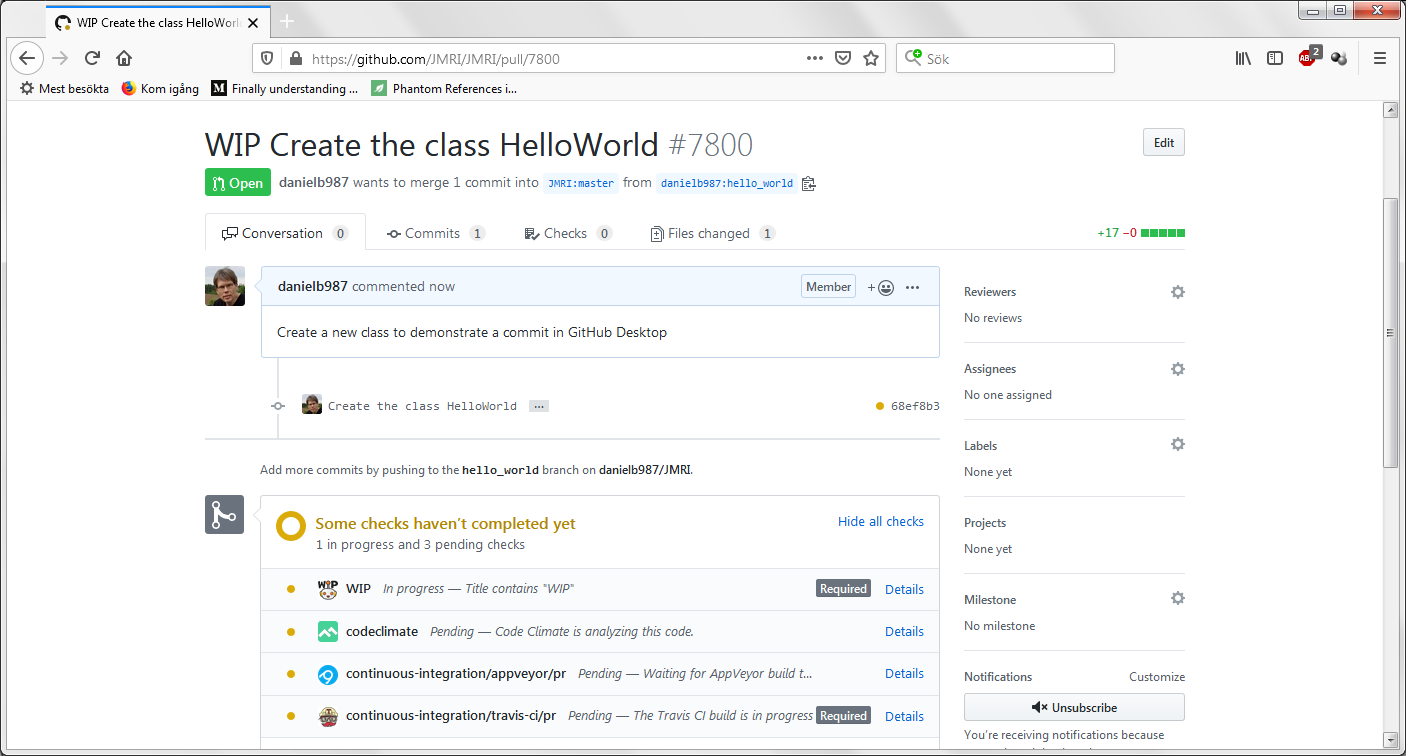
Below "Some checks haven't completed yet" is a list of tools that runs a lot of automatic
tests. These tools compile the code, run the tests and checks that everything is correct. If
a check is successful, it will have a green check mark, otherwise it will have a red
cross.
Not all tests need to be successful for the Pull Request to be merged, only the ones marked with "Required", but it's good if all tests are successful.
After that, you will have to wait for one of the maintainers to take a look at your Pull Request and hopefully merge it into JMRI.
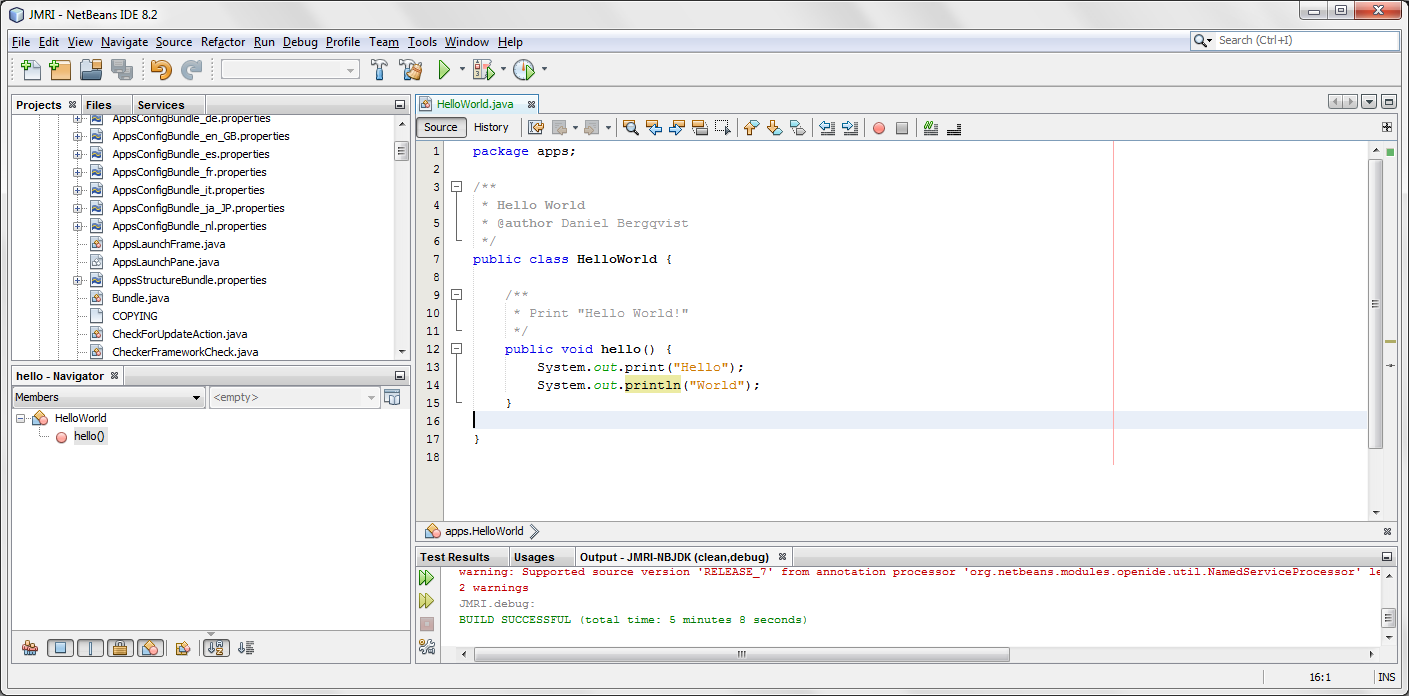
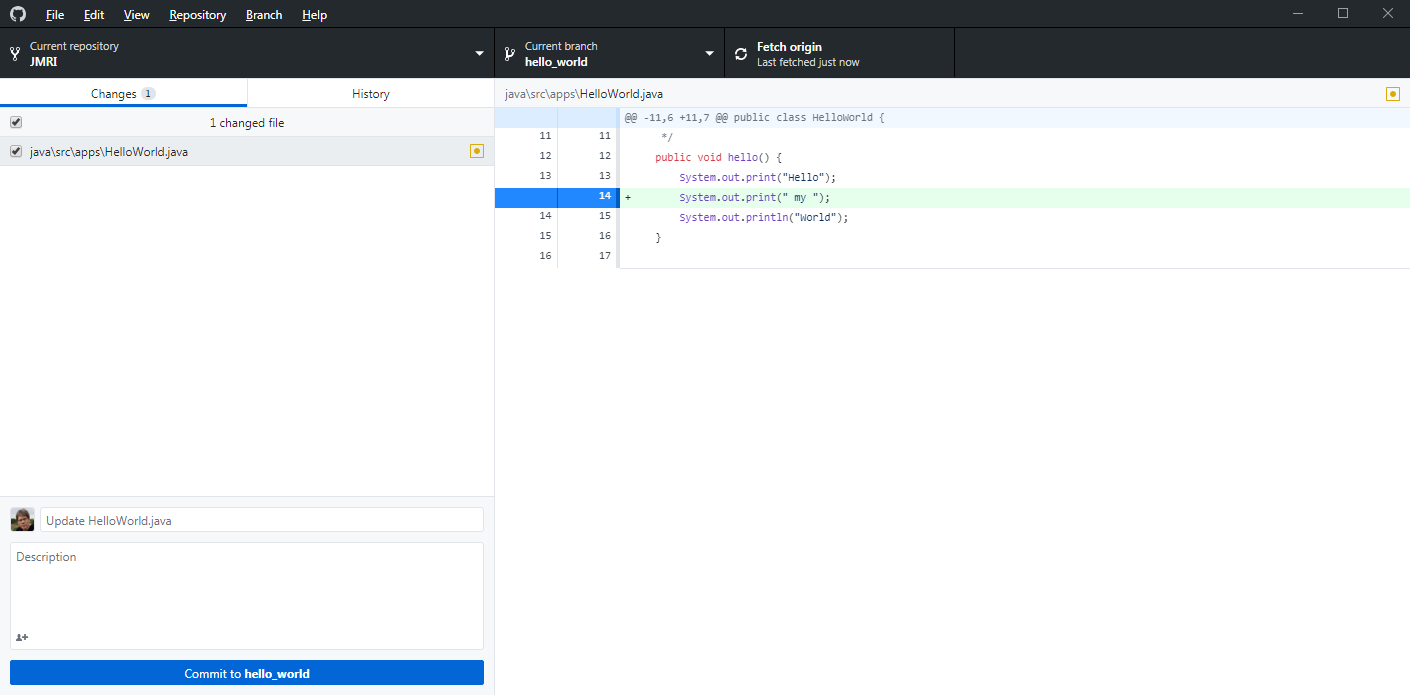
In our example, we have the method hello():
  public void hello() {
      System.out.print("Hello");
      System.out.println("World");
  }
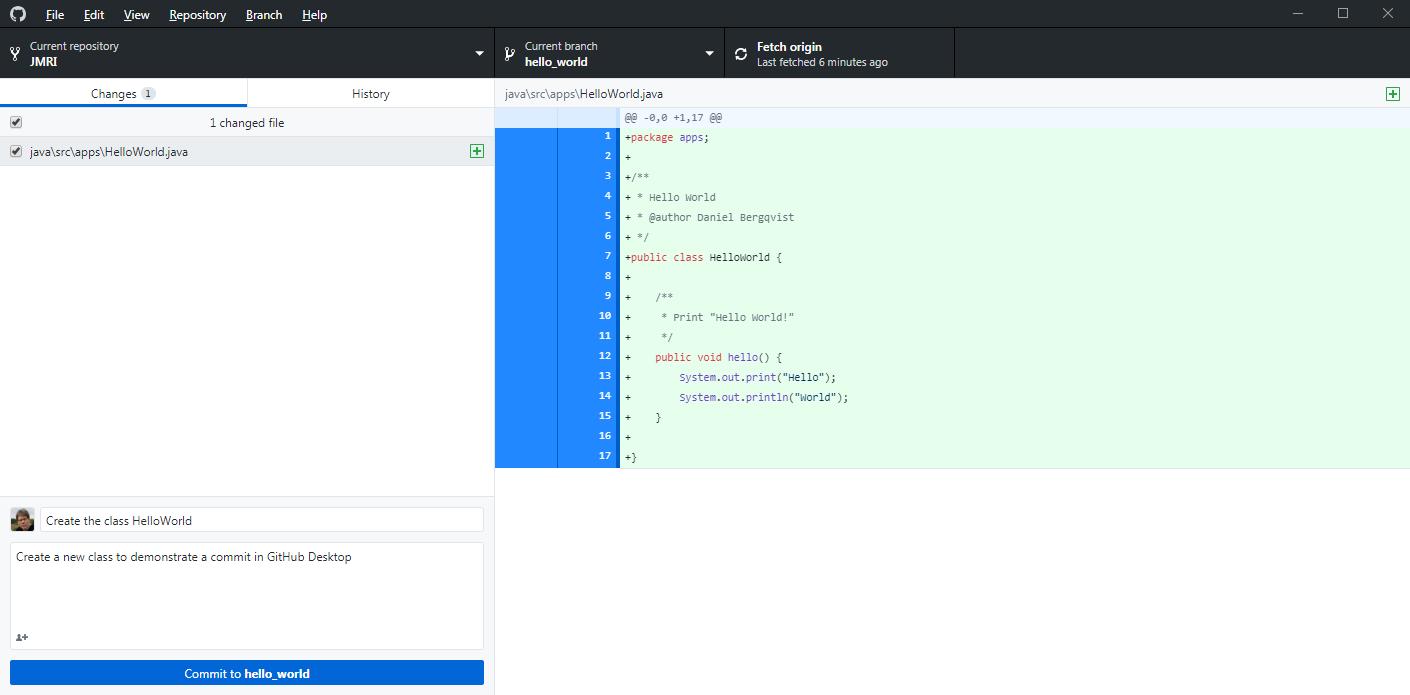
Lets add a row:
  public void hello() {
      System.out.print("Hello");
      System.out.print(" my ");
      System.out.println("World");
  }
Now we want to keep up with upstream/master, so we merge "upstream/master" into "master", and then "master" into our branch "hello_world". We select the branch "master" and merge "upstream/master" into our "master" branch and then select the branch "hello_world" and merge the branch "master" into "hello_world".
(For the case of demonstration, I use the branch hello_world2 to show a conflict).
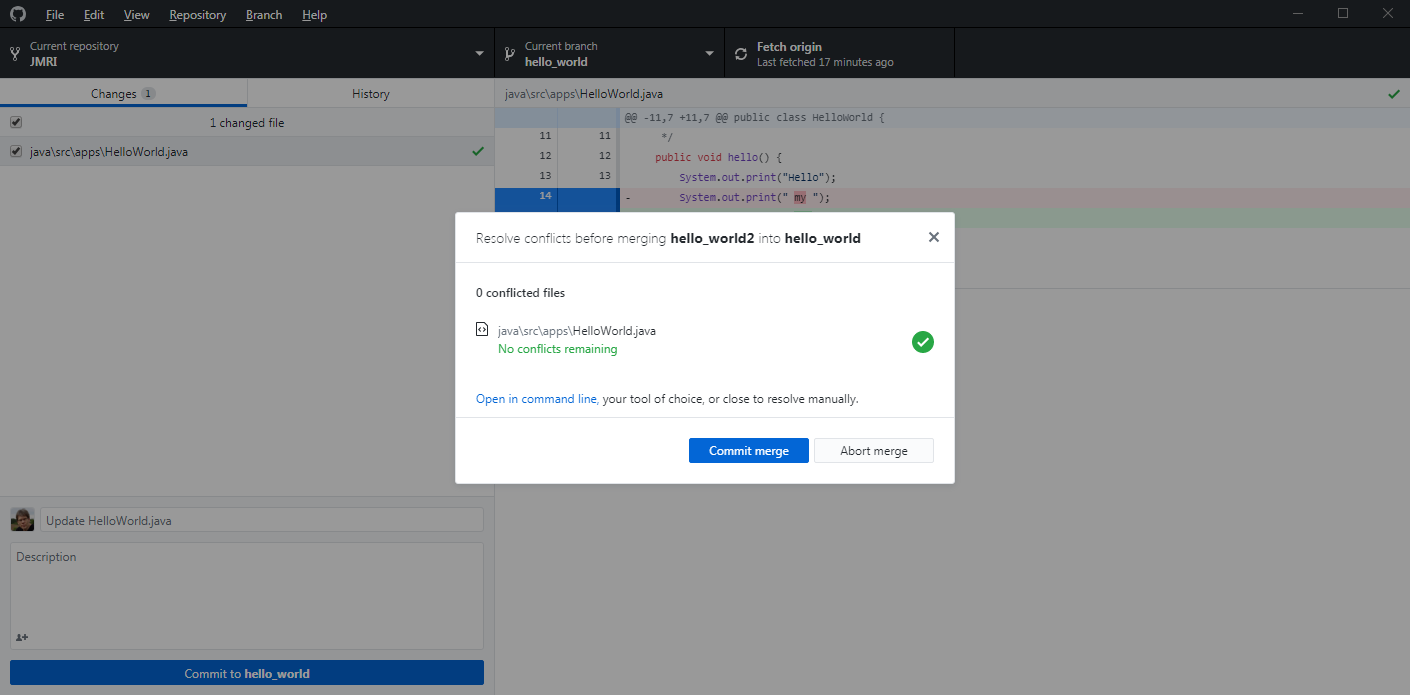
We now have a problem! Some other guy has made a change in the same code as we, and there is a conflict! GitHub tells that there is one conflicting file between the two branches we want to merge.
In order to solve that, we click on the button "Merge ...".
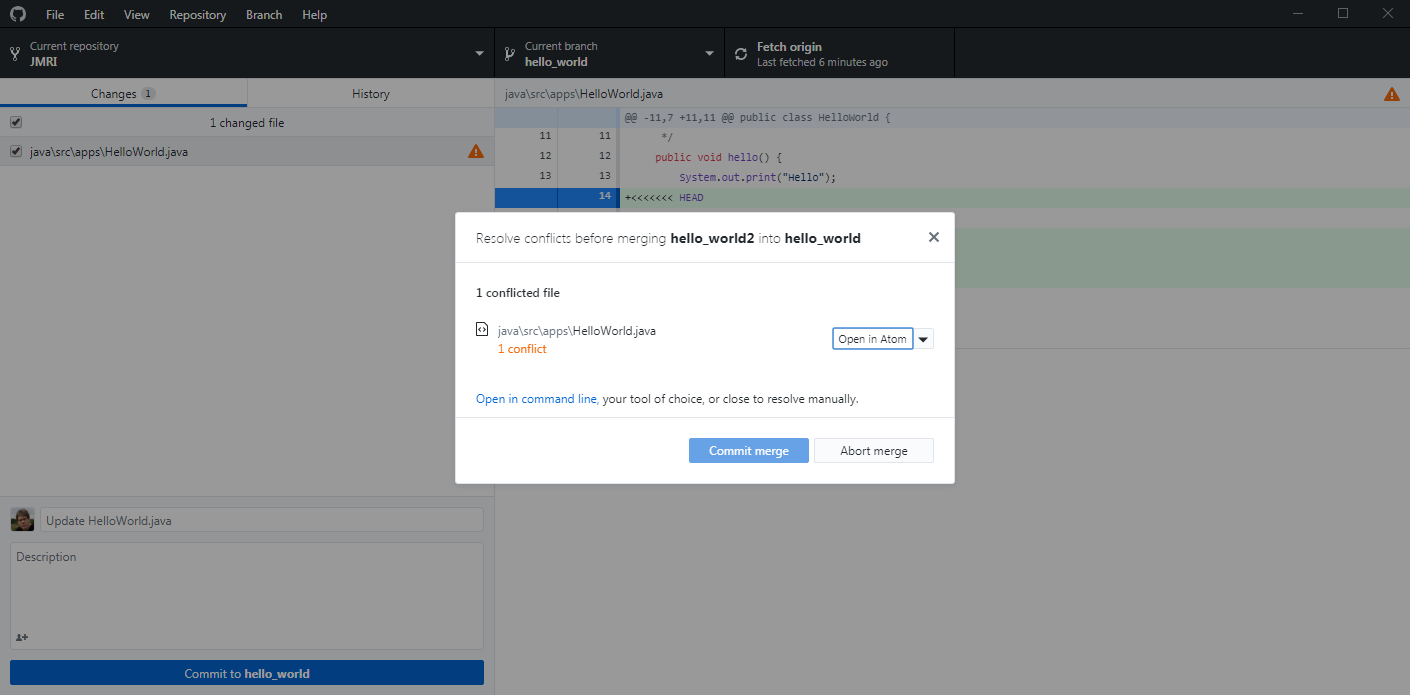
GitHub now protects us from doing too much damage by requiring us to fix the conflict before
we can commit the merge. We have to solve the conflict or abort the merge.
To solve the conflict, we open the conflicting file in our editor, for example
NetBeans.
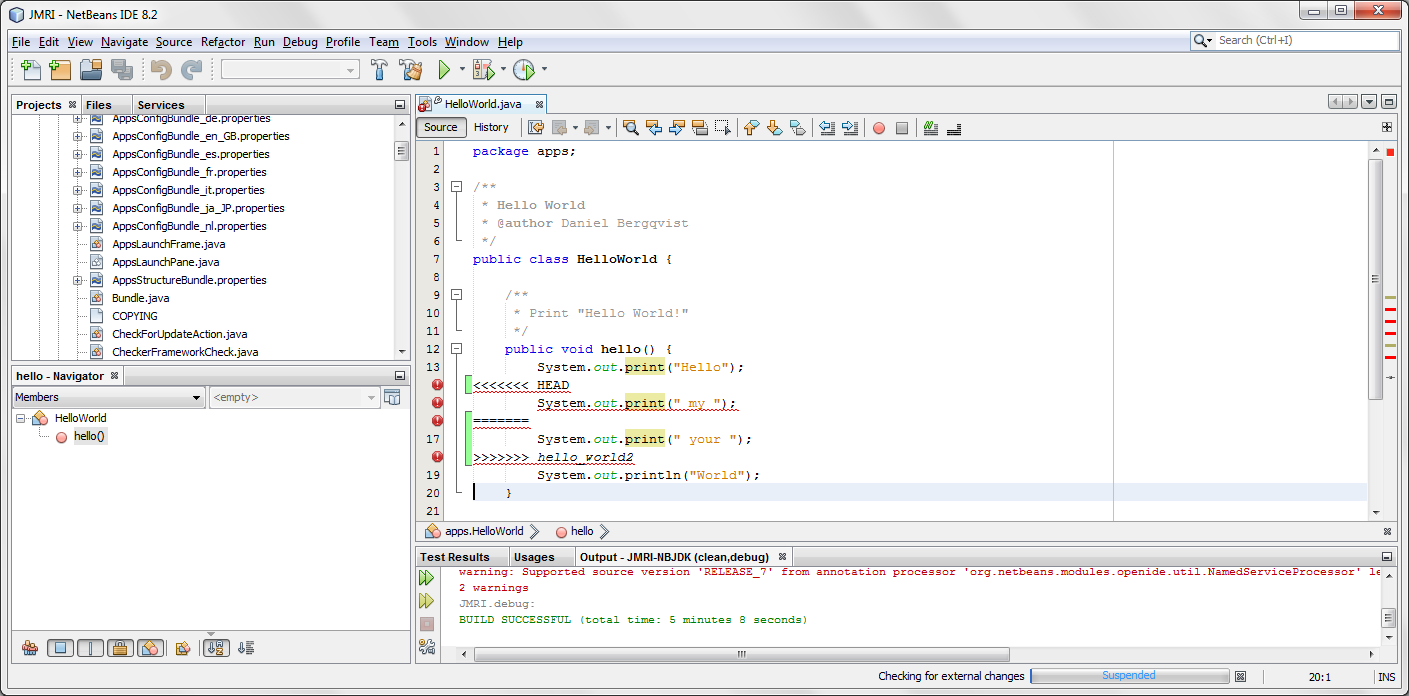
The strange code in the file shows there is a conflict, or in some cases there may
even be several conflicts in the file.
    public void hello() {
        System.out.print("Hello");
<<<<<<< HEAD
        System.out.print(" my ");
=======
        System.out.print(" your ");
>>>>>>> hello_world2
        System.out.println("World");
    }
There is two parts here. First, beginning with <<<<<<< HEAD
is the code we added. This code goes down to the line =======.
Below that are the lines of code that someone else wants to have, and that code goes down to
>>>>>>> hello_world2.
In this case, I have used the branch "hello_world2" to get a conflict, but most often you will have
merged master into your branch so this line will be ">>>>>>> master".
We need to decide if we should keep the original code, replace it with our own, or do something else. The key is to understand what the code does and to make a good decision. If in question, please ask the JMRI developer mailing list.
In this case, we resolve this by changing the line to:
System.out.print(" our ");
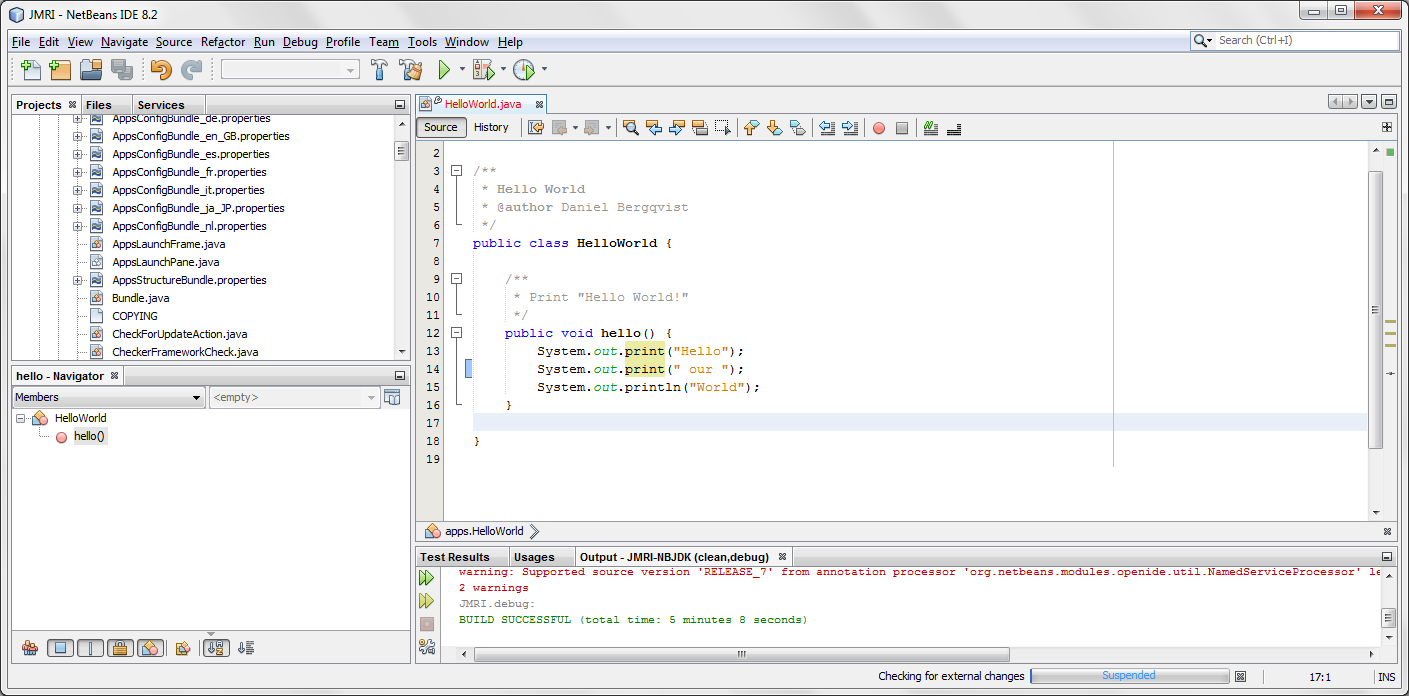
Then we go back to GitHub Desktop, we see that the conflict is solved, so we can now merge
the commit.