IntelliJ IDEA Community Edition (available from www.jetbrains.com/idea/) makes a great platform for
working with JMRI and Java on macOS, Windows and *nix.
Here we describe working with version 2023.x and up.
JMRI developers use Git for source control. Source control using Git is including as part of the IntelliJ IDEA download. For more information for getting the JMRI source, see JMRI: Getting the Code.
These instructions were first written and tested using IntelliJ IDEA 16 Community Edition (CE). The current version is 2024.3 and the Community Edition is still free. This page has been updated to reflect the 2022 version
After downloading and running the installer for your OS, configure the IntelliJ
application as follows:
Start IntelliJ and choose "Preferences..." from the application menu (macOS) or "Settings" from the File menu (Win).
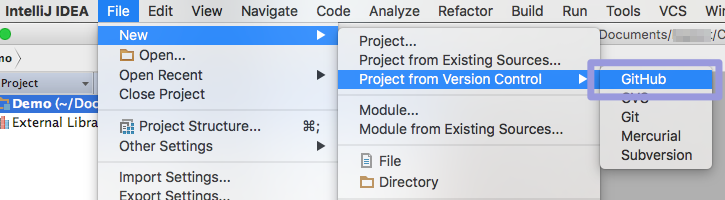
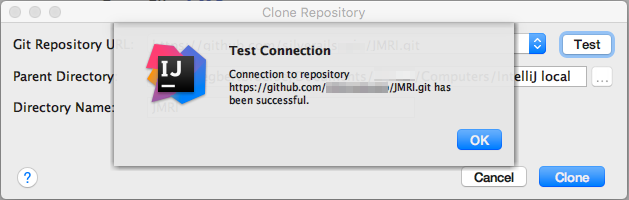
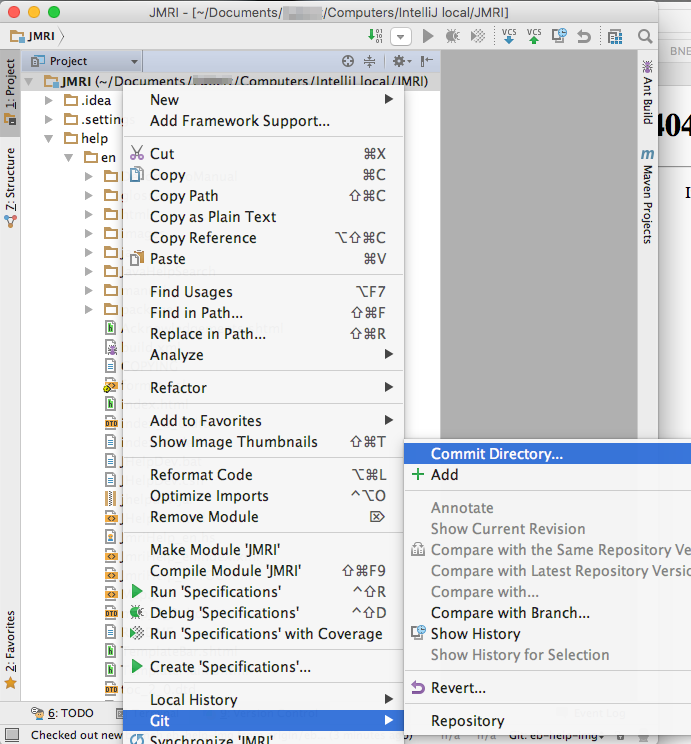
To get the source code from GitHub into IntelliJ, follow these steps:
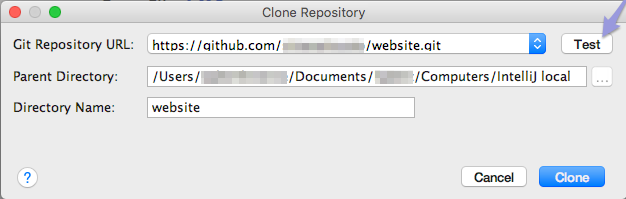

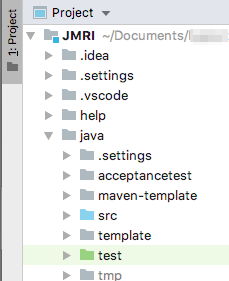
This will add JMRI to the IntelliJ Project window.
After cloning is completed, the IntelliJ Project window should look like this (OS X
example):
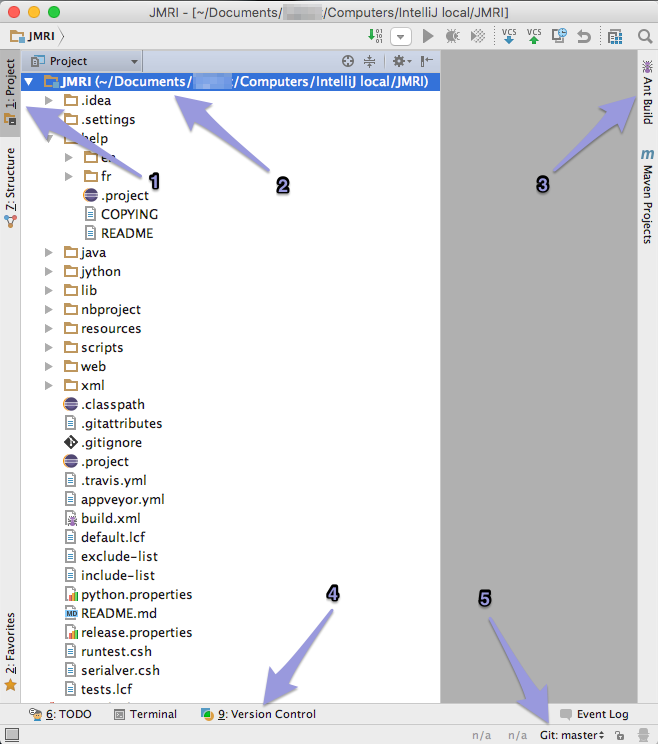
Along the edges of the window are several groups of tools, often used are:
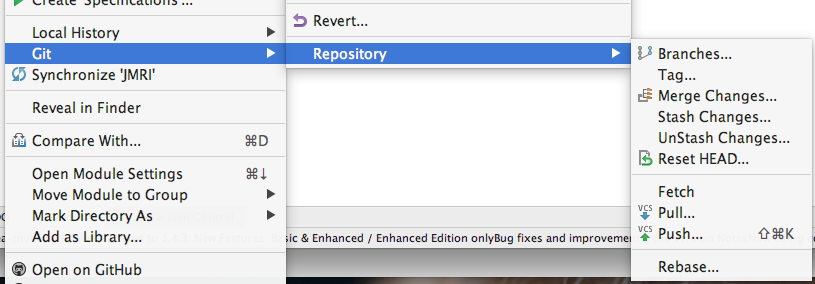
You can also access this panel from the main VCS -> Git -> Branches... menu or
right-clicking the JMRI Project folder and selecting Git -> Repository -> Branches...
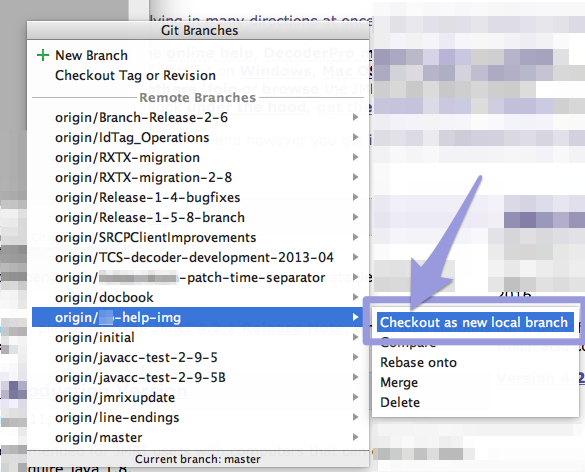
To check out another Branch from the remote repo, select its name under "Remote Branches",
right-click and select "Checkout as new local branch":
When the information from the new Branch is downloaded, the Message Center will
confirm:

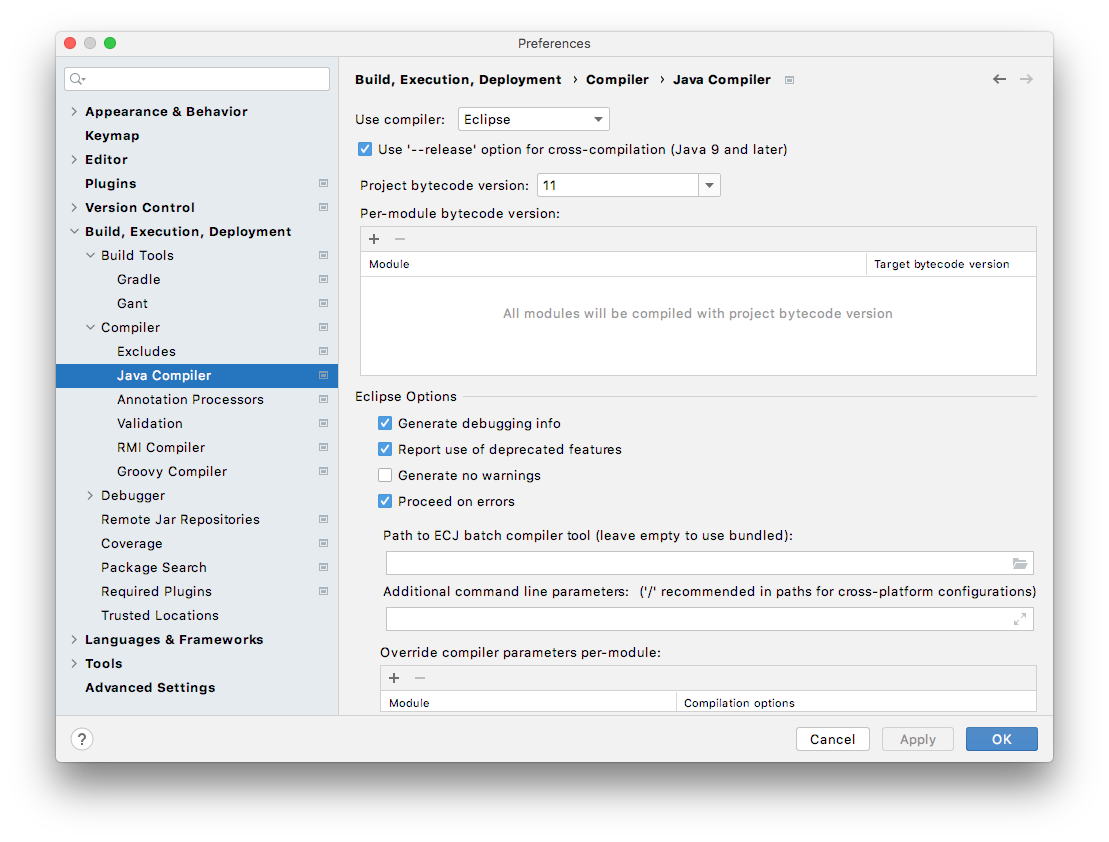
since 5.0 To ensure that the Java Development Kit version 11 you
intend to use for compiling JMRI is installed and will be used for this JMRI project, go to
File > Project Structure...
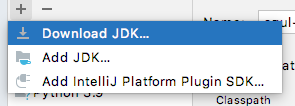
To manage the Java Development Kits available on your local computer, the Platform Settings > SDKs tab allows downloading, renaming and uninstalling JDKs as well as other packages such as Python:
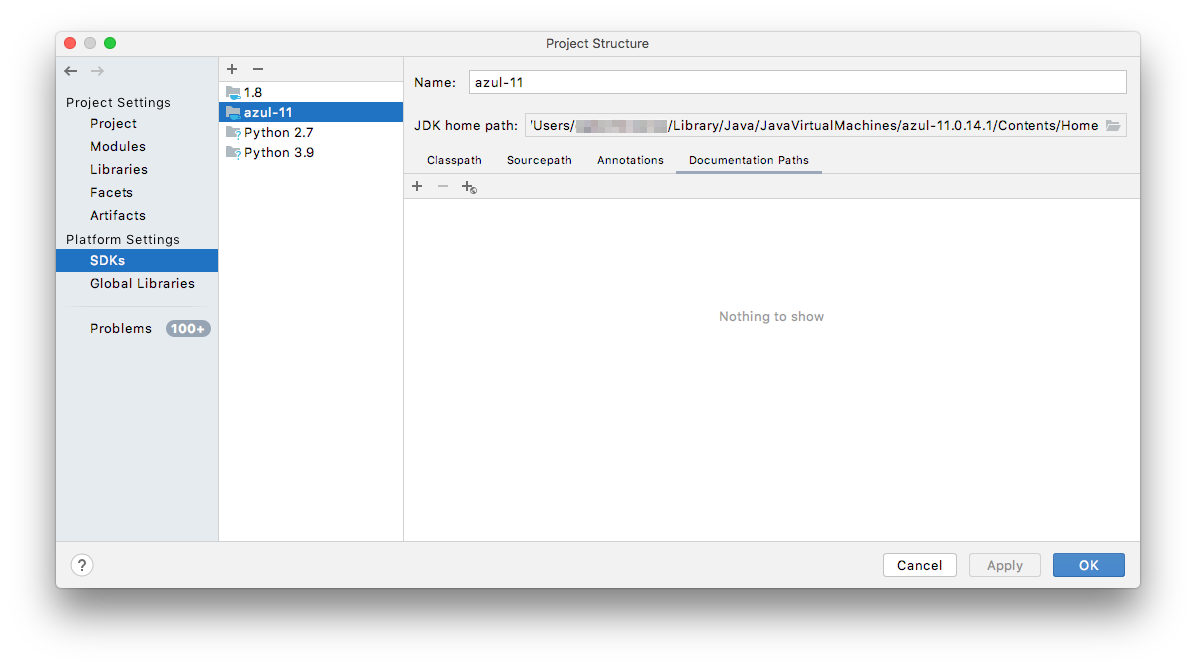
Now switch to the Project Settings > Project tab, where you can select your JDK of choice:

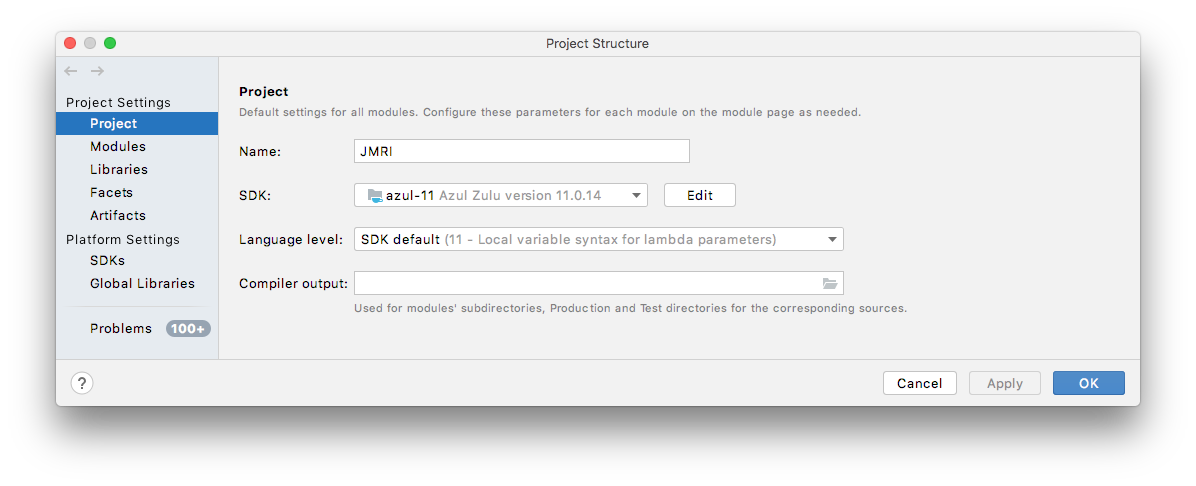
Click OK to close this dialog and apply the settings.
To work on the JMRI code, always start a new Branch so that your own "original" will stay
intact. In most cases, you will create this new branch off from master, your
personal copy of the main JMRI code.
To create a new Branch in IntelliJ, first check out master. To make it current, first do VCS
> Git > Pull... from JMRI-master, and VCS > Git > Push... to create a current
base.
Now then from the Git Branches pane, select "+ New Branch":
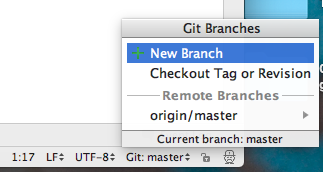
Supply a name i.e. my-dialog-2 and click OK.
Note: Starting the name of your Branch with a unique two letter combination will make it stand out
from the long list much better than a name like patch-1.
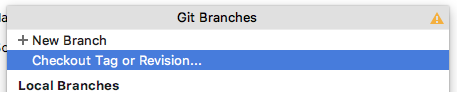
In special cases, you might want to branch from one of your own active branches, or from a
different branch or Tag in the JMRI GitHub repository.
To branch from a tag, select "Checkout Tag or Revision..." from the Git:branch dropdown at
bottom right:
In the dialog, start typing the name of the Tag you saw in GitHub web:
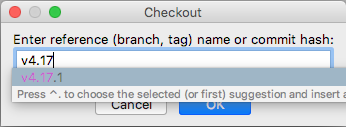
Click "OK" and provide a name for the new branch.
We recommend that before you try to build and run one of the applications within IntelliJ,
you run the Ant Build -> <Default target> first. This will create the necessary
working directories, load some resource icons, and create needed Java files. To run the
ant build.xml do the following:
ant
to use the correct JDK.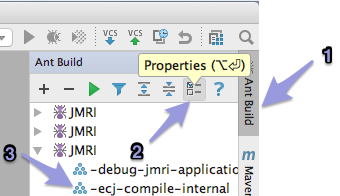

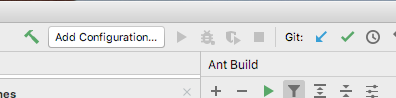
If the ant build is successful, you can launch any of the JMRI applications from the Ant Build tab.
To run an application, either:
panelpro ordecoderpro and select "> Run Target".Note: The first two "JMRI" sets will build the English and French JHelpDev TOC & Index files respectively. Hover your mouse over them and read the tooltip to learn which is which.
The Messages Center Console will list all steps of the build process, after which a Java icon will open with the application running including all your new edits.
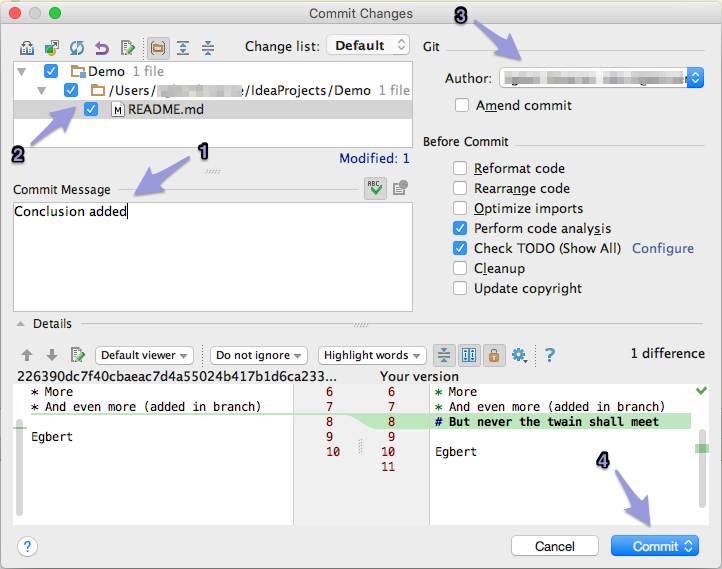
The standard practice for getting your changes included in the main JMRI code repository
is to Commit them to your local repository periodically and, when ready to publish
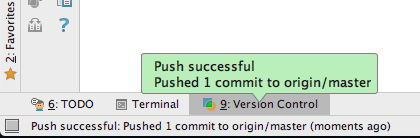
everything, "Push" an entire set of Commits to your own remote repository on GitHub, and
finally make a Pull Request for the maintainers to "Pull" your changes into the main JMRI
repository.
When working on more than one computer or different IDEs, Committing and Pushing makes your
new edit available on the other computers.
See the JMRI: Git FAQ "Setting up a Git environment for JMRI
Developers" for more information.
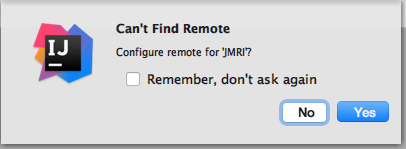
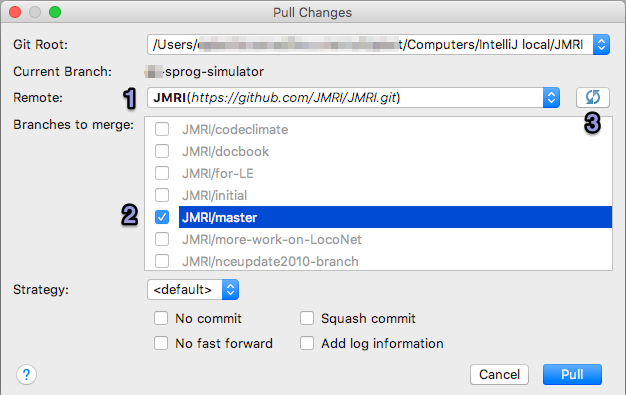
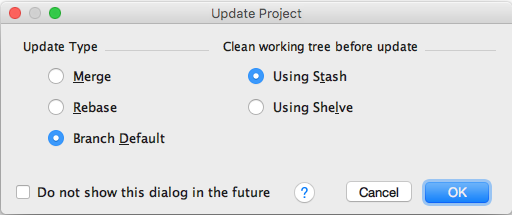
It is also good practice to "Pull" all recent changes from the main JMRI repository before performing your Commits. After a "pull" your workspace and eventually your remote GitHub repository will be in sync with the main JMRI repository, and you will see recent work by others. To perform a "Pull":
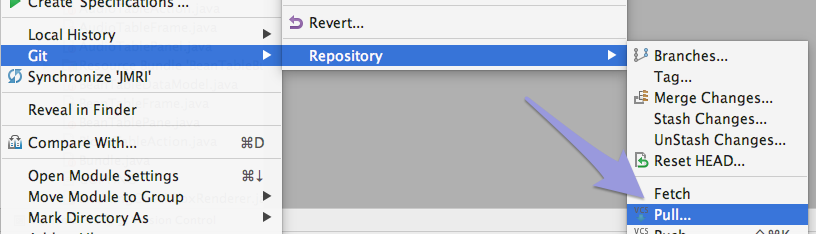
Pushing to your GitHub Branch:

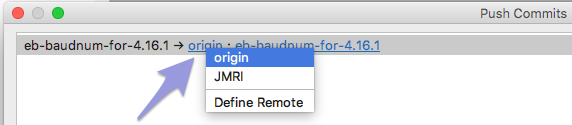
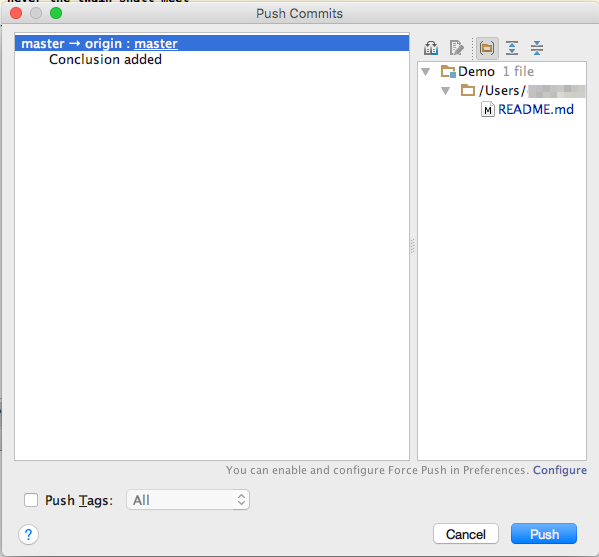
Before you can Push your changes to GitHub for the first time, you'll have to create your own GitHub repository (which you have already done in step 1).
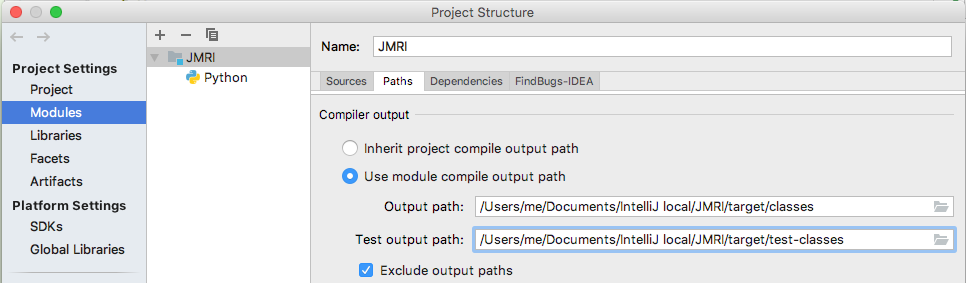
Check that the class and output paths have been set up correctly for the compiler. This
should happen automatically as part of the JMRI GitHub repository you copied at the start
(stored in the .idea/JMRI .iml file, see the IntelliJ
Compilation Settings help page).
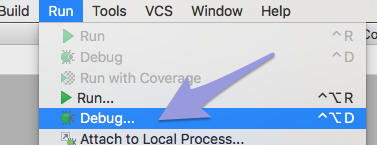
We've documented the following steps to help you get started using the built-in Debug tool. We tested the JMRI project with the JAR, Application and JUnit (test) Templates.
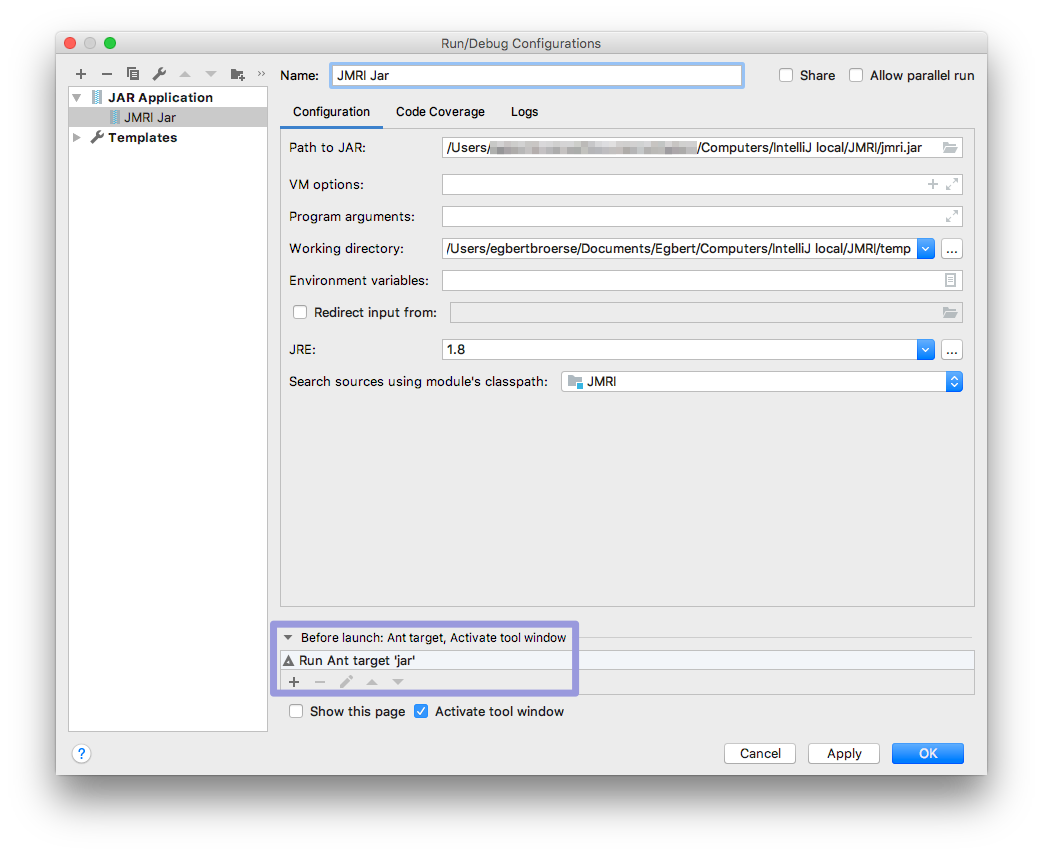
jmri.jar in your Project.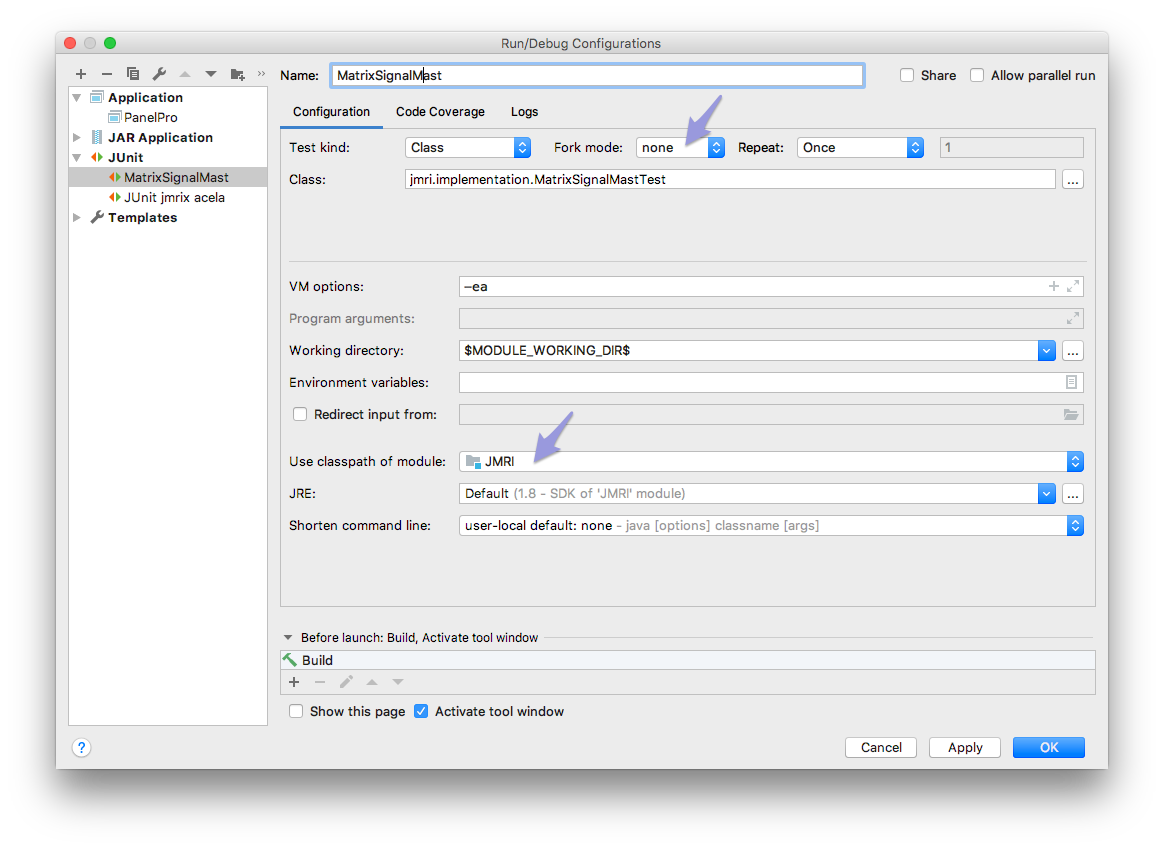

A further explanation of this pane and debugging in general can be found in the IntelliJ Online Help.
If your code was not compiled just before debugging, the source and class files might be out
of sync, so be sure to build first. As described above, you could add that to your Debug
Configuration too, but it might take unneeded extra time before each run.
Besides Debug, there's also a "Run ... with Coverage" option available in the Run menu and toolbar.
When you create or edit a test (located in your Project at JMRI.java.test etc.) you can test it in one of the following ways:
alltest Ant Build (double-click in the IntelliJ Ant Build
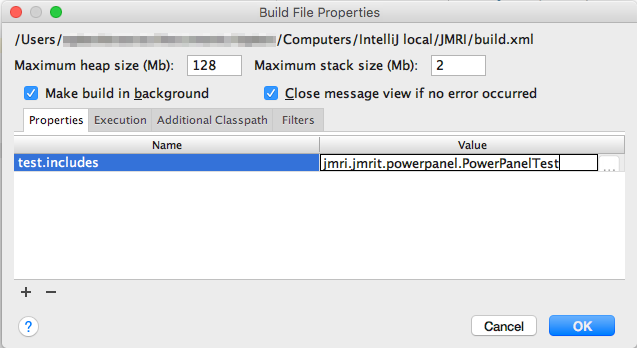
right hand column to run)test-single Ant TaskTo use test-single, enter the path of your test in the Ant Build Properties
by either clicking the Properties button at the top or right-clicking on any line in the Ant
Build column, choosing "Properties". Open the "Properties" tab, click the + (Add) sign at
lower left and enter test.includes in the Name column and the path to your test
under Value, starting with either apps. or jmri. as shown:
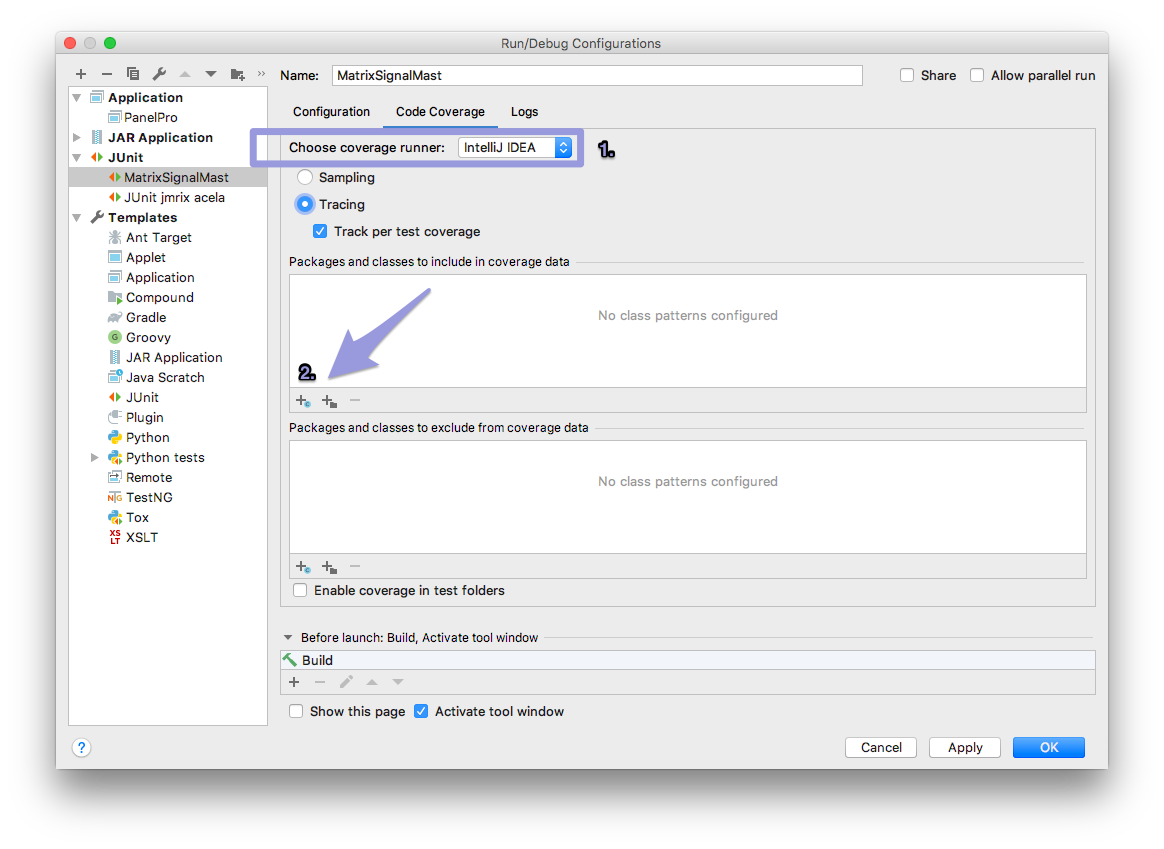
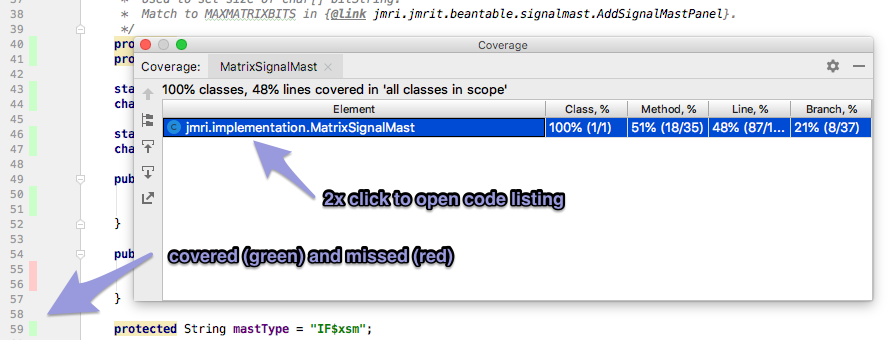
The Code Coverage of your test can be checked by running Debug With Coverage. Unless you
install the Jacoco application, IntelliJ runs its own coverage scheme:
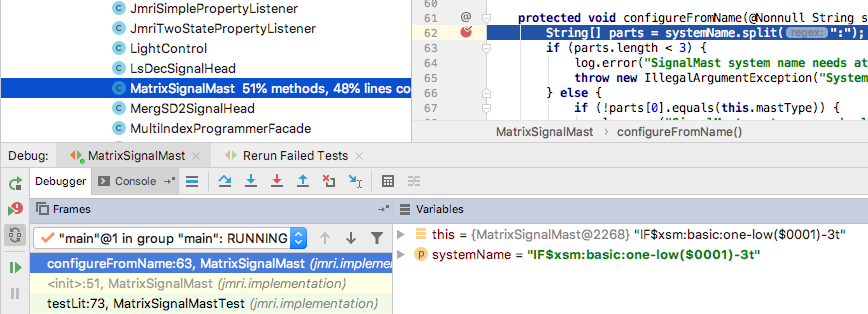
After tests have completed the Coverage pane opens. Double-click a class line to open the
code page. In the left margin coverage is marked:
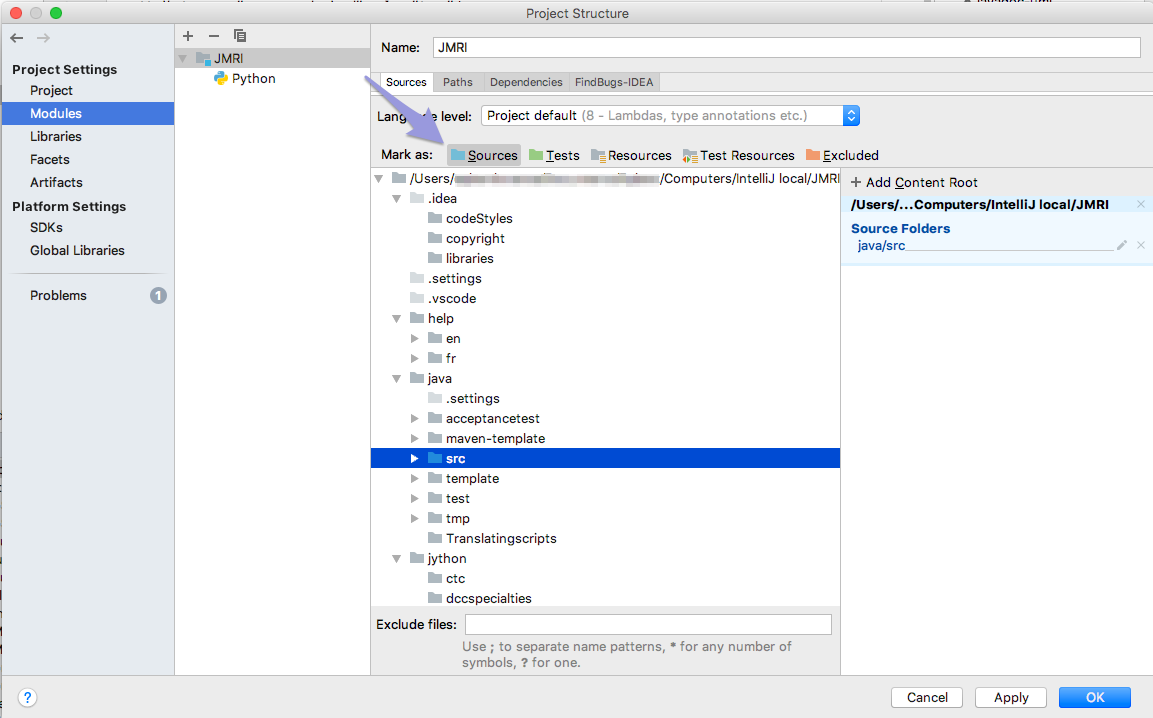
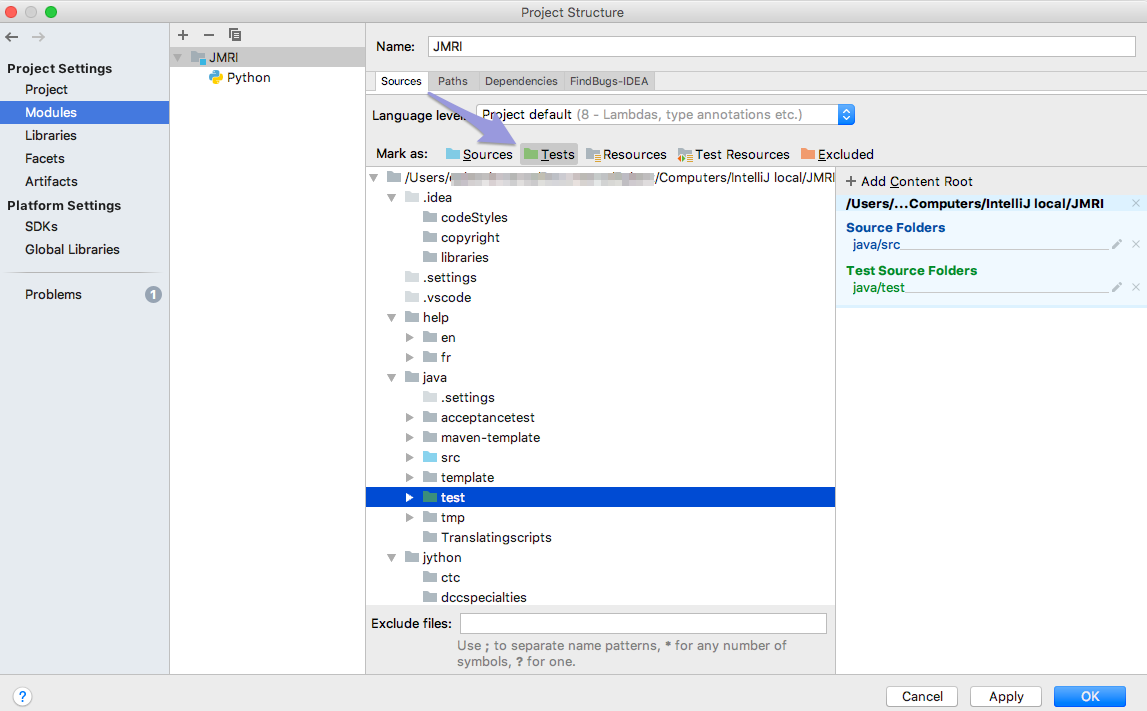
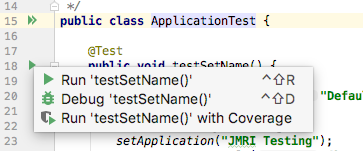
To run a single @Test test inside the file window, make sure you have set up
the JMRI Project Structure > Modules > Sources (see above). When
you open a Test file, in the left margin a green Run Test arrow will show next to every test.
Click it and select one of the 3 options from the combo:
local.properties file to match
the place where the SpotBugs application is located on your computer add these lines:# configure SpotBugs
spotbugs.home=/Users/you/Apps/spotbugs-4.2.3spotbugs.html
that is placed in the root of the JMRI Module on the Project tab.For additional resources check the official SpotBugs Help
When your contribution is ready, submit a "Pull Request" to the main JMRI code repository on the GitHub website so the maintainers of JMRI can study your proposed changes and merge them into the master JMRI repo.
To make a PR from within IntelliJ IDEA, select "Create Pull Request" from the "VCS" ->
"Git" menu (it's the one but last item, supported by the Git plugin).
Note: Be sure to select your own repository origin: if you see multiple options
to choose from in this submenu:

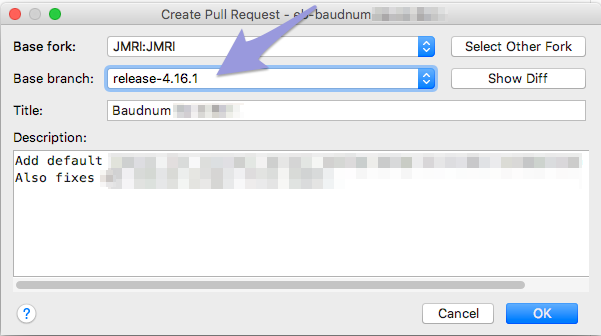
Fill in a title and comment for your PR:
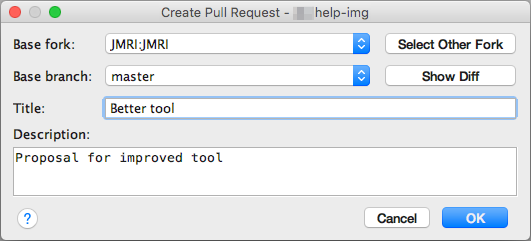
Unless your change is intended for a special branch like a previous release, you would set
the PR Target Branch to "master" as shown above. Otherwise, use the combo box to change the
branch where you want your new changes to be added:
To create a PR from GitHub web - outside IntelliJ - start by signing on to the GitHub website, selecting your repository & branch and clicking the Pull Request button. For more info, see the Git Developer Help page.
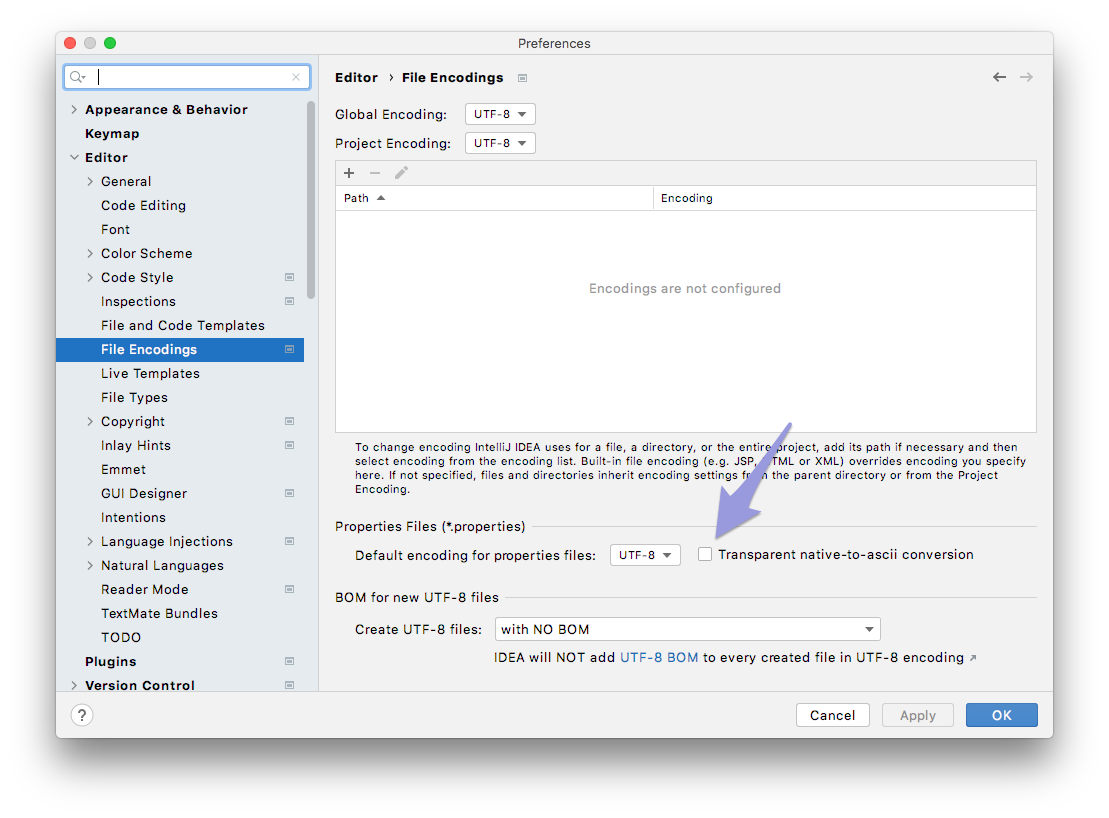
Before you start, make sure you have set up IntelliJ to convert special
characters using lower case encoding strings, as only then will your changes
be accepted for merging into JMRI.
The instructions to set this via vmoptions are at the top of
this page.
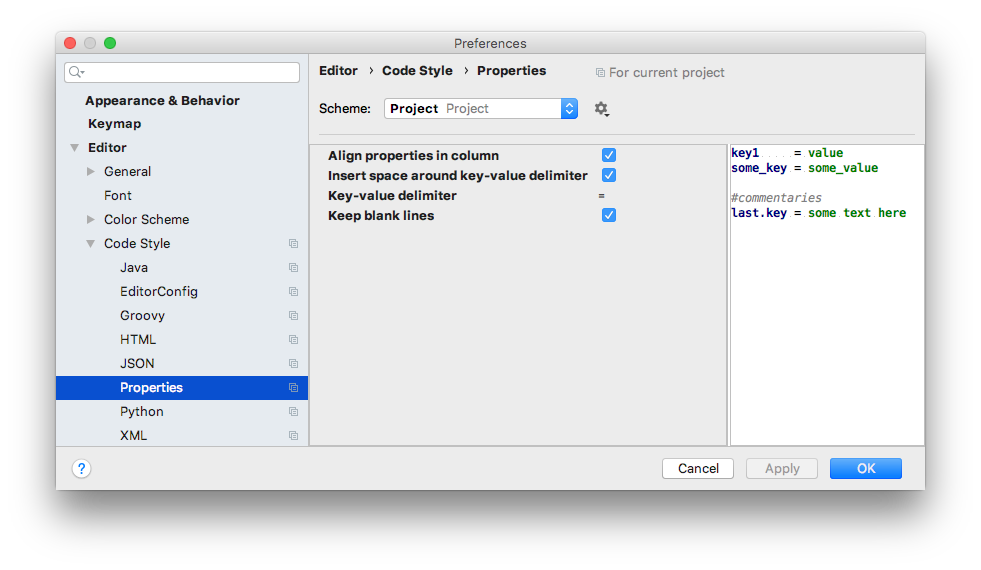
In addition, check that in the IntelliJ Preferences > Editor > Code Style >
Properties you checked "Insert space around key-value delimiter", or your edits will mess up
the work already in place.
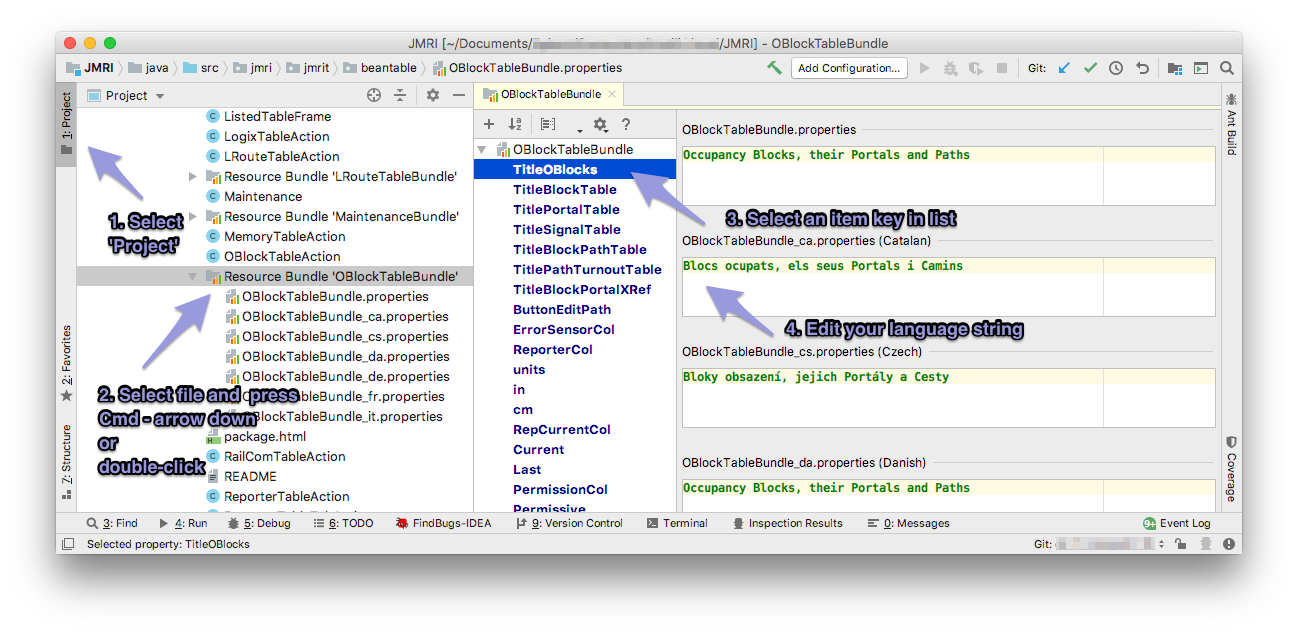
To easily edit Resource Bundle .properties files, select a 'Bundle' header icon in the Project file list and type Cmd +
arrow down key, or double click one of the language files. This will initially open a window with just that
single language file in the editor window.
To access a single view with the list of coded keywords on the left and text boxes for every
translation into a different language to the right, on IntelliJ 2022 install the Resource Bundle Editor
plugin (go to Preferences > Plugins, see screen shot).
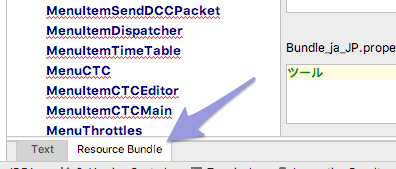
When you open a specific language file and you have the Resource Bundle Editor installed, at the
bottom of the screen you can switch views by clicking the Resource Bundle or the
Text tab:
When in testing your app you conclude that you would like to remove your last couple of
Commits, IntelliJ gives you the option to graphically Reset your HEAD.
To do this, open the "Version Control" -> "Log" tab at the lower left of the Project
window to view a "Track Plan" of the history of your Branch, all the way back to the
different parts that made JMRI:
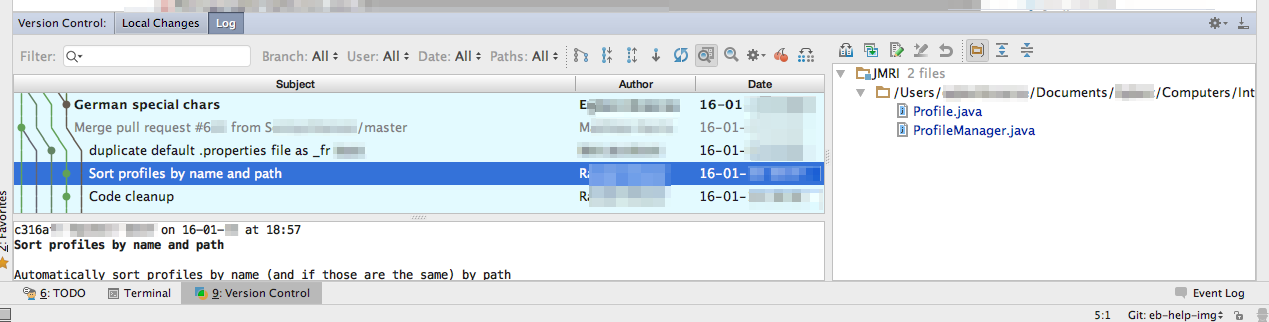
Click on any line to view the changes that were Committed at that point in time (listed to
the right).
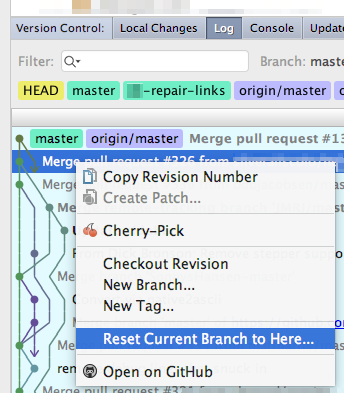
To reset your repo (HEAD) back to a certain point, right-click on the corresponding line and
select "Reset Current Branch to Here..." (and confirm).
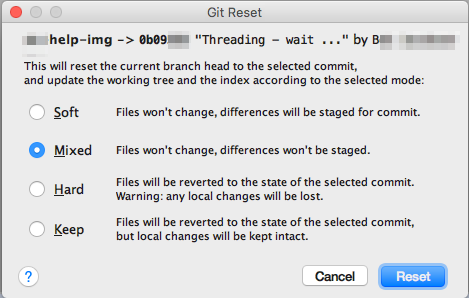
Confirm the way you want to save or discard your Commits after that point in the dialog:
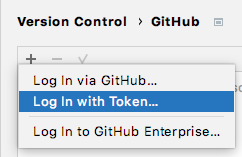
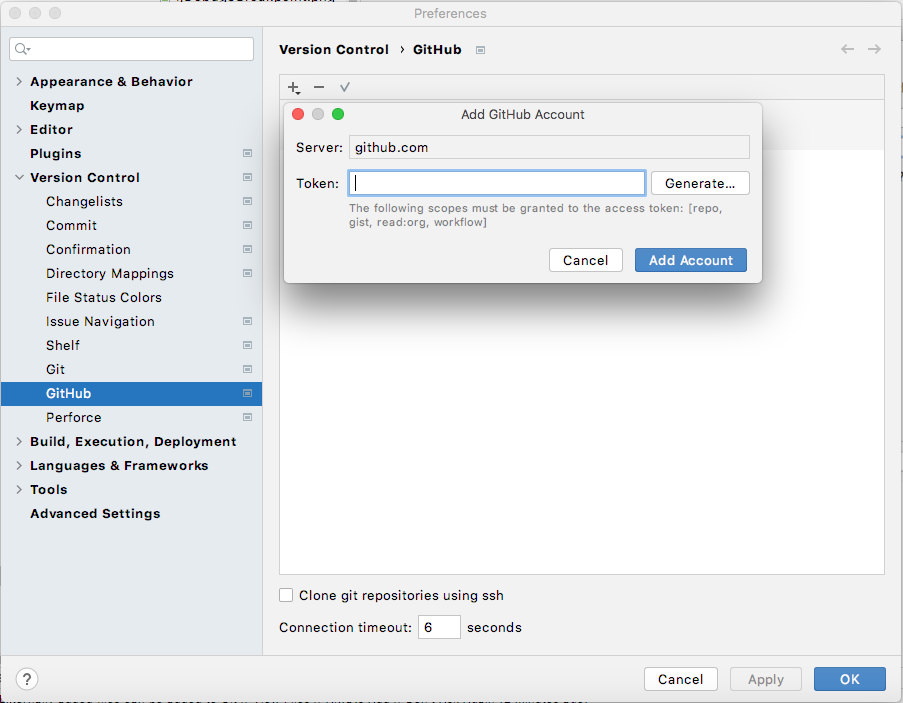
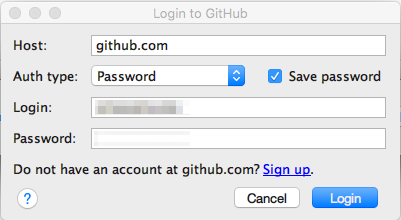
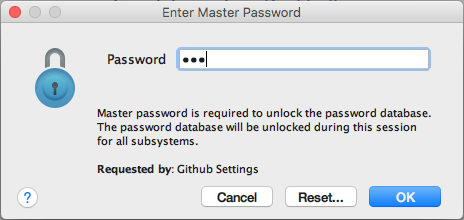
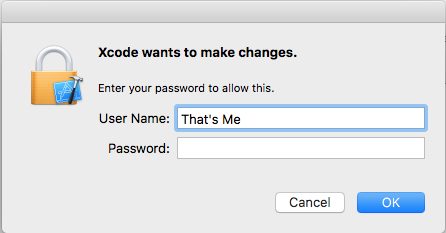
To securely store your GitHub login, you might periodically be asked to unlock it:
On macOS, when you run into this error, usually when starting IntelliJ for the first time
after a system update:

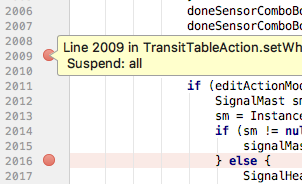
When you click Debug with a configuration selected (at top right) you
might see a path not found. name: com.intellij.rt.debugger.agent.CaptureAgent with
the Debug Variables pane showing: "Frame is not available". This is caused by an accidental
exception breakpoint on ClassNotFoundException. Open View Breakpoints...
from the Run menu and uncheck the breakpoint under "Java Exception
Breakpoints". We fixed it by unchecking the red lightning symbol in the margin of the
loadClass code listing. (source:
Stack Overflow)
If you see a message similar to this:
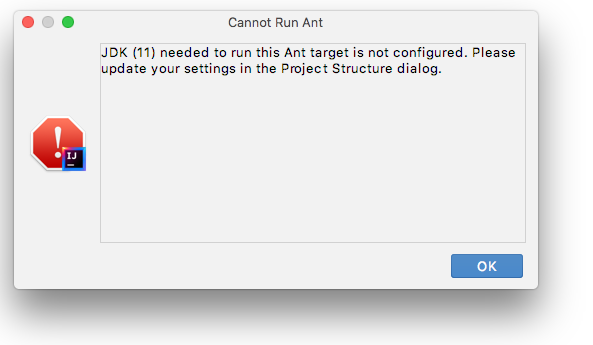
it means the SDK name as set in the Project Structure > Project Settings > SDK tab does not match any of
the JDKs installed. Fix it by choosing a different Java 11 JDK as described above.
See the IntelliJ IDEA web reference for more specific information on using this IDE.