If you would like to see cars delivered in a particular sequence, or with a specific load for delivery or shipping, the program allows you to apply a schedule to a siding. This is an optional feature and shouldn't be used until you become very familiar with how the program generates manifests and switch lists. A schedule provides very fine control on the order types of cars will be delivered to a siding. You can also specify the road name for the type of car delivered. For example, if you wanted two SP boxcars to be delivered followed by a tank car loaded with "Oil", you can create a schedule that will do exactly that.
First open the Locations panel.
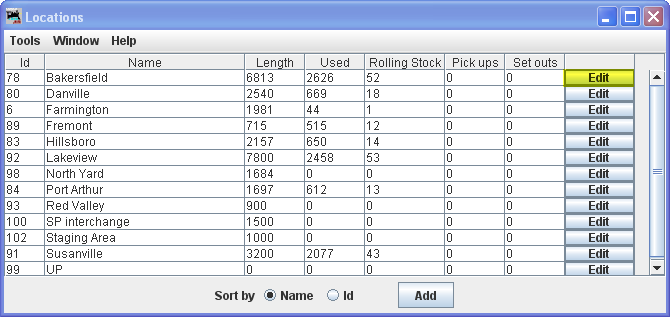
Then press to the right of the location to open the Edit Location panel.
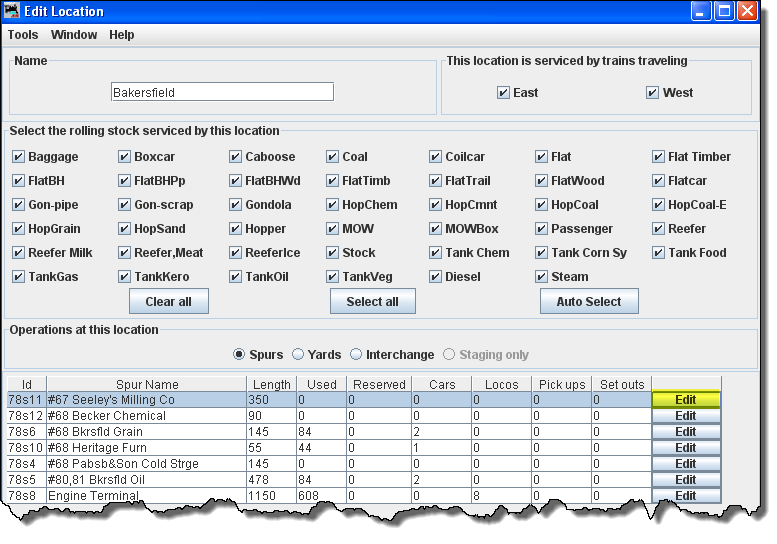
To schedule a location, select to display the Edit Spur Track window.
|
Next to Optional Schedule on the Edit Siding Track panel. Press should open the Add Schedule panel.
|
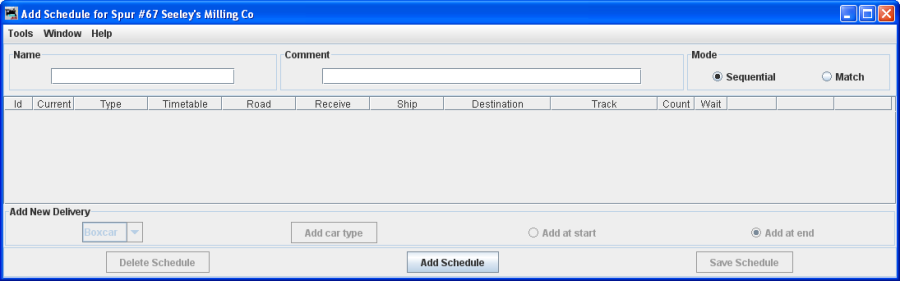
The Edit Schedule for spur---- window opens if the schedule exists and you want to modify it. If no schedule is selected, then when is pressed the Add Schedule for Spur---- window opens.
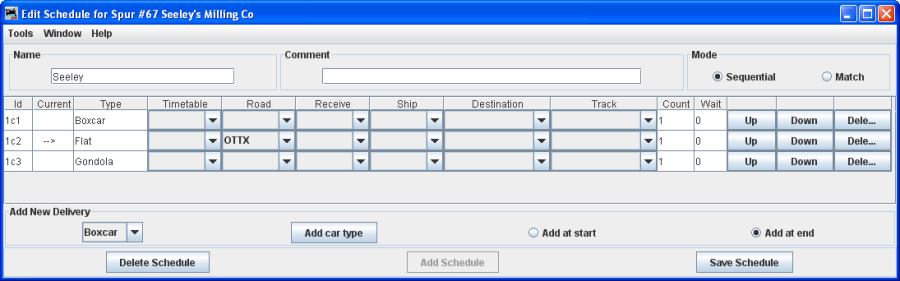
The schedule can operate in two modes, sequential, if you want cars in sequence. Use match mode when you do not care about car order.
Type a Name for your schedule and then press on the bottom of the panel. Multiple sidings can use the same schedule as long as the sidings use the same car types and roads.
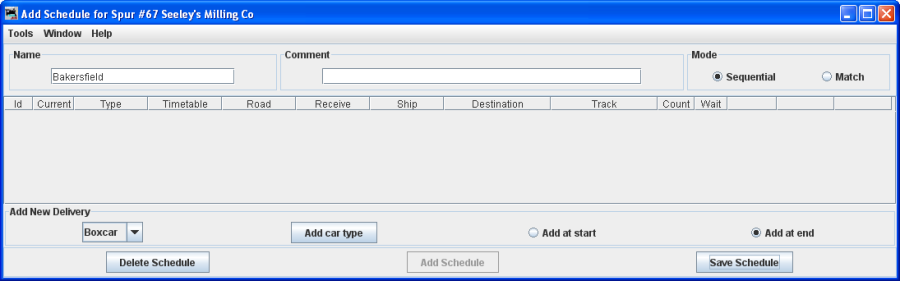
Now add your first delivery for this siding by selecting a car type then pressing . A new item should appear in your schedule containing the type of car,
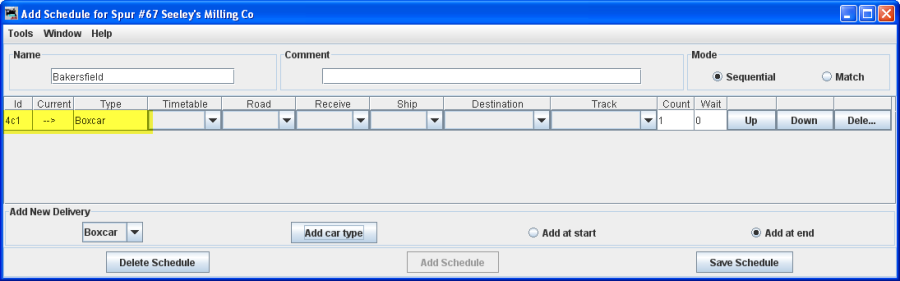
You can if you wish specify a particular road for the type of car you entered, or leave it blank if you don't care about the road name. You can also specify the car load received and shipped. Also a Timetable may be specified. All with the use of the drop-down menus
If you wanted more than one car type to be delivered consecutively, increase the count to the number that you wish. The maximum count is 10 and the minimum is 1. Repeat selecting the car types and pressing until your have a delivery schedule you like. Press and close the schedule panel when you are done.
Note only car types and roads that are accepted by this siding are available. If a car type or road isn't available, check the car types and roads for this siding and location.
If you want a specific load for your cars, you can create them using the Edit Car Attributes for car Load. Each new load is associated with the car type. For example you can have "Screws" for a boxcar, and "Oil" for a tank car. The program will only deliver cars with a "Schedule" load to a spur that has a Schedule that also requests that particular load. However, cars with a Schedule load can still be placed at yards, staging, and interchanges.
You can optionally use your staging tracks to empty cars with a "Schedule" load, and you can also optionally create "Schedule" loads using staging tracks.
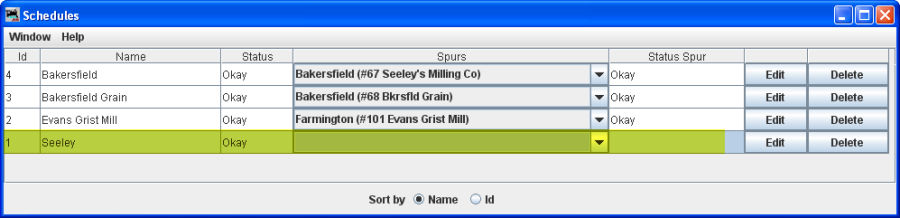
You can also access your Schedules from the Locations Tools menu. The Schedules table provides status for each schedule. Since you can assign a schedule to multiple spurs, the table also provides additional status for each of the spurs that use that particular schedule. The table also allows you the edit a schedule once its been assigned to a spur.