Add Location as Interchange and the Add Location window is used to add and Interchange.
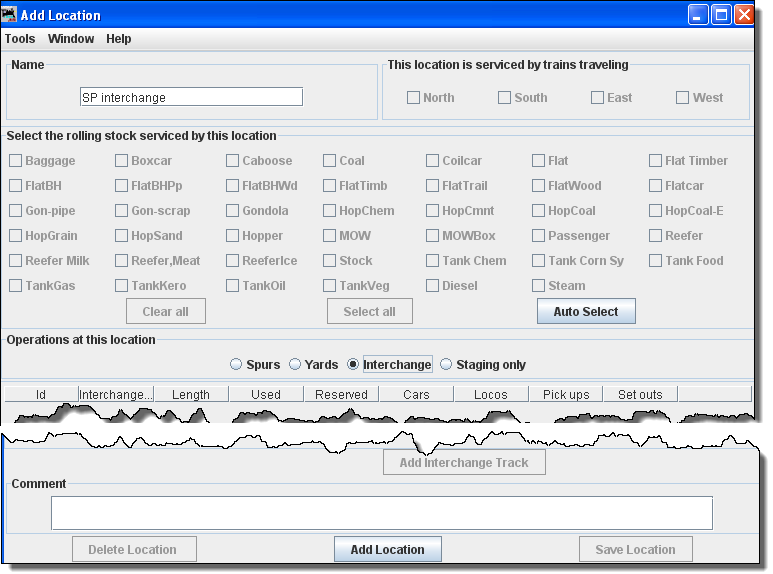
To add a location as an Interchange: in the Add Location window, type the
Name of the Interchange location, note most of the window is greyed out until
the location is added. The location name must be unique; the program will not allow two
locations with identical names. However, if you want more than one location to have the same
name for your manifests and switch lists, add a hyphen and a number to the locations name.
For example, "Boston-1" and "Boston-2" will print as "Boston". The program will remove the
hyphen and number when printing manifests and switch lists.
Select Operations at this location Interchange, then press at the bottom of the window.
This opens the Add Location window with all the options enabled. Now you will want to add the tracks to the interchange.

You may select This location is serviced by trains traveling, select at least one or any number of the directions depending on access to your interchaznge. We have selected East West for this interchange.
For example, if only south bound trains can access the location select "South" and deselect the other directions. This can be useful if you want to support only trailing point switching for a given location.
Next Select the rolling stock serviced by this location, you can control the rolling stock a location can service. Push the to deselect all types, or to select all types, then select or deselect the rolling stock you wish the location to accept.
Since the Operations at this location is a Interchange the is now enabled near the bottom of the window.
We also have the option to or
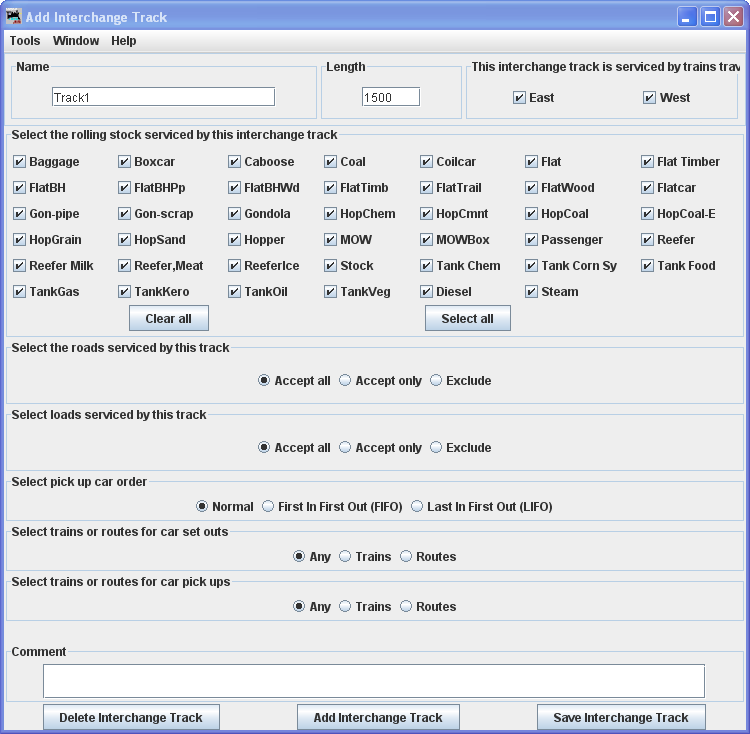
Press then the Add Interchange Track window is displayed, so you can detail the siding.
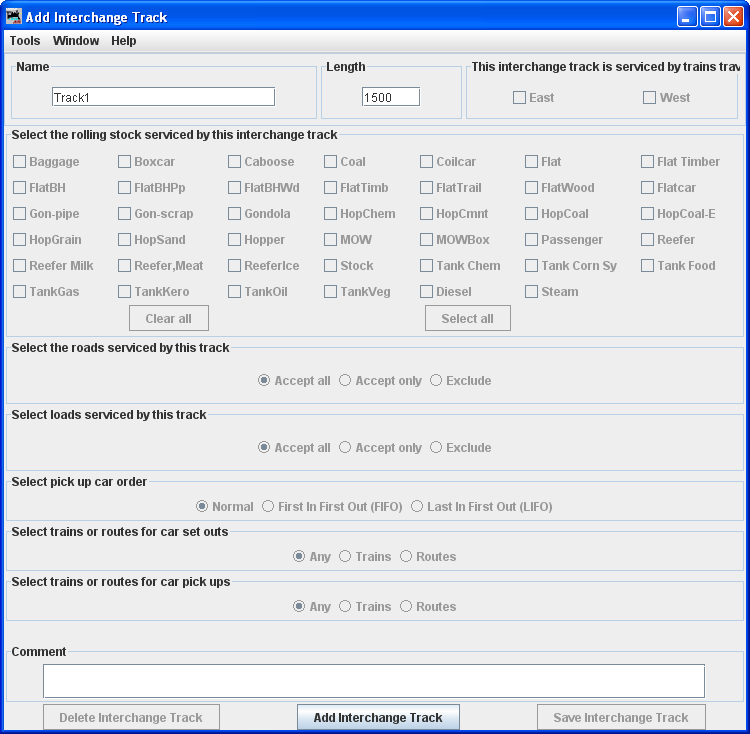
|
In Name type the specific track to be serviced at this location. Length of the Yard track in scale feet. You may enter the measurement in actual inches as and the program will convert to the scale feet that you select during setup. Press the siding track is added and the greyed out features are activated. |
|
|
You may Select the roads serviced by this track Accept all Default accepts rolling stock from any railroad. Accept
only Exclude We will use the default. If you want to edit the roads accepted go to Add Cars then Edit Roads to add a road that is not in the drop-down list. Select the loads serviced by this track Accept all Default accepts any load. Accept
only Allows you to list the loads you will accept. Exclude Select pick up car order Normal Default First In First Out (FIFO) Last In First Out (LIFO) Select trains or routes for car set outs Any ~~ default
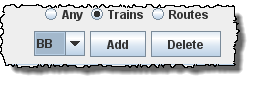
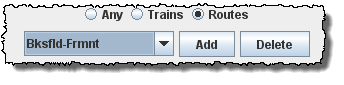
Trains
Routes Select trains or routes for car pick ups Any ~~ default
Trains
Routes We will use the default go to links to setup Trains or Routes. The Trains and Routes must be created prior to selecting. You may enter a Comment for the track. You may now press to add to the location or press if you do not want to store the track. If you want to add another track to this interchange location, then enter new data and Press to add the track. Close the window when done with this location. |
The Add Location window shows one Interchange track at the SP interchange
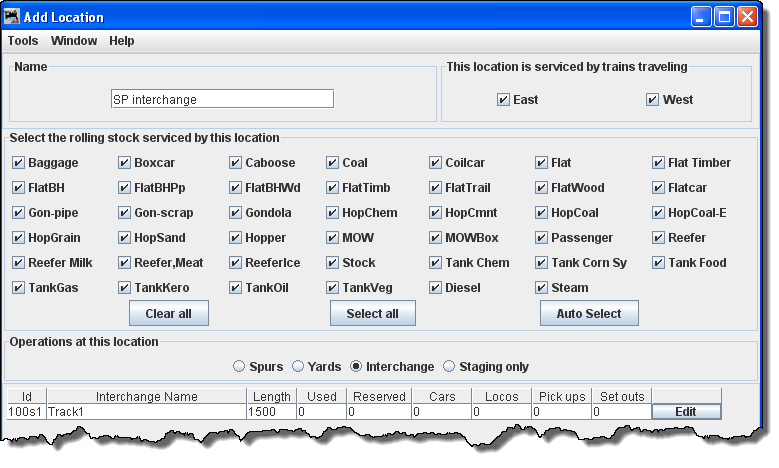
You may add as many tracks as required for the Interchange.
If you want to change information for any track entry, press the and the Edit Interchange Track window will open.
The Locations window shows all the locations in your database.
You may Edit any one of them, which opens the Edit Location window, which is the same as the Add Location window except it contains the info for the location you are editing.
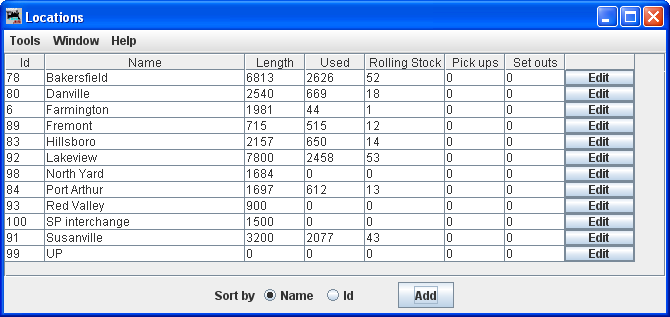
You may add as many locations and track as you need to complete the description of your layout.
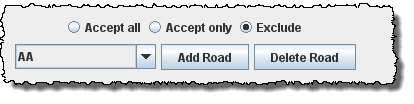 Accept all rolling stock except from those railroads that are
excluded.
Accept all rolling stock except from those railroads that are
excluded.
 Accept all loads except from those that are excluded.