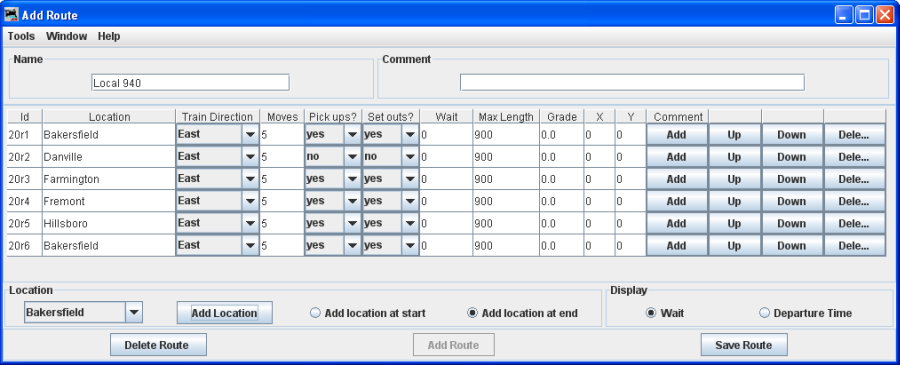
The Add Route Window opens and now you can add a route to your Operations data base.
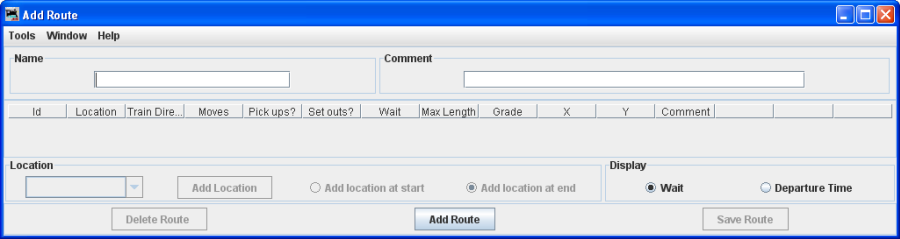
Then press located at the bottom of the window. The Add Route window now activates the attributes required to enter the route.
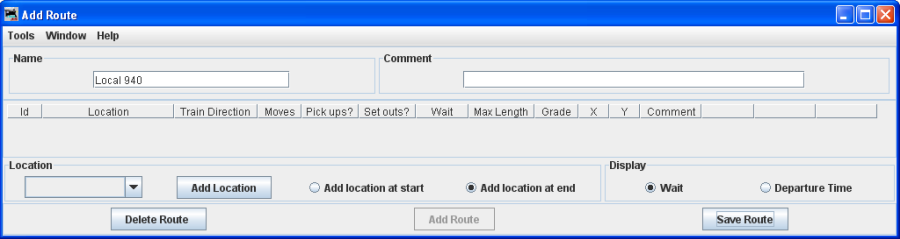
Now select the location from which the train will depart by selecting the location located at the left bottom side of the window.
Select Add location to start Add location at end
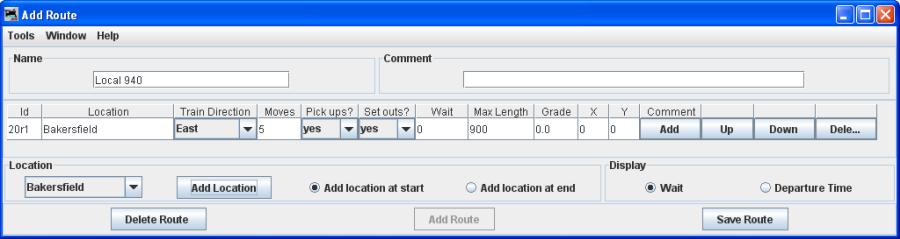
Press .Updated Add Route window will be displayed with all the attributes required active. Repeat until all stops are entered for the route.
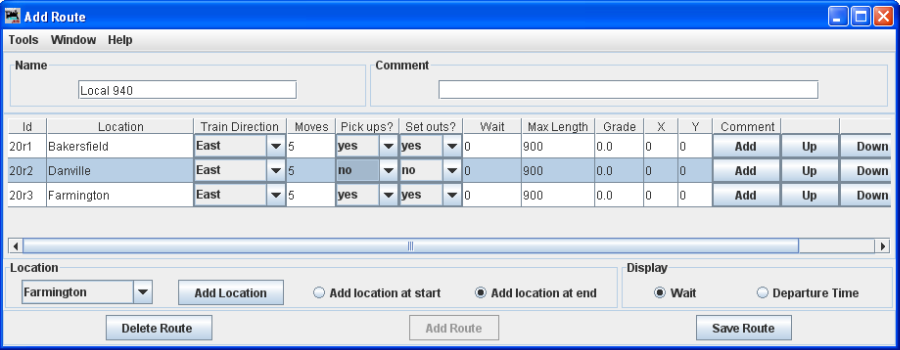
Now build your route by selecting the next location the train will visit, select all locations that the train will pass through even if the train will not work the location. This way your train's engineer will know when reading his manifest the towns he will be traveling through. Each time you add a location to the route, the table shows the order in which the train will visit. You can move a location up or down in the sequence if needed.
We will now add all the locations to the route. Now make sure that Add location at end is selected to add after the first location.
Make sure you press when you are done with entering the locations.
Each Location has the train's departure direction(Train Direction), number of desired car Moves, and whether car Pickups? and or car Drops? are allowed at that location.
You can also adjust the maximum train length (Max Length) that can depart that location. A car move can be a car pickup or car drop at that location. For example, 5 moves can be 5 pickups or 5 drops or any combination of 5 pickups or drops.
The Grade is used to determine how many engines the train will require for that segment. The X and Y are the coordinates on your dispatcher's panel for the optional train icon. You can set the coordinates here, or use the "SetX&Y" train icon popup menu to teach the program where you want the train icon placed when the train is at the specified location. Leave the X and Y coordinates at zero if you want to manually move the icon or you're not using the icon feature. After setting the number of moves, maximum length, or coordinates, click on the table to make sure it is recognized by the program.
You may move the selected location or to change position in list.
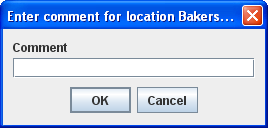
You may add a comment for each location. press Comment
Press which save your route. The program will create a file (OperationsRouteRoster.xml) in your JMRI directory in a folder called "operations". A backup file with the last settings for all of your routes is also created each time pressed.
Now we have our first route set up.
You may start a new route using the Add Route window and entering a new route name and repeat this process for each route.
Now back to the Route window, which will show us a list of all the routes.
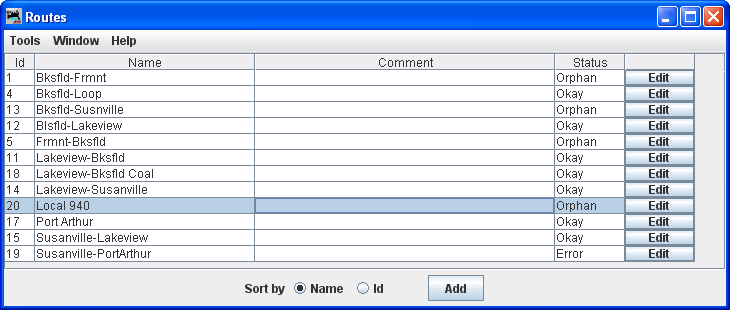
Note that you may press on any route and the Edit Route window opens which is similar to the Add Route window.
You may now press to add another route, repeating the process just completed.