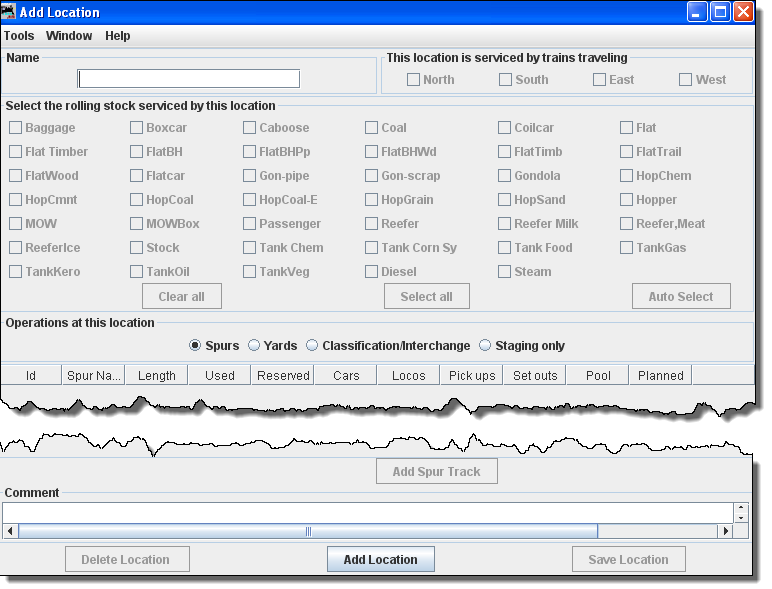
Name The Location name must be unique; OperationsPro will not allow two Locations with identical names. However, if you want more than one Location to have the same name on your Manifests and Switch Lists, add a hyphen and a number to the end of the Locations name. For example, Boston-1 and Boston-2 will both print as Boston. The program will remove the hyphen and number when printing Manifests and Switch Lists.
Press at the bottom of the panel. The various fields that were disabled should now be enabled.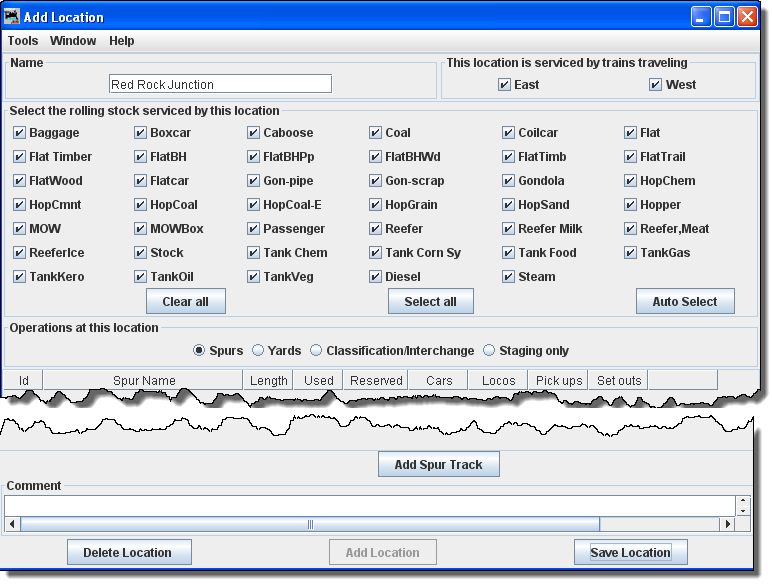
Each Location can have several Yard, Spur, Interchange or Staging Tracks:
Select the rolling stock serviced by this Location
The Locations Table shows the total length of all Tracks, the amount of track that is occupied (Used) by Cars and Engines, the total number of Cars and Engines (Rolling Stock) at each Location, the number of Cars and Engines that will be picked up (Pickups) by Trains, and the number of Cars and Engines that will be delivered (Drops) here by active Trains.
This Location is serviced by trains traveling North South East West
You can decide which train direction the Location can service. For example, if only south
bound trains can access the Location, select South and deselect the other
directions. This can be useful if you want to only support trailing point switching for a
given Location. If a Location can support multiple directions then select the ones that are
appropriate.
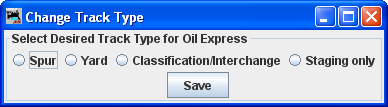
Operations (Tracks) at this Location Spurs Yards
Classification/Interchange
Staging only
To add a Track, press the "Add [...] Track" button. Now enter the name of the Track along
with the length of the Track in scale feet or in actual inches. Append a double quote (") to
the length when entering actual inches to have OperationsPro convert the length into scale
feet. Append cm if you want to convert from centimeters to meters. Press the "Add [...]
Track" button at the bottom of the panel to add a new track to the list and activate the
disabled fields.
The button at the bottom of the window
will change to match the option you chose as "Tracks at this Location".
To add a Location, press the "Add [location]" button, which shows one of the following types
Add Classification/Interchange Track
Each of these buttons opens a corresponding dialog to describe its function.
Press the button to save your work. The program will create a file (OperationsLocationRoster.xml) in your JMRI directory in a folder called "operations". The program will also create a backup file containing the last settings for all of your locations.
Spurs are very similar to Yards, so see above for more information. You can if you wish schedule the order that Cars will be delivered to a Spur. See Schedules for more information.
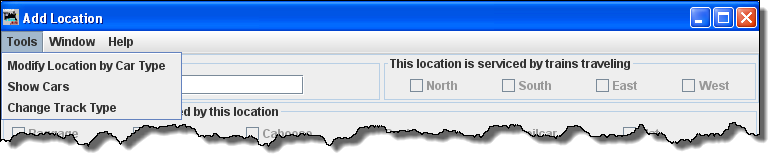
Tools
Change Track Type