LogixNG is similar to Logix. It's a way to define rules, like "If sensor IS1 is Active, then set turnout IT2 to Thrown". It borrows some concepts from Logix, but it's a complete new design and it can work side by side with Logix.
First, we create a LogixNG. We start PanelPro and select Tools ⇒ Tables ⇒ LogixNG ⇒ LogixNG to open the table with the LogixNGs.
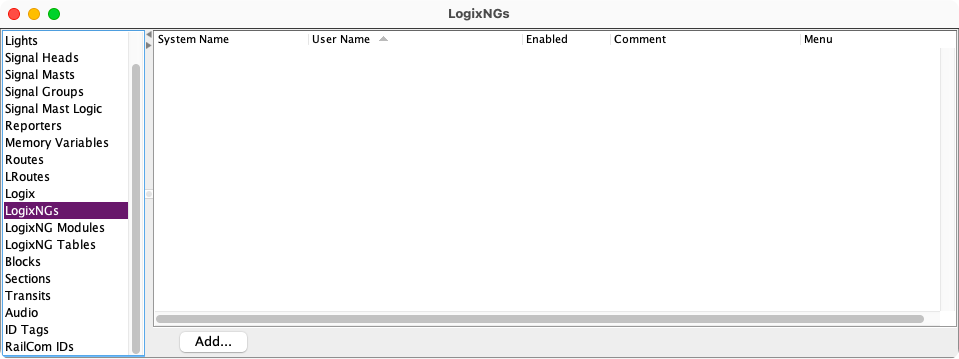
Click the Add... button to add a new LogixNG.
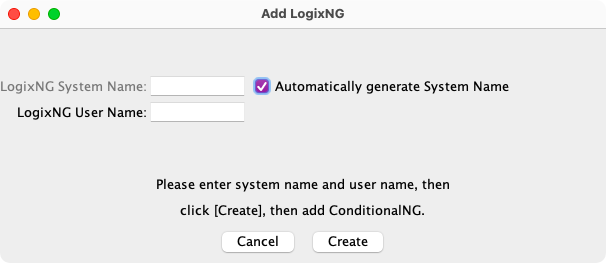
By default, the checkbox Automatically generate System Name is checked for all items in LogixNG.
Click the Create button to create a LogixNG. The LogixNG ConditionalNG list will be opened automatically.
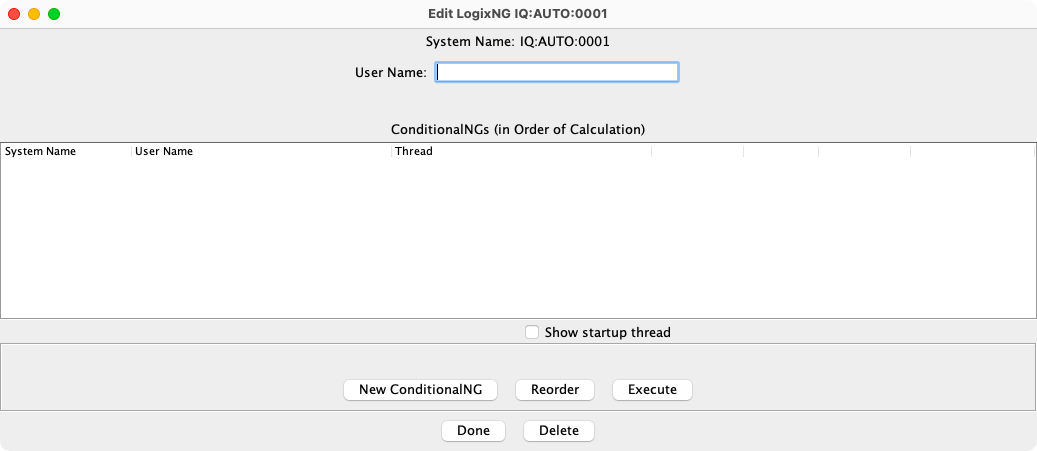
Click the New ConditionalNG button to add a new ConditionalNG.

Click the Create button to create it. The ConditionalNG editor will open.
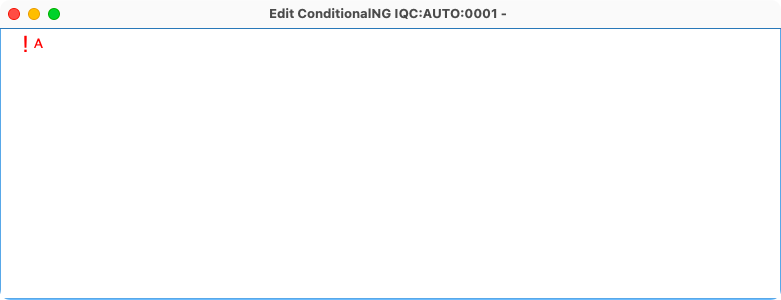
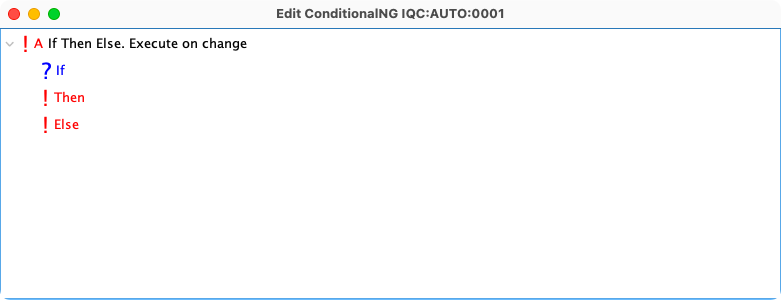
A ConditionalNG is a tree of actions and expressions. When the ConditionalNG is created, the tree consist only of a single female socket, "! A". The exclamation mark indicates that this is a digital action socket, so you can connect digital actions to it.
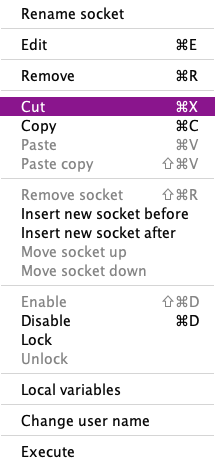
Right-click on any row to show the context menu for that row.
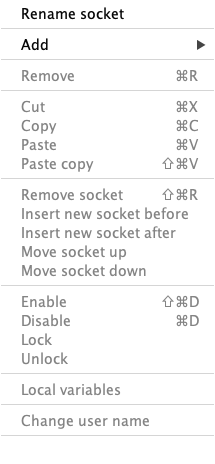
The common context menu items also have shortcut key combinations. If Highlight row in ConditionalNG editor is enabled in LogixNG preferences, the shortcut keys are also available without displaying the context menu. See LogixNG Preferences.
The process to add a row to the ConditionalNG tree was changed as of JMRI release 5.1.4. The old process is available at Orignal Add Process.
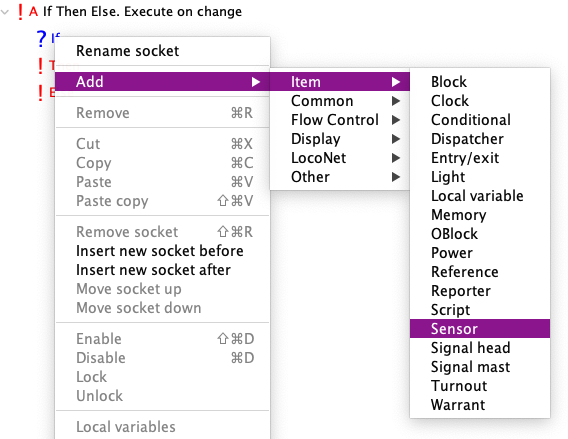
To create a new action, we right-click with the mouse on the female socket !
A and then select Add in the popup menu. The data selection is
presented in a series of sub-menus.
The first sub-menu provides a list of categories. Instead of a very long list of actions and expressions, they are grouped in categories.
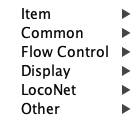
When a category has been selected, a list of types will be displayed. In this example, the types are from the Item category.
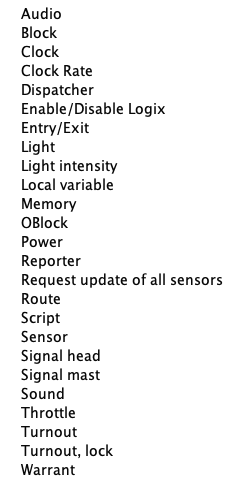
Let's start with a turnout item. Click on the Turnout item in the sub-menu.
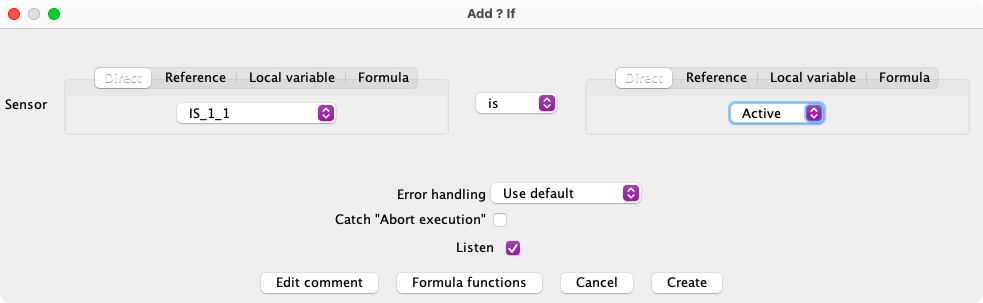
We now get a dialog box there we can select the turnout to control. And what to do with this turnout.
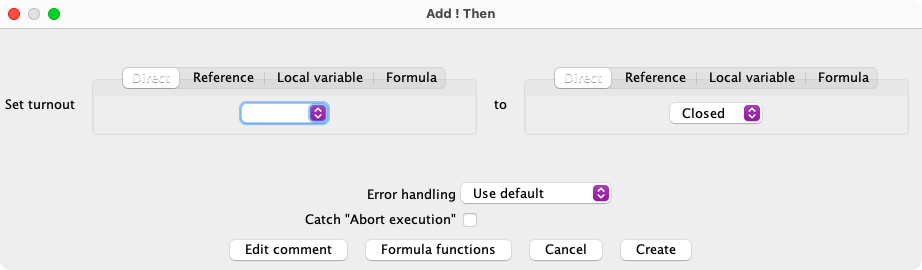
In this example, we select "IT_1_1" and we tell the action to throw the turnout when the action is triggered.
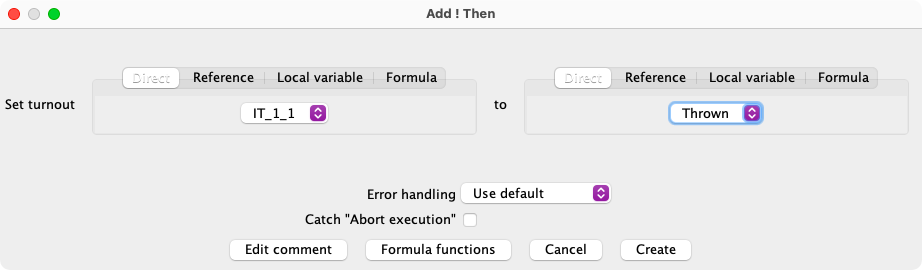
Click the Create button to create this action.
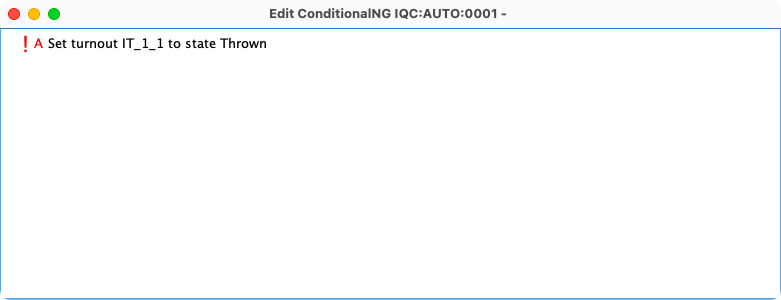
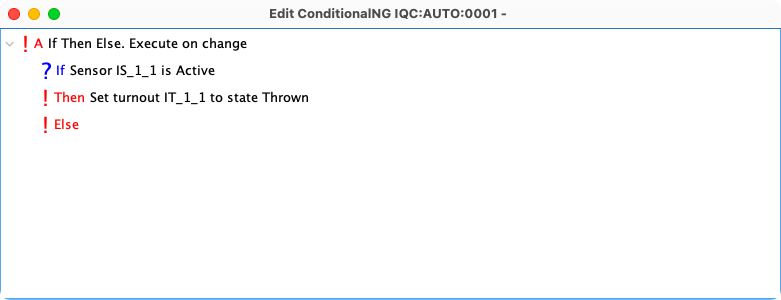
The action is now created and each time this ConditionalNG is executed, the turnout "IT_1_1" is thrown.
Having a single turnout action in the ConditionalNG will not do much good. Lets change the ConditionalNG so that it reads sensor "IS_1_1" and if it's active, the turnout is thrown.
To do this, we need to temporarily remove the Set turnout action and instead add an If Then Else action. LogixNG has a clipboard that allows us to cut and paste actions and expressions. So lets use it to temporarily move the Set turnout action to the clipboard.
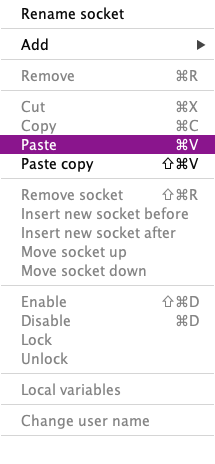
Right-click with the mouse on the Set turnout action and then select "Cut" in the popup menu.
The action is now moved to the clipboard and the ConditionalNG is empty.
We will not look at the clipboard for now, but as a side note, you can open the clipboard by selecting Tools ⇒ Clipboard in the ConditionalNG editor.
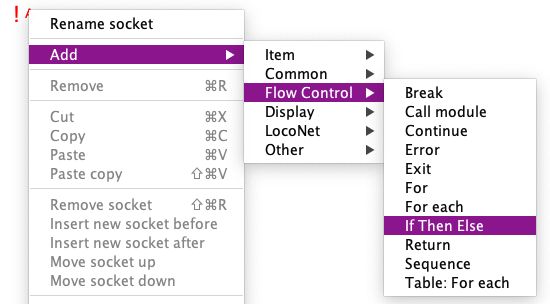
Right click on ! A and select Add. This time select the
Flow Control category and the If Then Else type.
Click on the Create button.
The If Then Else item has two options. The default is Execute on change. The Then and Else actions will execute when the If expression has changed between true and false. When the Always execute option is selected, the actions will execute even though the If expression is still true or false.
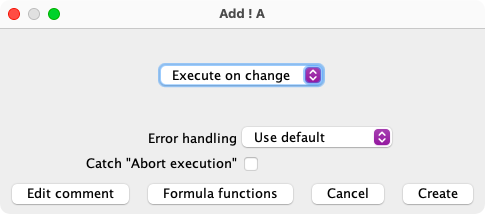
Click on the Create button.
We now have a ConditionalNG with the If Then Else action.
Right-click with the mouse on the Then socket and select Paste in the popup menu to paste the "Set turnout" action.
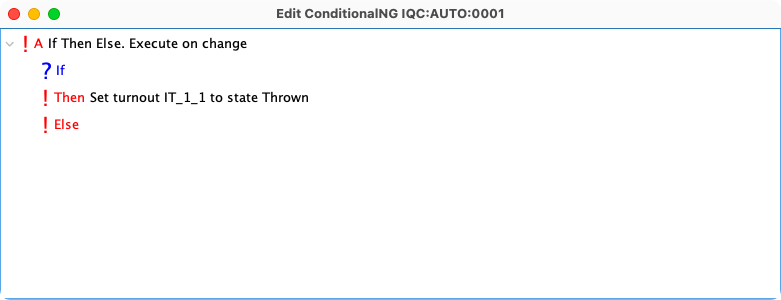
We now have the If Then Else action with the Set turnout action.
Right-click with the mouse on the If socket and select Add ⇒ Item ⇒ Sensor in the popup menu to add a new expression.
Select the "IS_1_1" sensor and select "Active". Note also the dropdown box is / is not in the middle.
Normally, any change to an expression item should trigger the true/false evaluation. Sometimes an expression item should participate in the evaluation but not trigger it. The Listen checkbox is used to control the trigger state.
Click on the Create button.
We now have a ConditionalNG which will be executed every time the sensor "IS_1_1" changes its state. And if "IS_1_1" changes to Active, then turnout "T_1_1" will be thrown.
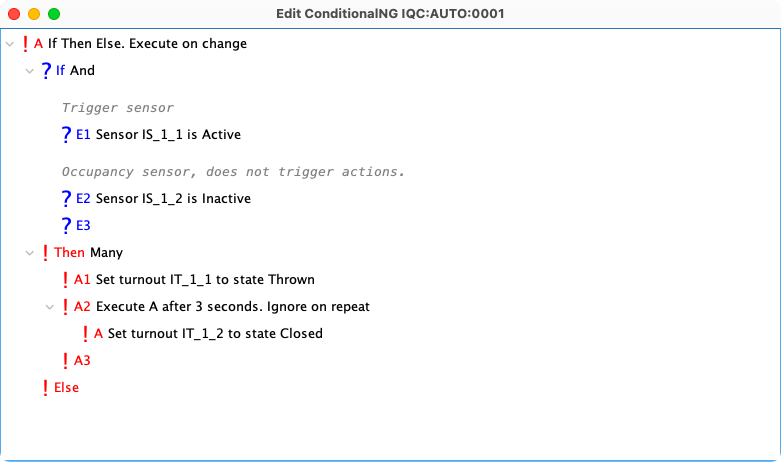
Logix support reading the fast clock. LogixNG also supports reading the system clock. Lets assume you want to cut power to the layout during the lunch. This can easily be done by the following ConditionalNG:
* IfThenElse
  * If: And
    * E1: System clock is between 12:00 and 13:00
    * E2: Power is On
  * Then: Set power Off
  * Else:
Chapter 1.1 - Map Logix features to LogixNG