Opens a window showing the complete roster. (See DecoderPro Manual.)

Select a decoder that matches the one installed in your Locomotive. The Open Programmer button will now become activated and you'll be able to move on with the Programmer selected from the drop-down list, then click on the Open Programmer button, the selected Programmer window will open. All programmers, Basic and Comprehensive, open to the Roster Entry pane.
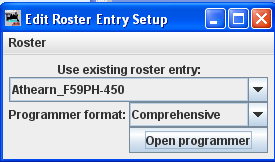
Select the roster entry from the drop-down list that you wish to edit. Select the Programmer format that you wish to use from the drop-down list. Click on the Open Programmer button and Roster Entry Pane of selected programmer will open.
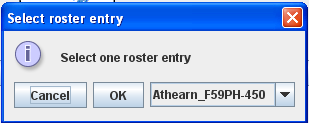
From the drop-down list select the roster that you wish to process, then click on the OK button. Click Cancel button if you wish to abort this function.
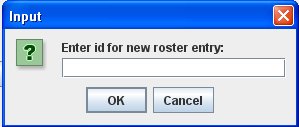
Type the name of the new roster you wish to process then click on the OK button. Click Cancel button if you wish to abort this function.
Opens the Select roster entry dialog box. Next the Save dialog will be displayed, select the location where you would like to save the roster file.
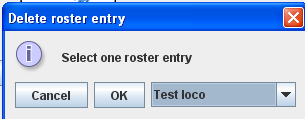
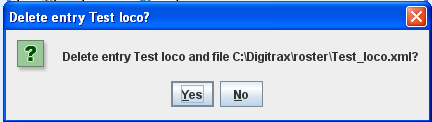
Select the Locomotive that you wish to delete from DecoderPro in the Roster drop-down list. Click OK and the Confirmation box Delete entry [file Name]? is displayed. Clicking Yes deletes the file, No aborts the operation.
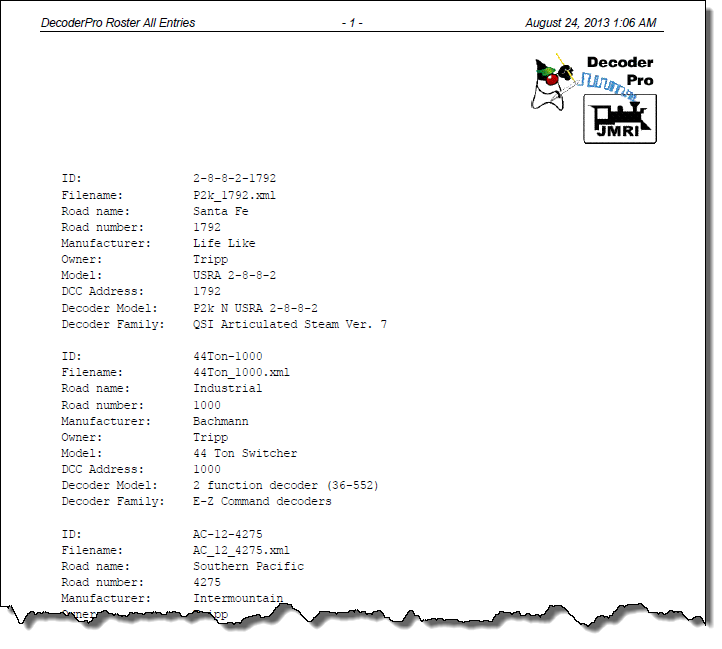
Opens your operating systems Print... dialog and when Print is selected, prints a complete summary of your roster entries. (typically 5 entries per page, so be prepared to print several pages). Printing to PDF file can save a lot of paper.
Preview Roster Summary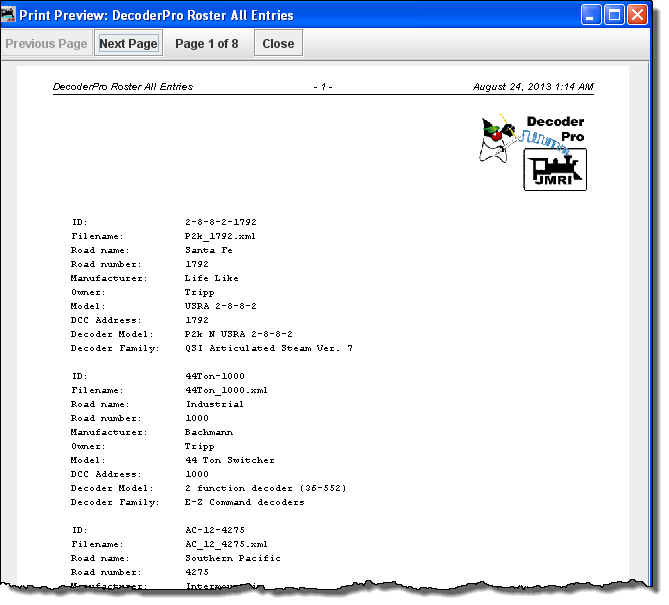
Roster Grouping allows you to allocate Roster Entries into different groups. If for example you run multiple layouts with different locomotives, you can allocate those Locomotives to the relative group, thus when you select a roster group to work with, the drop down lists in the Throttle or Edit Roster entries will only contain Locomotives that are in that specific list.
When working with a Roster Group, some of the functions above change slightly:
Opens the Save dialog box to allow you to select directory and name the file.
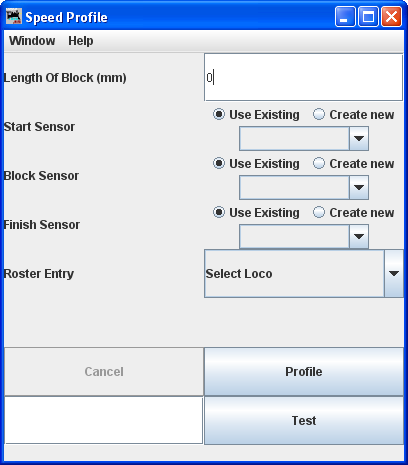
The Speed Profiling tool is designed to create a profile of a loco at various speed steps to help with the automatic running of a loco within JMRI. Primary goal is to help with the principle of getting a loco to stop within a specific distance from a known throttle setting.
The tool works on the principle of timing a loco over a known distance at a given speed step, in both the forward and reverse direction. Currently it requires three sensors which monitor the occupancy of a section of track. Ideally the section of track that the timed runs are performed over should be straight, and a minimum of 1 m long, the longer the length the better the result. For this profiling to work correctly acceleration / deceleration should be disabled on the loco decoder.
|
|
To profile the loco, fill the above details into the window, place the loco in the starting section facing forwards towards (but not on) the section of track that the timed run will be taken over, then press profile.
What happens is that the tool will set the loco off running in the forward direction at speed step 1, when it activates the timed section sensor it starts a timer. Once the finish section sensor is activated the timer is stopped, and the speed is calculated in Millimeters per Second, this is then recorded against the roster. The tool will then ensure that the loco is clear of the timed section sensor, then repeat the procedure again but in the reverse direction. Once the loco is back at the initial start section, the whole procedure is repeated again for the next speed step, this occurs until a profile of all speed steps has been completed.
Having completed the profiling, it is possible to test the profile out. Place the loco in the starting section again facing forward toward the timed section, ideally some distance away from it. Enter in a starting speed step number in the box next to the Test Button, then press test. What will occur is that the tool will set the loco off running at the given speed step, then it will attempt to gradually stop the loco before it reaches the far end. Results will vary especially at the higher speed steps, where you will more likely experience an over run.