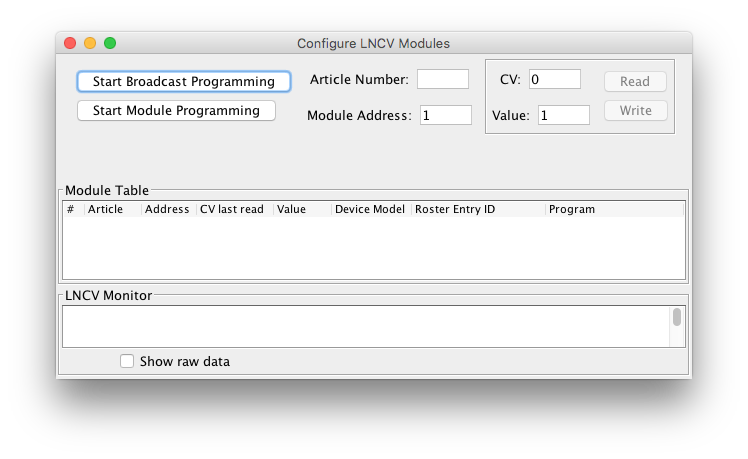
since 4.21.4The "Manage LNCV Modules" tool lets you access
and program connected LocoNet devices that respond to the (Uhlenbrock) LNCV LocoNet
programming protocol.
Examples are the Uhlenbrock Switch Module 63410 and Digikeijs DR5033 booster. You find the
tool in the LocoNet menu as long as a LocoNet connection is available.
You might use this tool in combination with the "Show Raw Data" option in the LocoNet Monitor to check for any additional responses rejected by the LNCV filters.
Unless a programming session is running, LNCV modules will not respond to Write commands (the Read and Write buttons in the tool are only enabled during a session).
LNCV Programming requires 3 elements to address CVs in an LNCV module on LocoNet:
Uhlenbrock and Digikeijs/Digirails publish the Article number for each (new) device. For
example, the Digikeijs DigiBoost DR5033 has Article number 5033, which was registered with
Uhlenbrock. The Uhlenbrock 63330 has Article number 6333, the Uhlenbrock 63410 has 6341
(skip last zero).
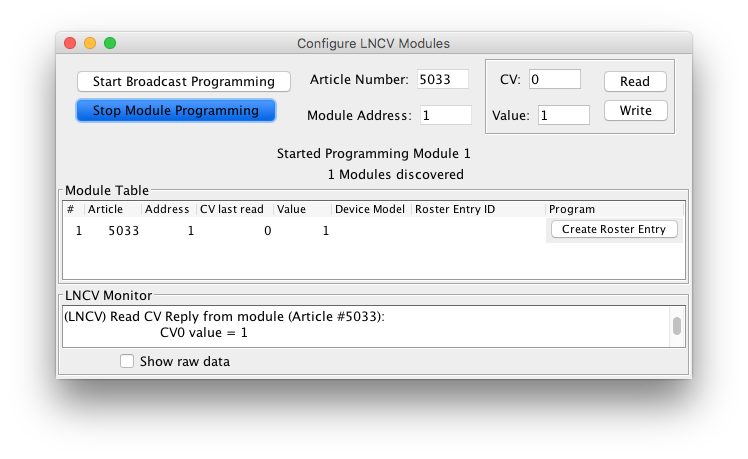
Enter the Article number e.g. 5033 in the "Article" field before proceeding.
Next, enter the Module Address in the corresponding field.
After opening a programming session, the "Open Module Programming" stays highlighted and
the Read and Write buttons are enabled.
To close the programming of a module, click the same button, that now reads "Stop Module
Programming".
While a programming session is running this button is highlighted and the Address field is
not editable, to prevent switching module address without first closing the session running.
Note that changing the module address stored in CV0 won't immediately halt the session, so
take care and close the current session before opening a new session on the new module
address.
For incidental programming, the tool allows reading and writing of individual CV
values.
To read, enter a CV number in the fields on the right of the tool pane and click [Read] to
see the value in the Value field.
To write, enter a CV number plus the new value to set in the CV, and click [Write].
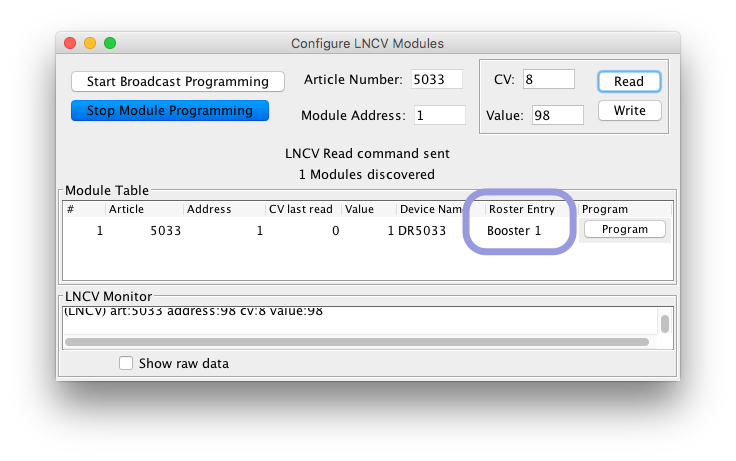
LNCV Responses coming back from the layout will be listed in the LNCV Monitor, and the devices sending a reply show up in the Devices table.
When your Roster contains (exactly) one entry for a decoder of this article number and
address, it will be listed in the table as the Roster Entry ID, as shown below.
When you have a matching Roster Entry, the button in the Program column will read
[Program] and will directly open the Roster Entry tabs.
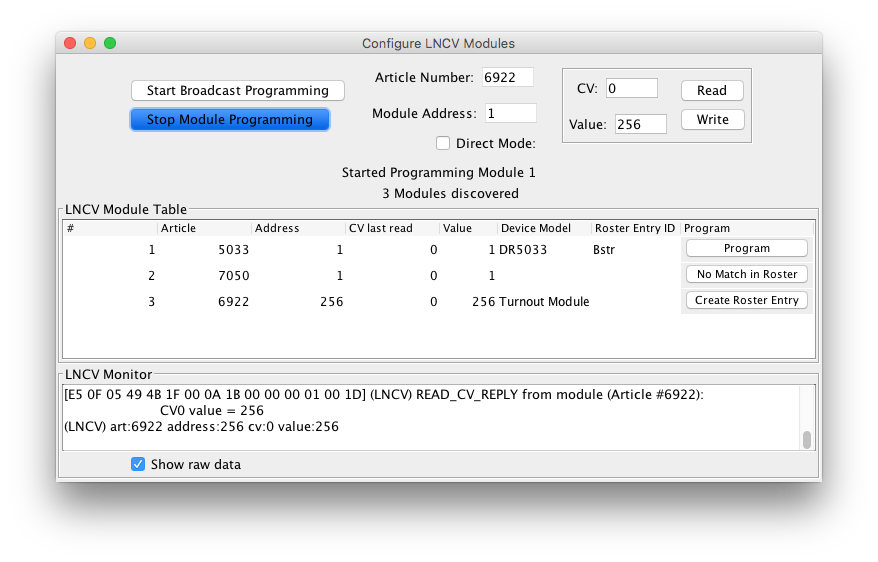
When no match was found in your Roster but a matching definition was found in the JMRI Decoder Index, the button will read [Create Entry]. Click on it and enter an ID (name) for your new roster entry.
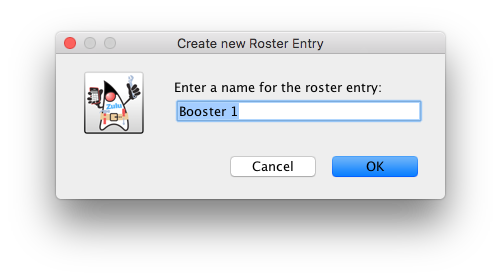
After clicking [OK] the button is updated to [Program].
Be sure to complete the Entry creation process by clicking [Save to Roster] on the DecoderPro Roster Entry tab.
If your device responded to a general call but is not yet found in the Decoder Index,
the button will read [No Match in Roster].
since 5.1.3Click the button to get a dialog to recreate the
Decoder Index, as a new decoder file that was copied to the user files /decoder folder
might not yet be part of the Index.
If that doesn't fix it, report your device on the jmri_users group or create an Issue in
GitHub.
Older LNCV devices may not have their own address, or even no article ID. They can be programmed using Broadcast mode, but you have to be sure only one such device is powered, as they all would respond to programming commands.
Click "Start Broadcast Programming" to start a session.
To close a Broadcast session, click "Stop Broadcast Programming".
Using the universal address 65535 (or simply leaving the Article field empty) you can, as
the name suggests, call up all LNCV Adapters that want to respond (not all do).
As the universal address is not valid for addressing specific modules, it can only be used to
call up an individual adapter for which the address is unknown. For this you connect ONLY the said
adapter to the LocoNet. The adapter can then be called up and its address read from LNCV
0.
By only filling in an Article number (and leaving the address field empty) you can send a
Broadcast call to all devices of that specific type, and many devices will respond by
providing their DCC address, which will be added to the table.
Once you have the report back from the layout, click [Close Broadcast Session] to exit the
general access.
Click on one of the rows to copy the address to the top, and click [Start Module Programming]
to continue.
Check the 'Direct Mode' checkbox to access 16 state buttons to set LEDs etc. on Uhlenbrock Track-Control items.
Anyone interested in writing their own LNCV decoder definitions in JMRI, please note that
in the definition programming mode should be defined as
<mode>LOCONETLNCVMODE</mode>.
The Article part (item 1. in the list above) must be defined in the definition as the
<model productID="5033" />. To process LNCV commands in JMRI
LnOpsProgrammer, elements 1. and 3. are combined into a single CV number as
"part_1.part_3".
For example CV6 in the DR5033 is defined as:
<variable CV="5033.6" readOnly="yes" item="Temperature">