The Signal Group Table displays a list of your Signal Groups.
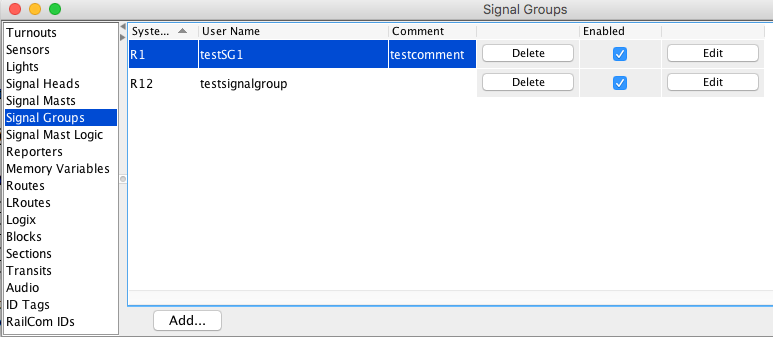
There are six columns in the Signal Group Table:
To define a new Signal Group, click on the Add... button at the bottom of the Signal Group Table. This will prompt you for a Signal Group name and whatever further information is needed.
You can delete a Signal Group from the Signal Group Table by clicking one of the Delete buttons. Save a copy of your JMRI Configuration file as a backup first!
Click on one of the Edit buttons at the right of the Signal Group Table
to open the Edit Signal Group window for the
corresponding Signal Group. 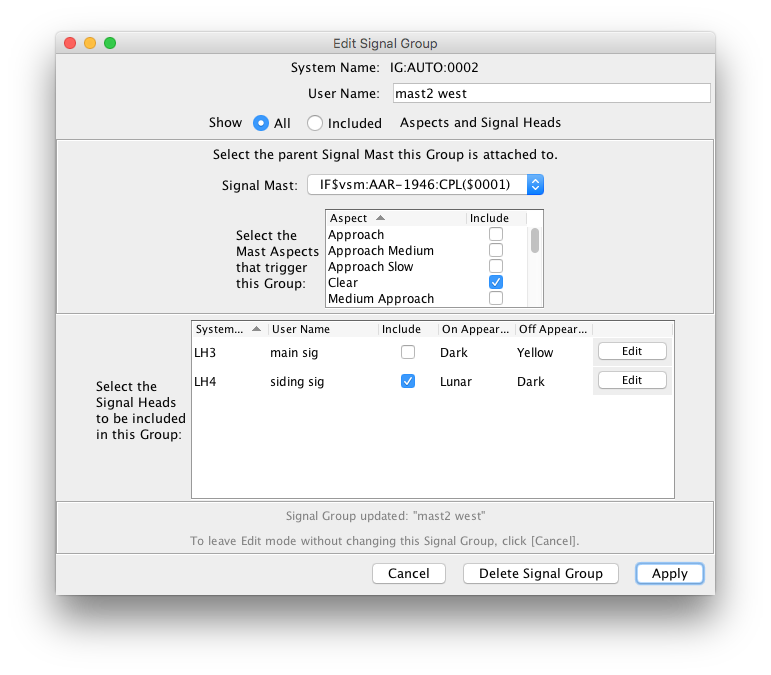
Consider the following track diagram, with 6 possible junctions off the main running
line.
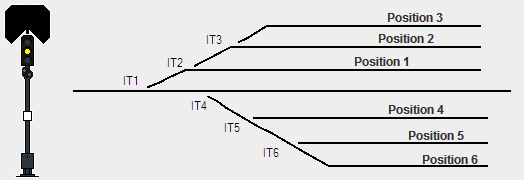
The Signal facing this junction will have a Junction Indicator attached, with each possible route through the junction having it own Indication. When the Route is set for straight through, then no indicator is shown (pictured above).
If the route is set for position 1, then the position 1 indicator will be shown (pictured
below).

With this configuration, you would create a single Turnout Signal Head for each position, configured with both a Dark and Lunar Appearance. You can use any two combinations of colors you like, however Dark and Lunar are more suitable for this situation.
Within the Signal Group, you would then select each of the Signal Heads that are used to create the junction indicator. The logic for each Signal Head is then configured as follows:
|
Position 1 - Set Turnouts IT1 set Thrown IT2 set Thrown |
Position 2 - Set Turnouts IT1 set Thrown IT2 set Closed IT3 set Thrown |
|
Position 3 - Set Turnouts IT1 set Thrown IT2 set Closed IT3 set Closed |
Position 4 - Set Turnouts IT1 set Closed IT4 set Thrown IT5 set Thrown |
|
Position 5 - Set Turnouts IT1 set Closed IT4 set Thrown IT5 set Closed IT6 set Thrown |
Position 6 - Set Turnouts IT1 set Closed IT4 set Thrown IT5 set Closed IT6 set Closed |
Back to the Signal Groups help page.