Special Actions are tasks that can
be initiated automatically as a Dispatcher Train running in automatic mode traverses the
layout.
The Add Action pane provides for creating new Actions:
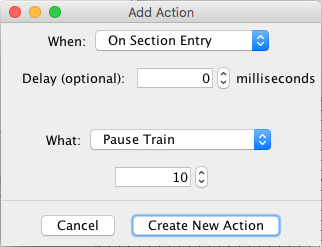
The "Edit" version of this window is the same as the one shown above, except the Create New Action button is replaced by an Update Action button and the selections and data are filled in to current values of the Action being edited.
An Action is defined in two steps:
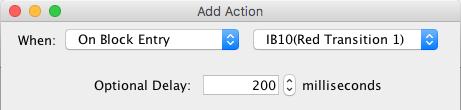
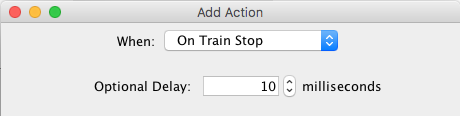
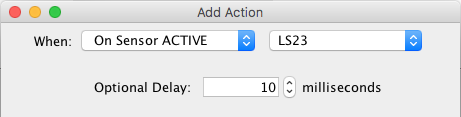
To specify the When part, select an option in the When popup menu, and fill in any data that might be required. Data item fields or menus will appear when the item needing them is selected. Each data item is supplied with a text description (tooltip) that may be summoned by hovering the cursor over the item. Each When option is described in more detail in the Actions Help.
Optionally a Delay, specified in milliseconds, can be set with each When option. The default Delay of 0 causes the Action to be be initiated immediately after the when event occurs. If a Delay time greater that 0 is specified, Dispatcher will wait for the specified time after the when event occurs before initiating the Action.
To specify What action is requested, select an option in the
What: popup menu, and fill in any data that might be required. Entry fields
will appear when the item needing them is selected. Each data item is supplied with a text
description (tooltip) that may be summoned by hovering the cursor over the item.
From the drop down box choose one of:
After making a When choice, continue by choosing one of the following What actions and fill in the settings:
When the Action is completely defined, click the Create New Action button (or the Update Action button if editing). Any required data will be validated. If a problem is found, a message will appear, and the Add/Edit Action window will remain to allow correction of the problem. If everything checks out, the Add/Edit Action window will disappear and the new (or edited) Action will appear in the View Actions window.
Click the Cancel button to dismiss the Add/Edit Action window without creating a new Action or completing the edit of an existing Action. Closing the Add/Edit Action window is equivalent to clicking the Cancel button.
Back to the Special Actions help.