The Sensor Table
The Sensor Table contains a list of the Sensors that exist for this Panel.
Sensor Table Columns
 Contents of
the Sensor Table are displayed by selecting it under Tools⇒Tables. As with
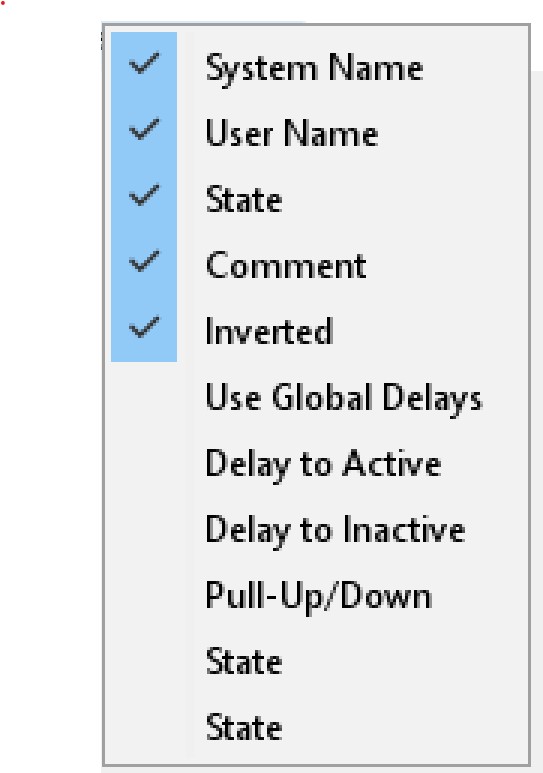
all JMRI tool tables, you can add or remove columns from the display by right-clicking
anywhere in the column header and selecting or deselecting the desired columns from the menu
that appears (see picture at right; some columns can also be selected by checkboxes at bottom
of the main Sensor Table window). You can change the order of the columns by dragging their
titles, change the width of columns by dragging the vertical line between columns, and sort
the rows by clicking the column title (a triangle will appear indicating the direction of the
sort).
Contents of
the Sensor Table are displayed by selecting it under Tools⇒Tables. As with
all JMRI tool tables, you can add or remove columns from the display by right-clicking
anywhere in the column header and selecting or deselecting the desired columns from the menu
that appears (see picture at right; some columns can also be selected by checkboxes at bottom
of the main Sensor Table window). You can change the order of the columns by dragging their
titles, change the width of columns by dragging the vertical line between columns, and sort
the rows by clicking the column title (a triangle will appear indicating the direction of the
sort).
The Sensor Table window will display two types of columns: sensor information (information
about an individual sensor) and button columns (clickable buttons to affect the sensor or the
sensor table entry).
Sensor Information
- System Name
- Prefix corresponding to hardware type with suffix you assign when sensor is created.
Cannot be changed once created.
- User Name
- You can directly enter or change the "User Name" for an existing Sensor (double click
in the cell).
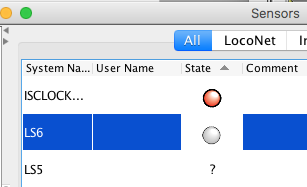
- State
-
Clicking the "State" text or icon will change the state of an existing Sensor. Choose
between textual and graphic display of the Sensor state in the Display preferences. Note thae value
of State is not stored when you close JMRI, even when you use one of the "Store to file"
options.
- Comment
- Any additional information you want to provide.
- Inverted
- When checked, the Sensor command and status is inverted. For example, an inverted
Sensor means that when the layout sends an "Active" Sensor command, the Sensor becomes
"Inactive" to JMRI.
- Use Global Delays
-
When checked, the Sensor will use the system values specified in the "Defaults >
Global Debounce Delays..." menu option for the duration which the system waits before it
registers the change of state.
See Sensor Debounce Delay below.
- Delay to Active/to Inactive
-
Specify the amount of time in milliseconds that the system waits before registering the
state change of a Sensor to either state. See Sensor Debounce
Delay below.
- Pull-Up/-Down
-
Some hardware connections (such as Digi XBee) allow the user to choose
whether sensor inputs are set by that hardware as electrically "pulled down (low)" or
"pulled up (high)" or neither. If you are using such a connection and want JMRI to tell
the hardware to set its pull up/pull down, select Edit to set this
field. If your hardware doesn't have this capability (or you don't know), leave the
default (No Pull-up/Pull-down). More information may be available in
help pages for specific hardware or
on manufacturers' web sites.
Button Columns
- Delete
- Pushing the "Delete" button will remove the Sensor from the table.
Note that this doesn't remove the Sensor from any files you've saved that contain it. If
you load one of those files, perhaps when you restart the program, the Sensor will
reappear. You should use one of the "Store to file" options in the "File" menu to save new
versions of any files that contain this Sensor.
- Edit
- Pushing the "Edit" button will bring up an edit window where you can change any of the
information about this particular sensor. Clicking "Apply" or "Ok" save this information as
long as JMRI remains open. You must use one of the "Store to file" options in the "File"
menu to save this new information in a file to be used after JMRI is closed.
- Query
- Pushing the "Query" button will query the hardware "known state" and put that in the
Sensor state column.
- Forget
- Pushing the "Forget" button will reset the Sensor state to "Unknown."
Sensor Table Display Controls
Along the bottom of the Sensor Table pane are buttons and checkboxes that control the
display of the indicated columns. Note that the display of these columns can also be changed
by right-clicking on the column headers and selecting or deselecting columns.
- Add...
-
A window to add a new Sensor will open when you press this button. For more information
see Adding/Editing Sensors.
- Show Debounce Delay Information
-
When checked, the optional Delay columns are shown.
- Show Pull-Up/Down Information
-
When checked, the optional Pull-Up/Down columns
are shown.
- Show State Query actions
- When checked, an optional Sensor State "Query" and "Forget" button is shown for each
Sensor.
The word Defaults appears on the window's menu bar. Clicking it brings up
two options:
- Global Debouce
-
The "Global Debounce Delays..." menu lets item you configure
default values for both delays. See below.
- Initial Sensor State (for Internal Sensors ONLY)
-
The "Initial Sensor State" menu item lets you choose what state Internal Sensors (system
name beginning with "IS") will display after JMRI startup. [Note that the initial state
of other sensors cannot be set directly by JMRI, although you can use a script to set them.
There is another sensor table display default available from the
Edit⇒Preferences⇒Display available on the main window. Check to display
icons for sensor state instead of text.
Sensor Debounce Delays
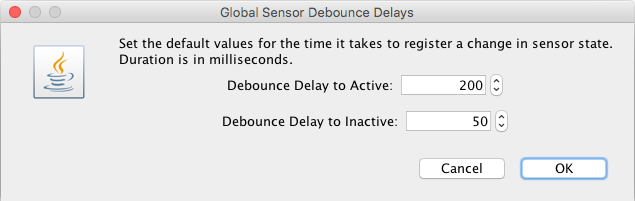
The Sensor Debounce Delay helps prevent false triggers of a Sensor being passed into the
system and triggering other events in the system.
Debounce Delays, activated from the Sensor Table "Defaults > Global Debounce Delays..."
menu, allows you to assign a period in milliseconds before any sensor change is registered
with the rest of the system. See for
general info on debounce.